Get ready to indulge in the fall flavors with my Pumpkin Cream Cheese Pancakes! This fluffy and delicious recipe merges the rich taste of pumpkin with creamy cheese for a breakfast treat like no other. Perfect for cozy mornings or special occasions, these pancakes are easy to make and surprisingly simple. I’ll walk you through every step, ensuring your pancakes turn out golden brown and fluffy every time! Let’s dive in!
Ingredients
Dry Ingredients
– 1 cup all-purpose flour
– 1/2 cup rolled oats
– 1 tablespoon baking powder
– 1 teaspoon baking soda
– 1/2 teaspoon salt
– 1 teaspoon cinnamon
– 1/2 teaspoon nutmeg
Wet Ingredients
– 1 cup canned pumpkin puree
– 1/2 cup cream cheese, softened
– 1/4 cup brown sugar
– 2 large eggs
– 1/2 cup milk (dairy or non-dairy)
– 1 teaspoon vanilla extract
Cooking Essentials
– Butter or cooking spray for frying
Gather these ingredients before you start. The dry ingredients create a sturdy base. The wet ingredients bring flavor and moisture. Cream cheese adds a rich taste and helps to make the pancakes fluffy. Canned pumpkin puree gives a smooth texture and a lovely autumn flavor.
You can switch up some ingredients. Use whole wheat flour for a healthier option. For a dairy-free choice, try coconut milk and vegan cream cheese. This recipe works with many substitutes. Don’t be afraid to mix it up!
When measuring flour, spoon it into your cup. Avoid packing it down. This helps keep your pancakes light and fluffy. Be sure to have everything ready before you start cooking. This way, you can focus on making the pancakes perfect.
Step-by-Step Instructions
Preparing the Dry Mixture
Start by taking a large bowl. Add the following dry ingredients:
– 1 cup all-purpose flour
– 1/2 cup rolled oats
– 1 tablespoon baking powder
– 1 teaspoon baking soda
– 1/2 teaspoon salt
– 1 teaspoon cinnamon
– 1/2 teaspoon nutmeg
Whisk these together until they mix well. This step is key for even flavor.
Mixing the Wet Ingredients
In another bowl, combine the wet ingredients:
– 1 cup canned pumpkin puree
– 1/2 cup cream cheese, softened
– 1/4 cup brown sugar
– 2 large eggs
– 1/2 cup milk (dairy or non-dairy)
– 1 teaspoon vanilla extract
Blend these ingredients until smooth. Make sure the cream cheese mixes well to avoid lumps.
Combining Mixtures and Cooking
Now, gently fold the dry mix into the wet mix. Stir carefully to keep the batter light. Some lumps are okay; do not over-mix.
Next, heat a non-stick skillet over medium heat. Lightly grease it with butter or cooking spray.
Pour about 1/4 cup of batter for each pancake onto the skillet. Cook until bubbles rise to the surface and the edges set, which takes about 2-3 minutes.
Flip the pancakes and cook for another 2-3 minutes until golden brown. Repeat this with the remaining batter. Grease the skillet as needed between batches.
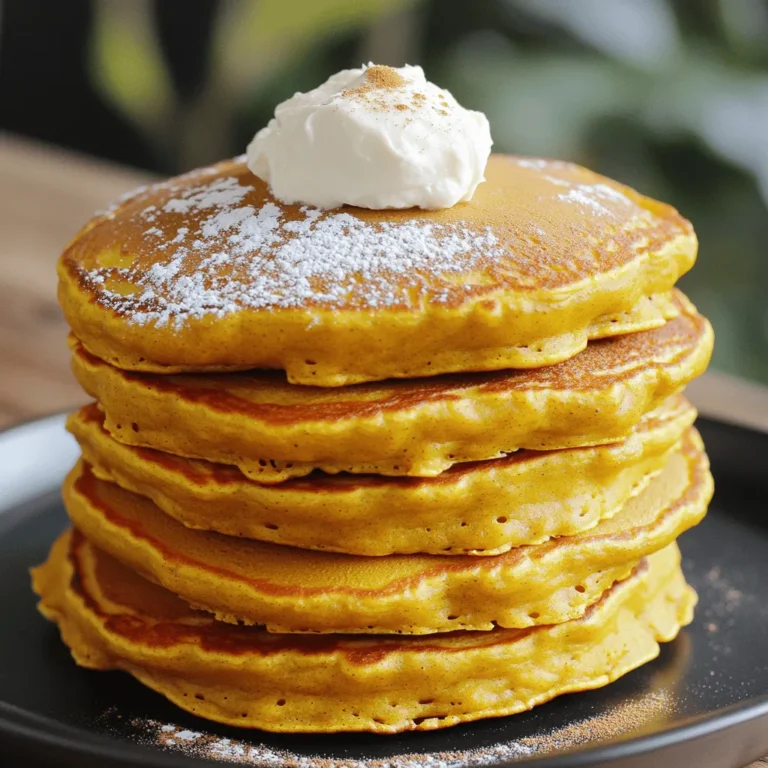
Serve the pancakes warm with cream cheese on top, a dusting of cinnamon, and maple syrup if you like. Enjoy your fluffy pumpkin cream cheese pancakes!
Tips & Tricks
Avoiding Over-Mixing
To keep pancakes fluffy, don’t over-mix your batter. When you combine wet and dry ingredients, mix gently. A few lumps are okay; they help your pancakes stay light. Over-mixing makes gluten form, which can lead to dense pancakes. Remember, you want a smooth mix without being too smooth.
Cooking Temperature
The right skillet temperature is key. Preheat your skillet over medium heat. If it’s too hot, pancakes can burn. If it’s too cool, they will not cook evenly. To test, sprinkle a few drops of water on the skillet. If they dance and evaporate, you’re ready! Maintain this heat for even cooking and a beautiful golden color.
Perfectly Stacked Presentation
For a stunning stack, layer pancakes neatly. Place a thin slice of cream cheese on top of each pancake. Dust with powdered sugar or cinnamon for a lovely finish. You can also add a drizzle of maple syrup for color. A well-stacked presentation makes your pancakes look as good as they taste!

Variations
Adding Chocolate Chips
You can easily add chocolate chips to your pancake batter. Use about 1/2 cup of semi-sweet or dark chocolate chips. After mixing the wet and dry ingredients, gently fold in the chocolate chips. Be careful not to over-mix. The chocolate melts while cooking, making every bite a sweet treat. These pancakes become a favorite for kids and chocolate lovers.
Alternative Flours
If you want a healthier option, consider using whole wheat flour. This gives the pancakes more fiber. You can also try gluten-free flour blends. Just make sure they contain xanthan gum for best results. The taste and texture may change slightly, but they will still be delicious. Experiment with different flours to find what you like best.
Seasonal Flavor Additions
To add more fall flavor, try mixing in ingredients like cranberries or pecans. Use about 1/2 cup of dried cranberries or chopped pecans. Stir them into the batter before cooking. You can also try spices like ginger or cloves for a warm twist. These additions will make your pancakes unique and perfect for the season.
Storage Info
Refrigeration
Store leftover pancakes in an airtight container. Place parchment paper between layers to avoid sticking. They will stay fresh for about 3 to 4 days. You can also wrap them in plastic wrap before placing them in the container. This keeps them moist and prevents drying out.
Freezing Instructions
To freeze pancakes, stack them with parchment paper in between each one. Wrap the stack in plastic wrap, then place in a freezer bag. Remove as much air as possible to prevent freezer burn. They can last up to 2 months in the freezer. When you’re ready to enjoy them, just pull out the number you want.
Reheating Tips
For reheating, the oven works best. Preheat it to 350°F (175°C). Place the pancakes on a baking sheet and cover with foil. Heat for about 10 minutes. This keeps them fluffy and warm. You can also use a microwave, but they may lose some fluffiness. Heat them for 30 seconds, then check if they are warm enough. Enjoy your pancakes just like fresh!
FAQs
Can I use fresh pumpkin instead of canned?
Yes, you can use fresh pumpkin. Start with a small pumpkin. Bake or steam it until soft. Then, scoop out the flesh and mash it well. Use this in place of canned pumpkin. You may need to adjust the moisture. Fresh pumpkin can be wetter than canned. You might want to reduce the milk in your batter slightly.
What can I use as a dairy-free alternative?
For a dairy-free option, use almond milk or oat milk. Both work well in this recipe. For cream cheese, try a dairy-free cream cheese made from nuts or soy. These substitutes keep the pancakes rich and creamy without dairy. Be sure to check labels for added sugars or preservatives.
How can I make these pancakes ahead of time?
To prep pancakes ahead, cook them as usual. Let them cool, then store in an airtight container. Keep them in the fridge for up to three days. For longer storage, freeze them. Place parchment paper between pancakes to avoid sticking. Reheat in a toaster or microwave for a quick breakfast.
You now have a complete guide to making delicious pumpkin pancakes. From gathering dry and wet ingredients to cooking perfect pancakes, it’s all here. Remember to avoid over-mixing for the fluffiest results and maintain the right skillet temperature for even cooking. Feel free to experiment with variations like chocolate chips or seasonal flavors. Store leftovers properly to enjoy them later. With these tips and tricks, you’ll impress everyone with your pancake skills. Happy cooking!

