Looking for a quick and tasty sweet treat? These No Bake Chocolate Coconut Bars are your answer! They are easy to whip up, require no baking, and taste fantastic. With simple ingredients like rolled oats and almond butter, you’ll satisfy your sweet tooth in no time. Join me as we explore how to make these delicious bars and customize them to fit your taste. Let’s dive in!
Ingredients
List of Ingredients
– 1 ½ cups rolled oats
– 1 cup unsweetened shredded coconut
– ½ cup almond butter (or any nut butter of your choice)
– ½ cup honey or maple syrup
– 1/3 cup unsweetened cocoa powder
– 1 teaspoon vanilla extract
– ¼ teaspoon salt
– ½ cup dark chocolate chips (dairy-free if desired)
Ingredient Substitutions
– You can swap almond butter for peanut butter, cashew butter, or sunflower seed butter. Each nut butter gives a unique taste.
– For sweeteners, try agave syrup, brown rice syrup, or coconut nectar. Each has its own flavor and sweetness level.
– If you run out of cocoa powder, use carob powder. It gives a slightly different taste, but still delicious.
Step-by-Step Instructions
Preparation Steps
– Mixing dry ingredients
In a large bowl, add 1 ½ cups of rolled oats, 1 cup of shredded coconut, and 1/3 cup of cocoa powder. Stir these together until they are well mixed. It helps to break up any clumps, so everything blends nicely.
– Whisking wet ingredients
In another bowl, add ½ cup of almond butter, ½ cup of honey or maple syrup, 1 teaspoon of vanilla extract, and ¼ teaspoon of salt. Whisk these ingredients together until smooth. This mixture will provide moisture and sweetness.
Combining Ingredients
– Mixing wet and dry mixtures
Now, pour the wet mixture into the dry one. Stir them together until they are fully combined. You can use a spatula or a wooden spoon for this. Make sure there are no dry spots left.
– Using hands for thorough mixing
Sometimes, using your hands helps mix everything better. Don’t be shy! Get in there and mix until the ingredients stick together well. This step is key for a good bar texture.
Setting the Bars
– Line the baking dish
Grab an 8×8-inch baking dish. Line it with parchment paper, leaving some paper hanging over the sides. This makes it easier to lift the bars out later.
– Pressing in the mixture and melting chocolate
Transfer the mixture into the lined dish. Press it down firmly and evenly with your hands or the back of a spatula. Next, melt ½ cup of dark chocolate chips in a microwave-safe bowl. Heat them in 30-second bursts, stirring in between until smooth. Pour this chocolate over the pressed mixture and spread evenly with a spatula.
These steps will set you up for making delicious No Bake Chocolate Coconut Bars. Enjoy the process!
Tips & Tricks
Perfecting the Recipe
To ensure the mixture sticks together, use enough nut butter and sweetener. These ingredients help bind everything. If you find it crumbly, try adding a bit more almond butter. Mix thoroughly with your hands if needed. This helps blend all the flavors well.
For melting chocolate smoothly, use a microwave-safe bowl. Heat the chocolate chips in short bursts of 30 seconds. Stir after each interval until it’s fully melted. This method prevents burning and keeps it smooth.
Presentation Tips
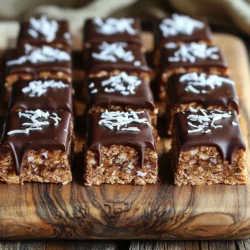
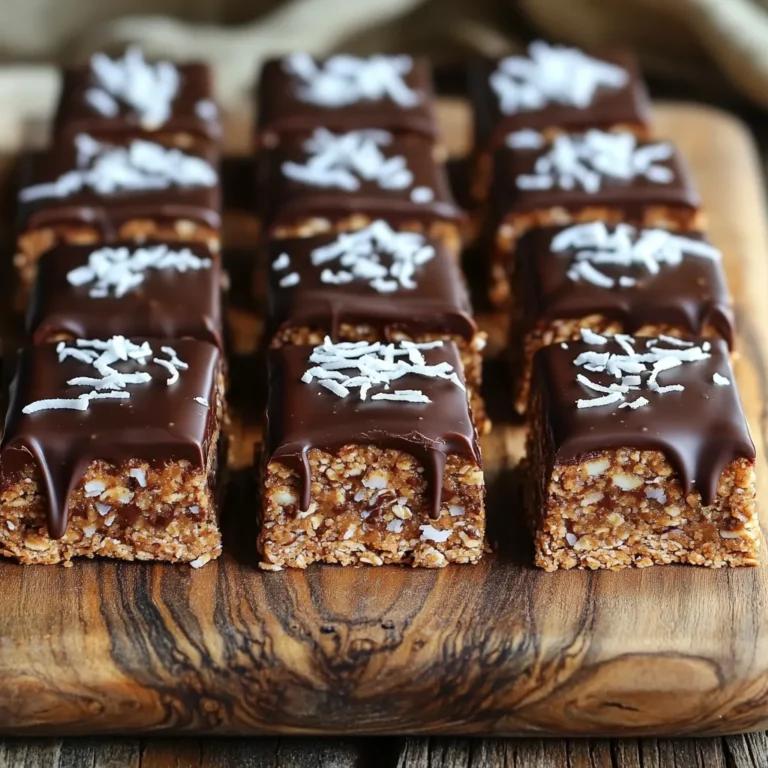
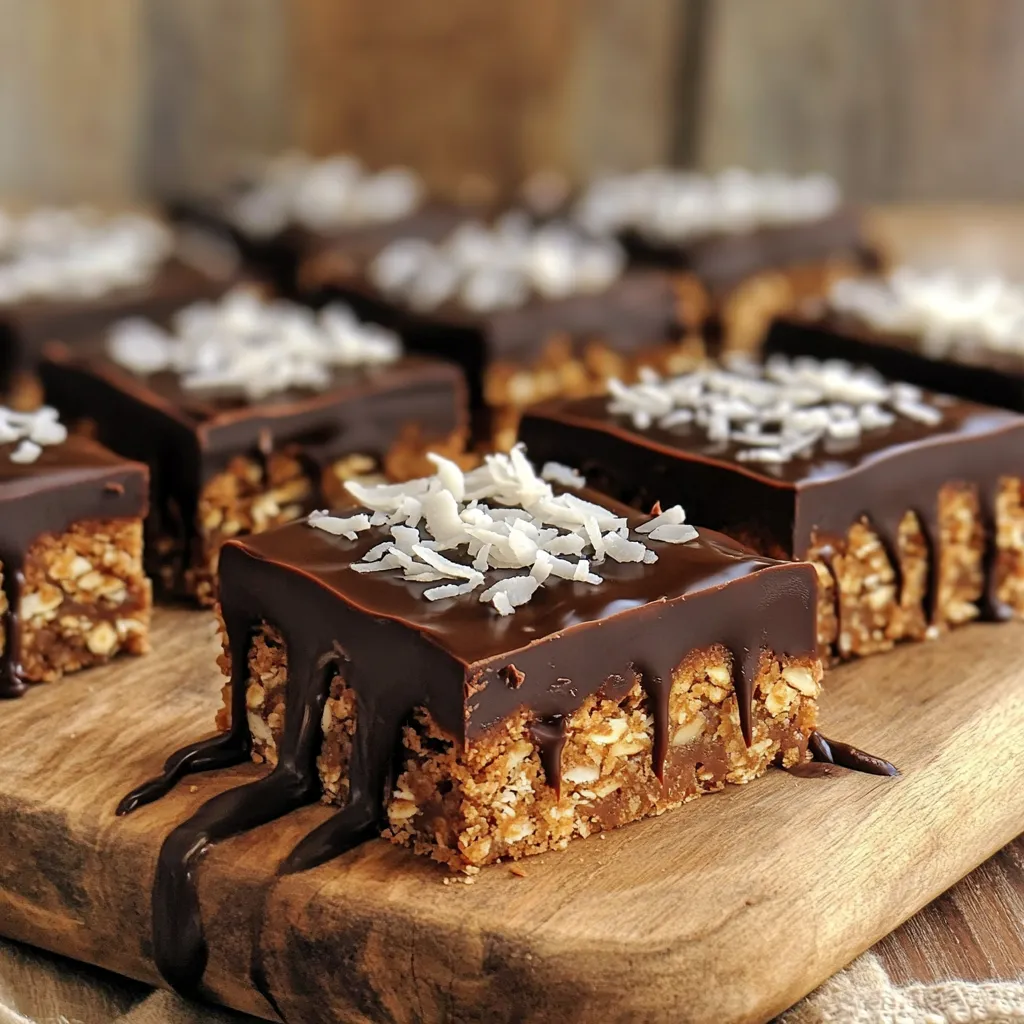
For serving, arrange the bars on a rustic wooden board. This gives a nice, homey feel. You can also use a clean white plate for a modern look. Drizzle any leftover melted chocolate on top. This adds flair and makes them look gourmet.
Sprinkling extra shredded coconut on top enhances their visual appeal. It adds texture and a pop of color. You can even add a few nuts for crunch and charm.
Serving Suggestions
Pair these bars with hot tea or coffee. The rich chocolate and coconut flavors balance well with warm drinks. They also work great as a quick snack or dessert.
These bars are perfect for parties or casual get-togethers. Their easy prep makes them a hit for any occasion. You can even pack them for picnics or road trips.
Variations
Flavor Add-Ins
You can make these bars more exciting with some flavor add-ins. Try adding nuts or seeds to the mix. Chopped almonds, walnuts, or pumpkin seeds will add crunch. They also boost nutrition. You can also use different flavors of nut butter. Cashew butter or peanut butter can change the taste. Each nut butter adds its unique flavor, making it fun to experiment.
Dietary Adjustments
These bars can fit different diets too. If you need a gluten-free option, use certified gluten-free oats. They taste great but keep the bars safe for those with gluten issues. For a vegan version, swap honey for maple syrup. You can also choose dairy-free chocolate chips for a fully vegan treat. This way, everyone can enjoy them!
Creative Twists
Get creative by adding dried fruits. Chopped dates, cranberries, or raisins can sweeten the bars. This adds a chewy texture that contrasts nicely with the chocolate. You can also change the type of chocolate you use. Try white, milk, or dark chocolate instead of just dark. Each type brings a different level of sweetness. This flexibility lets you make your bars just the way you like them!
Storage Info
Proper Storage Techniques
To keep your No Bake Chocolate Coconut Bars fresh, store them in the fridge. Place them in an airtight container. This helps to prevent them from drying out. They will stay tasty and firm when chilled.
For long-term storage, you can freeze these bars. Wrap each bar tightly in plastic wrap or foil. Then, place them in a freezer-safe container. This keeps them safe from freezer burn. When you want to enjoy a bar, simply thaw it in the fridge overnight.
Shelf Life
In the fridge, these bars last about one week. This is great for a quick snack or dessert. If you freeze them, they can last for up to three months. Just remember to check for signs of spoilage.
Look for any off smells or changes in color. If the bars feel hard or dry, they may not taste good anymore. Always trust your senses. If something seems off, it’s best to toss them. Enjoy your treats while they are fresh!
FAQs
Common Questions
Can I use honey instead of maple syrup?
Yes, you can use honey instead of maple syrup. Both sweeteners add a nice flavor. Honey gives a bit of a floral taste, while maple syrup is rich and earthy. Pick based on your taste or what you have at home.
How do I make these bars vegan?
To make these bars vegan, replace honey with maple syrup. Choose a nut butter that is dairy-free. Use dark chocolate chips that are labeled vegan. This way, you can enjoy these bars without any animal products.
Troubleshooting
What to do if the bars are too crumbly?
If your bars are too crumbly, add a bit more almond butter or syrup. This will help bind the mixture together. Press the mix down harder in the pan. Let it chill longer if needed.
Can I substitute almond butter with a different nut butter?
Yes, you can use any nut butter you like. Peanut butter works well and adds a fun taste. Cashew butter or sunflower seed butter are good options too. Just make sure to check for allergies.
Nutritional Information
Caloric content per serving
Each bar has about 180 calories. This can vary based on the nut butter and chocolate used.
Health benefits of ingredients used
These bars have rolled oats, which are high in fiber. Fiber helps keep you full and supports digestion. The coconut adds healthy fats. Almond butter provides protein, while dark chocolate is rich in antioxidants. These ingredients work together to make a tasty, wholesome treat.
This blog post covered how to make tasty and healthy bars. We discussed the key ingredients, which can be swapped easily. You learned the steps to mix and set your bars and tips to make them shine. I also shared storage tricks to keep your bars fresh. Remember, these bars are flexible! You can adjust them to fit your taste or diet. Enjoy experimenting with flavors and share your creations with friends and family. You have the knowledge now, so go ahead and make these delicious bars!