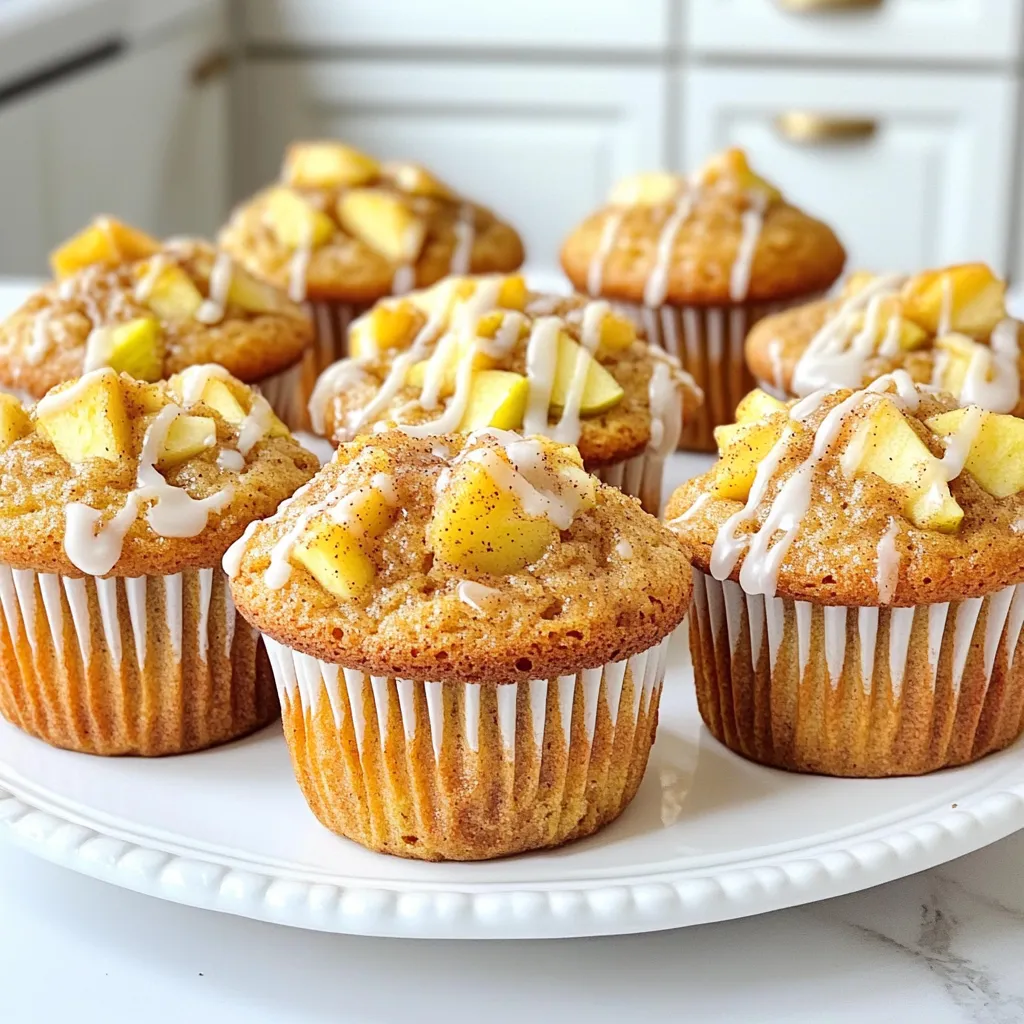
Apple Cinnamon Coffee Cake Muffins Simple and Tasty
If you’re craving a sweet treat that’s perfect for breakfast or a snack, look no further! My Apple Cinnamon Coffee

If you’re craving a sweet treat that’s perfect for breakfast or a snack, look no further! My Apple Cinnamon Coffee
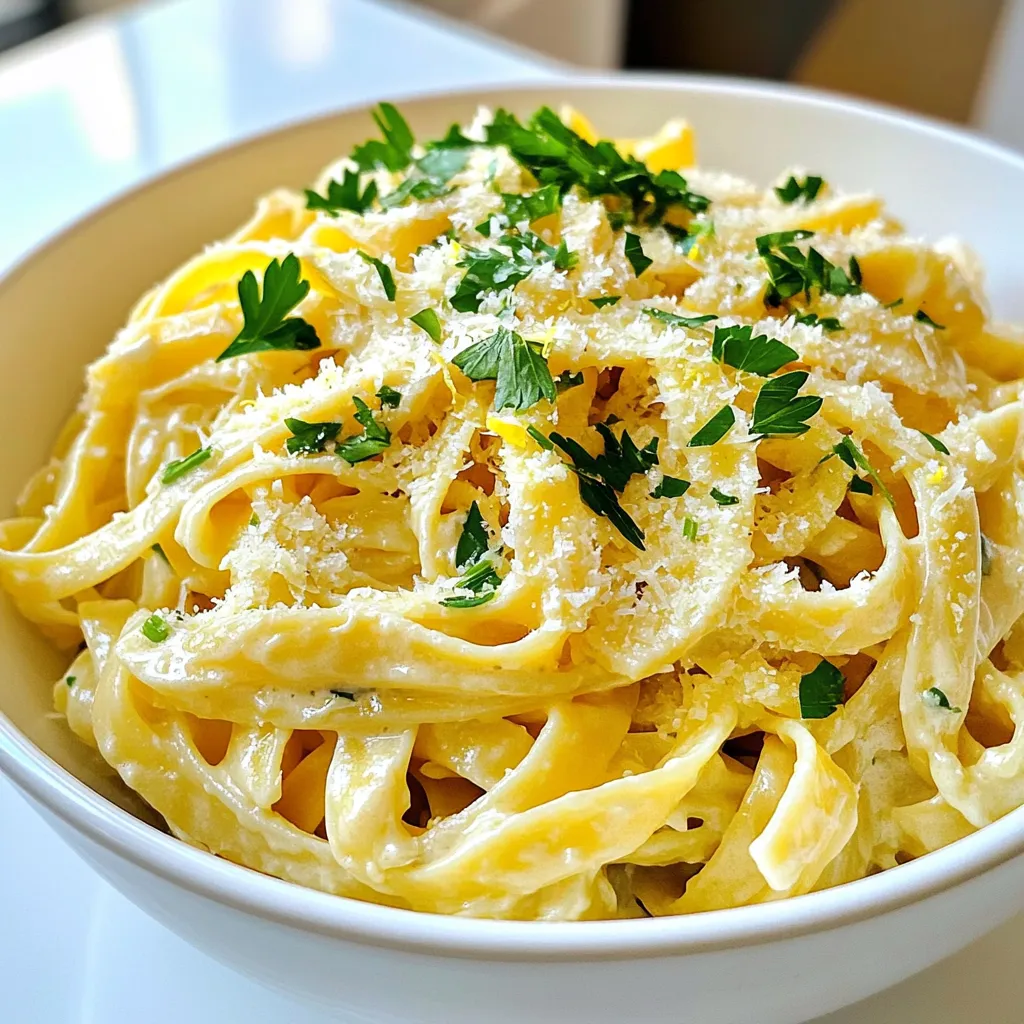
Are you ready to impress your taste buds? In this recipe for Creamy Garlic Parmesan Pasta One Pot Delight, I’ll
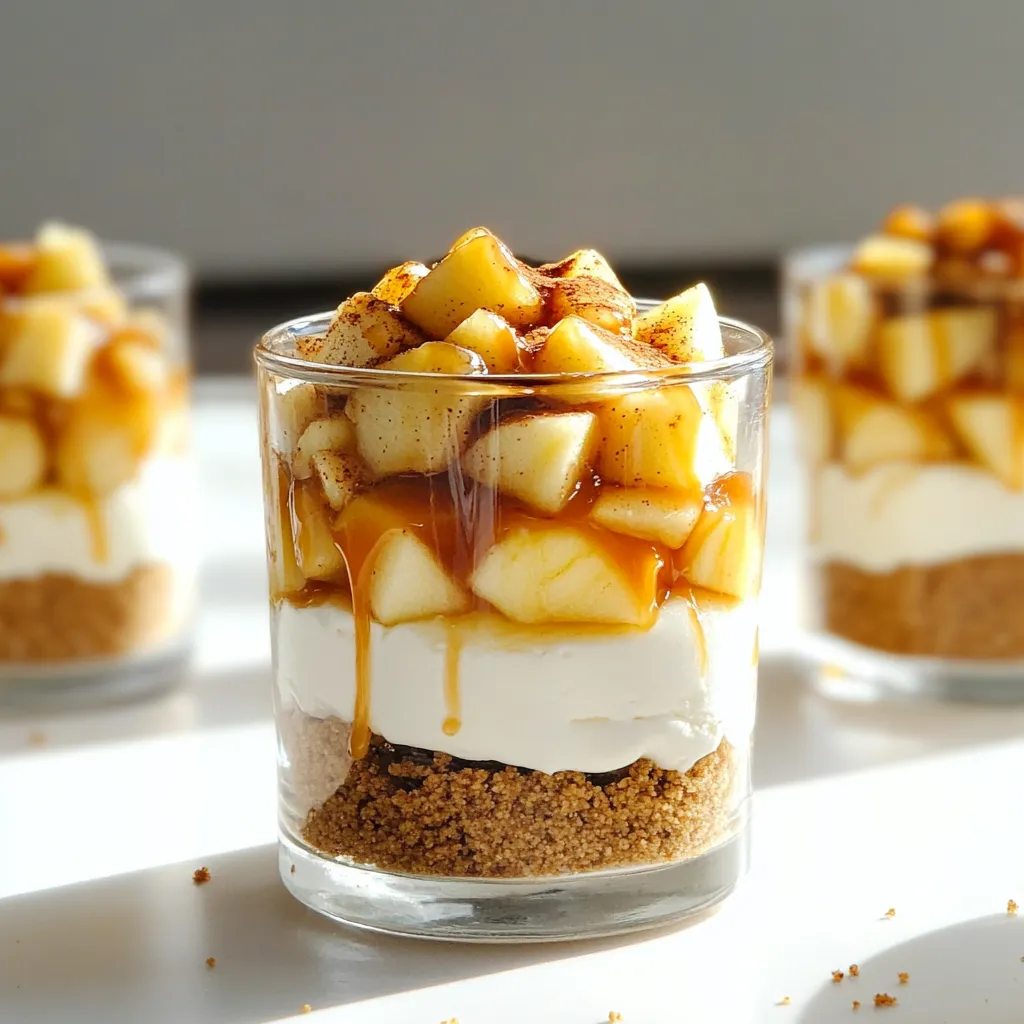
If you love the warm, cozy flavors of fall, you’ll adore these Caramel Apple Cheesecake Parfaits. This easy treat packs
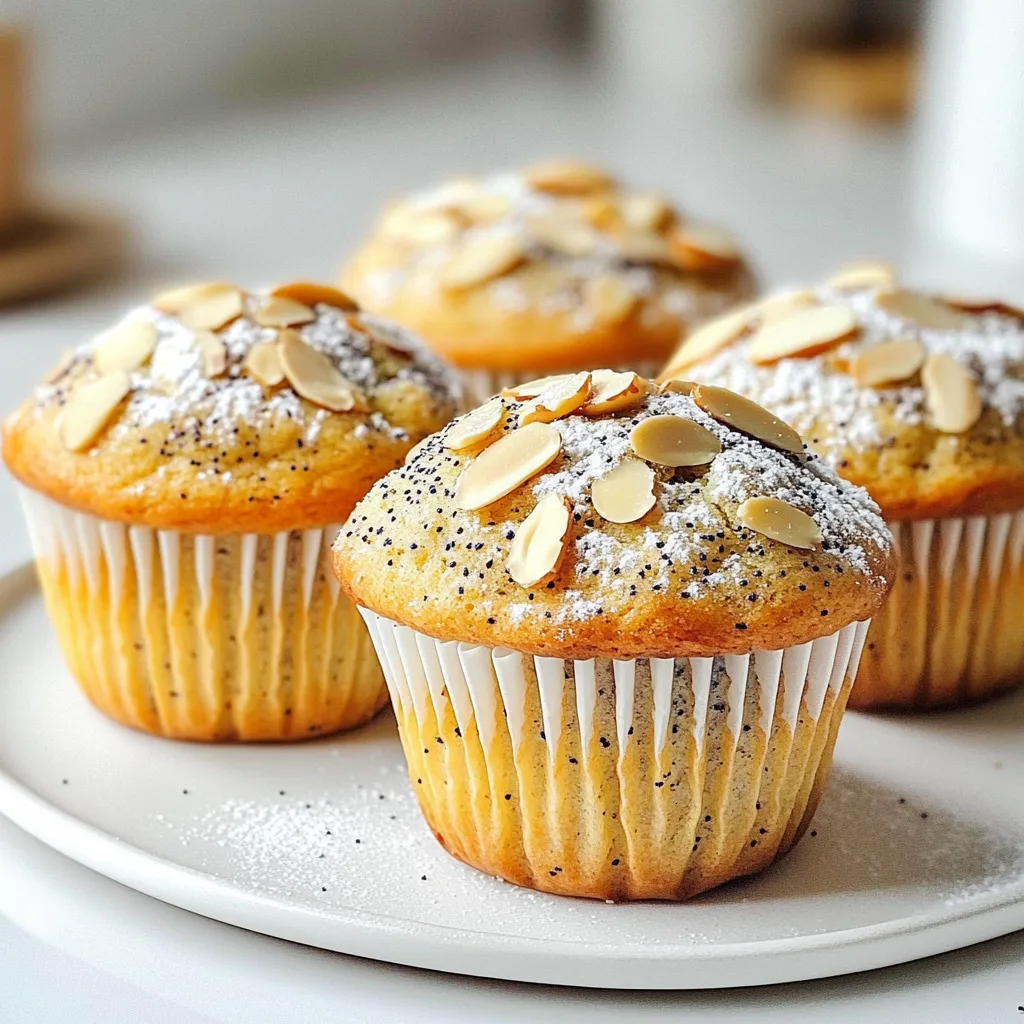
Are you ready to treat yourself to some easy and delicious Almond Poppy Seed Muffins? These delightful treats are packed
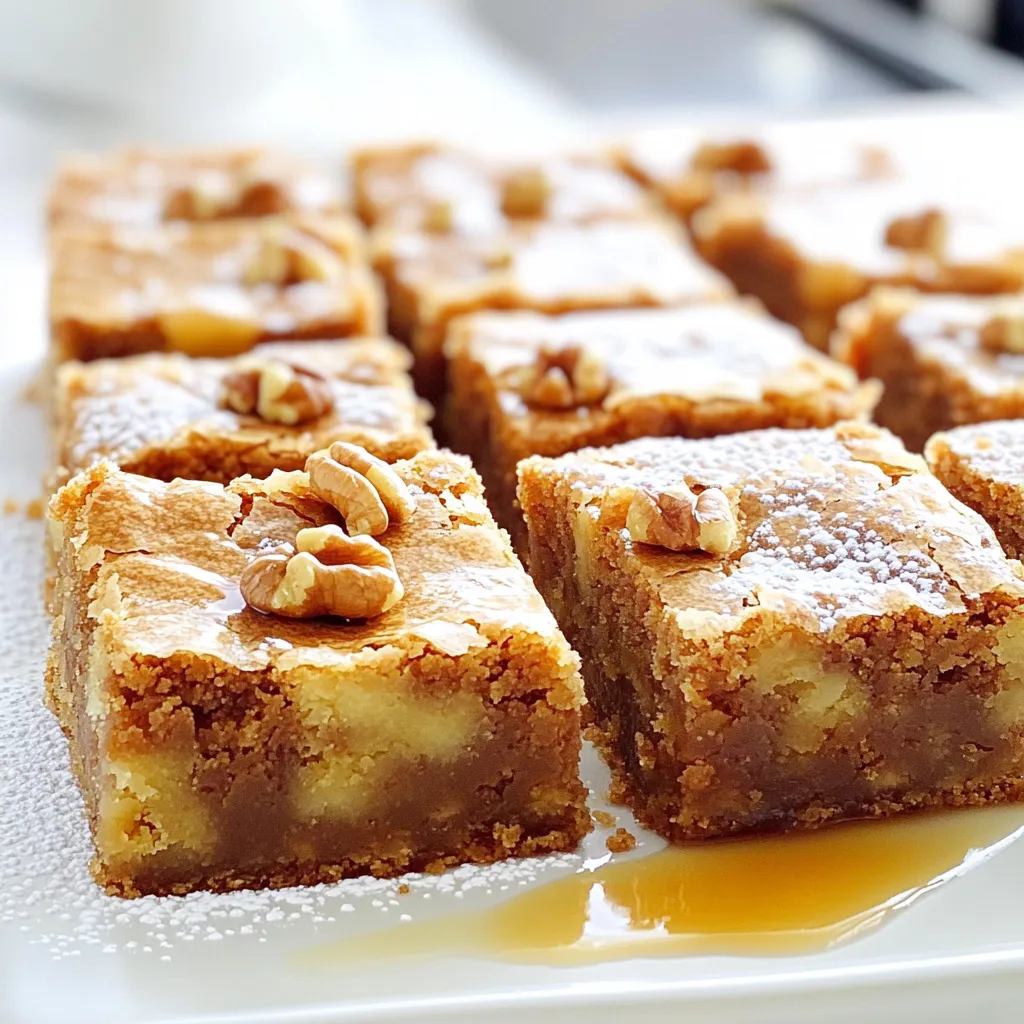
Are you ready to indulge in a sweet treat? Maple Brown Sugar Blondies are the perfect balance of rich, buttery
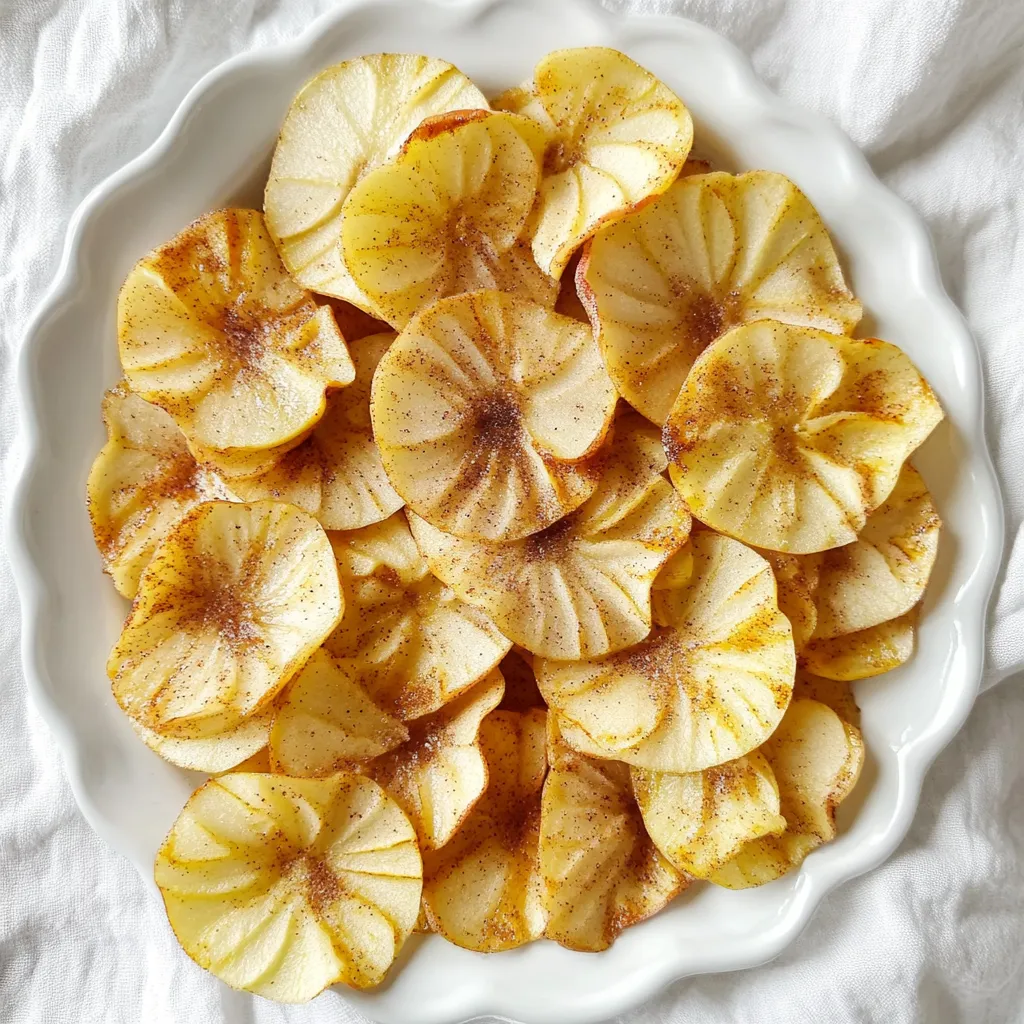
Looking for a tasty snack that’s easy to make? You’ve come to the right place! In this post, I’ll show
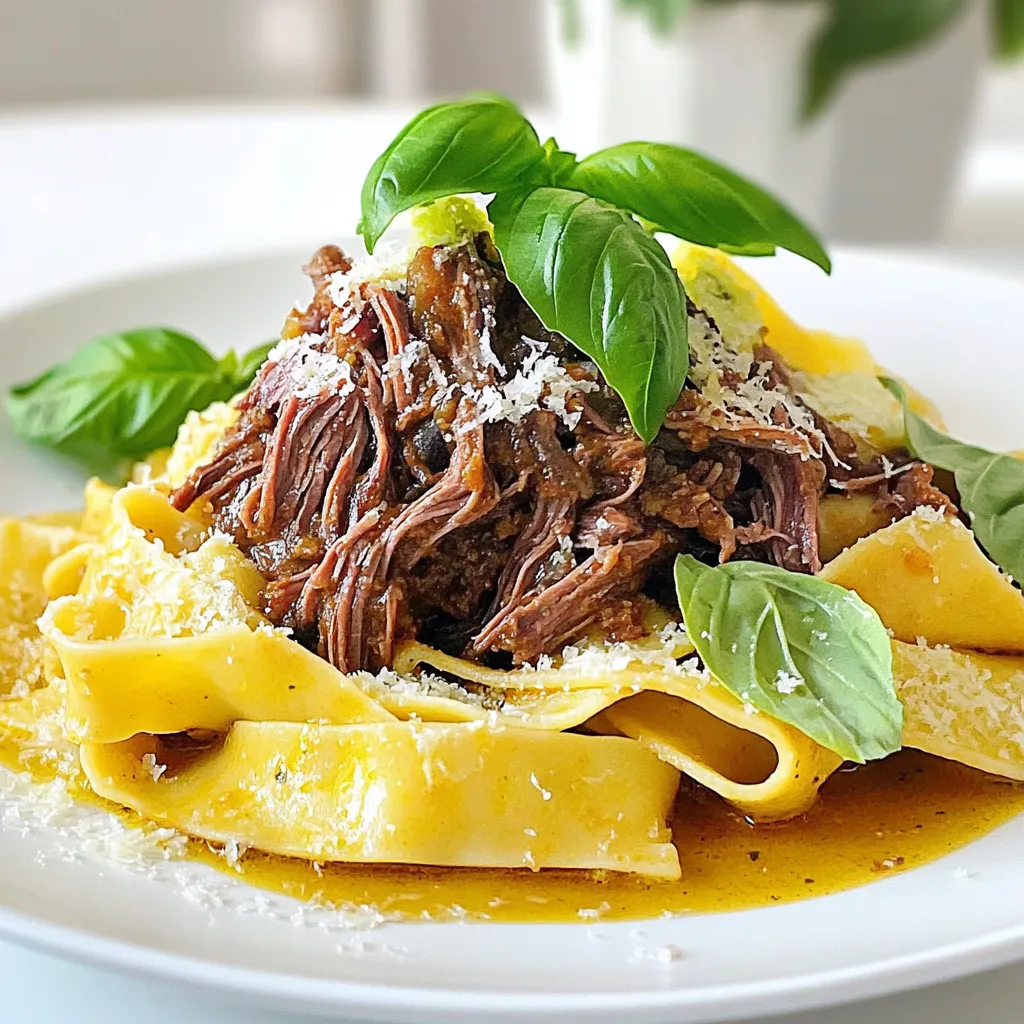
Welcome to a plateful of comfort with my Short Rib Ragu with Pappardelle, made effortless in a slow cooker! This
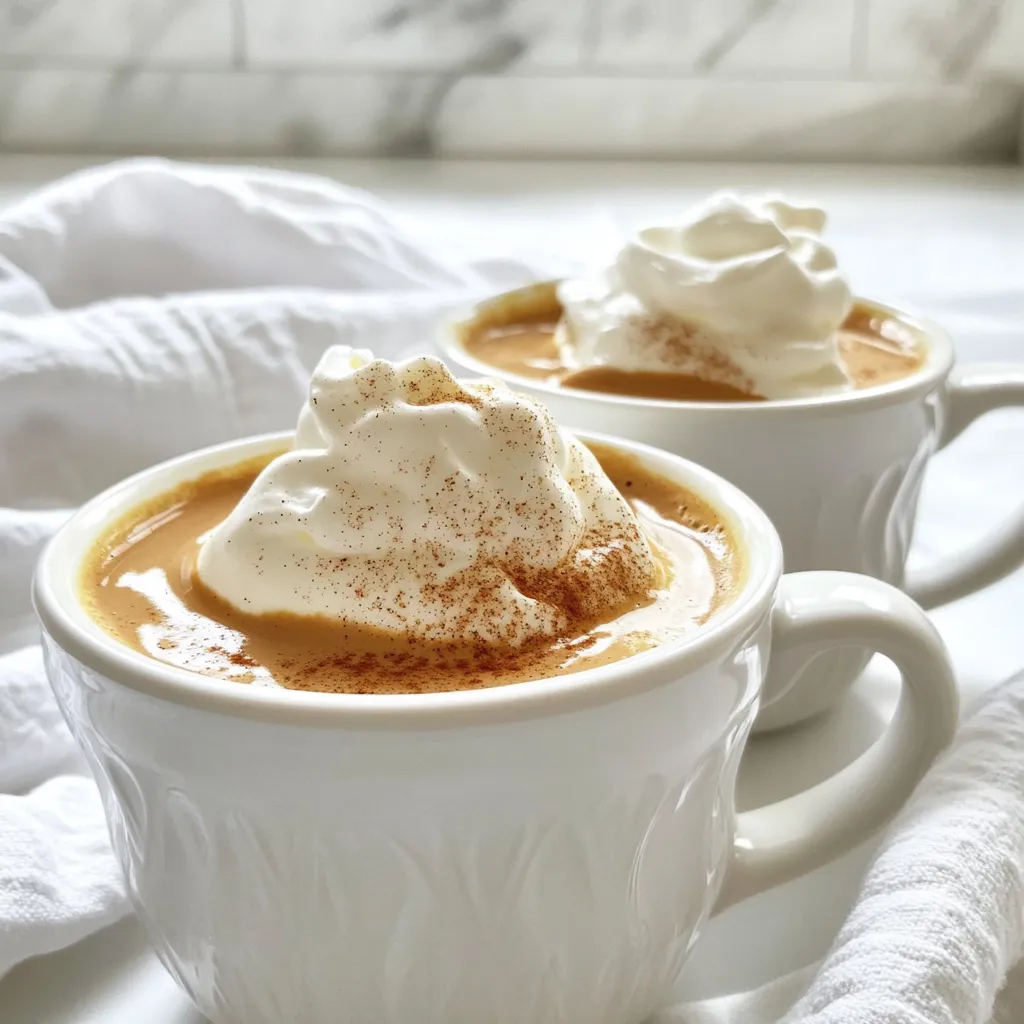
Are you ready to indulge in the rich flavors of fall? This Pumpkin Spice Hot Chocolate Creamy Delight Recipe offers
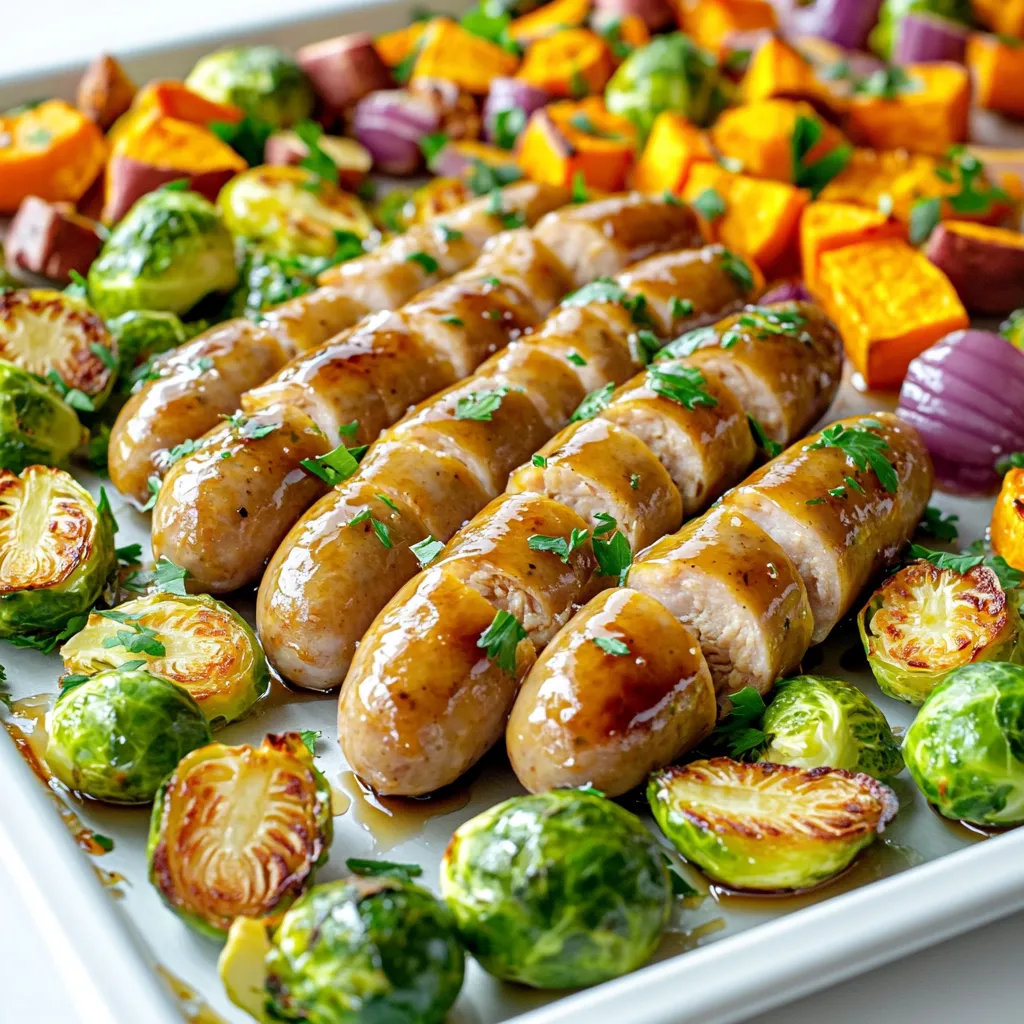
Get ready for a tasty adventure with my Maple Glazed Chicken Sausage Sheet-Pan Delight! This easy recipe combines juicy chicken
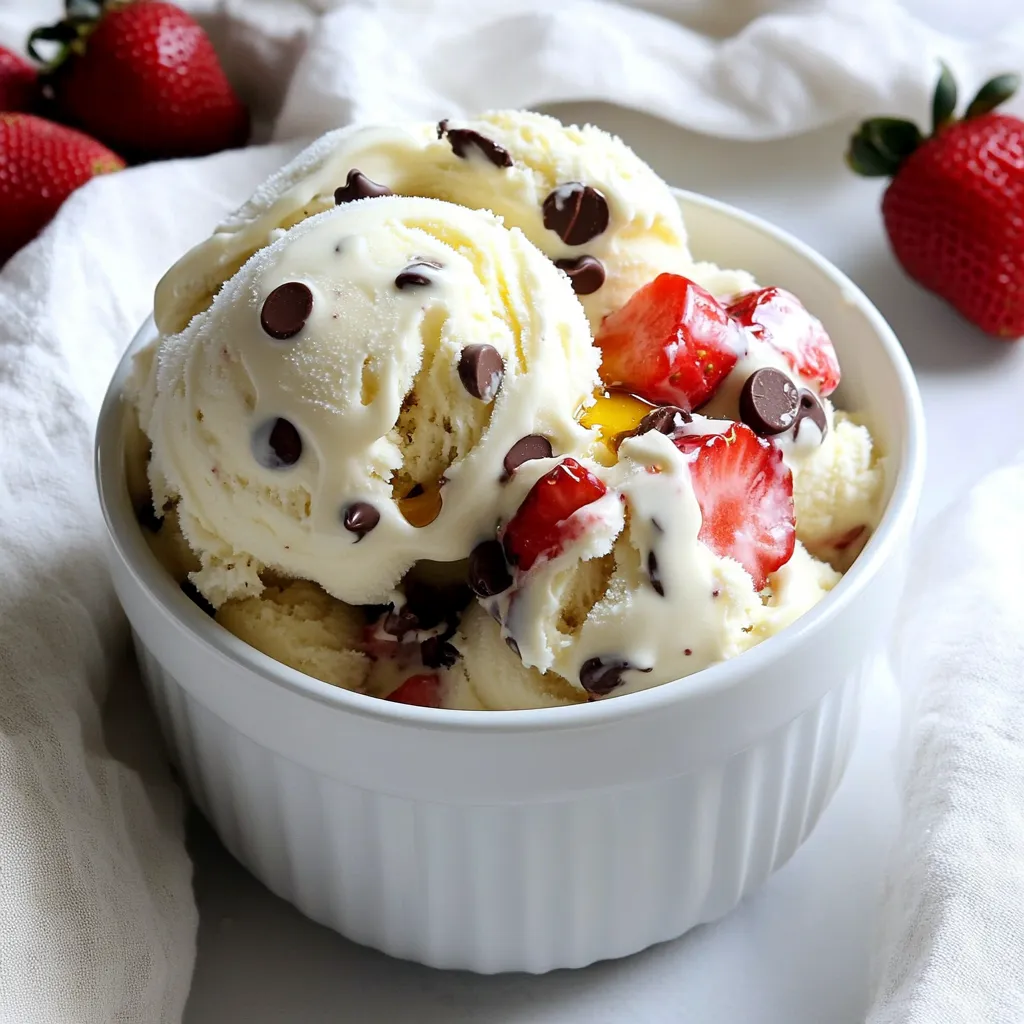
Are you ready to indulge in a guilt-free dessert? Cottage cheese ice cream packs rich flavor and a boost of
