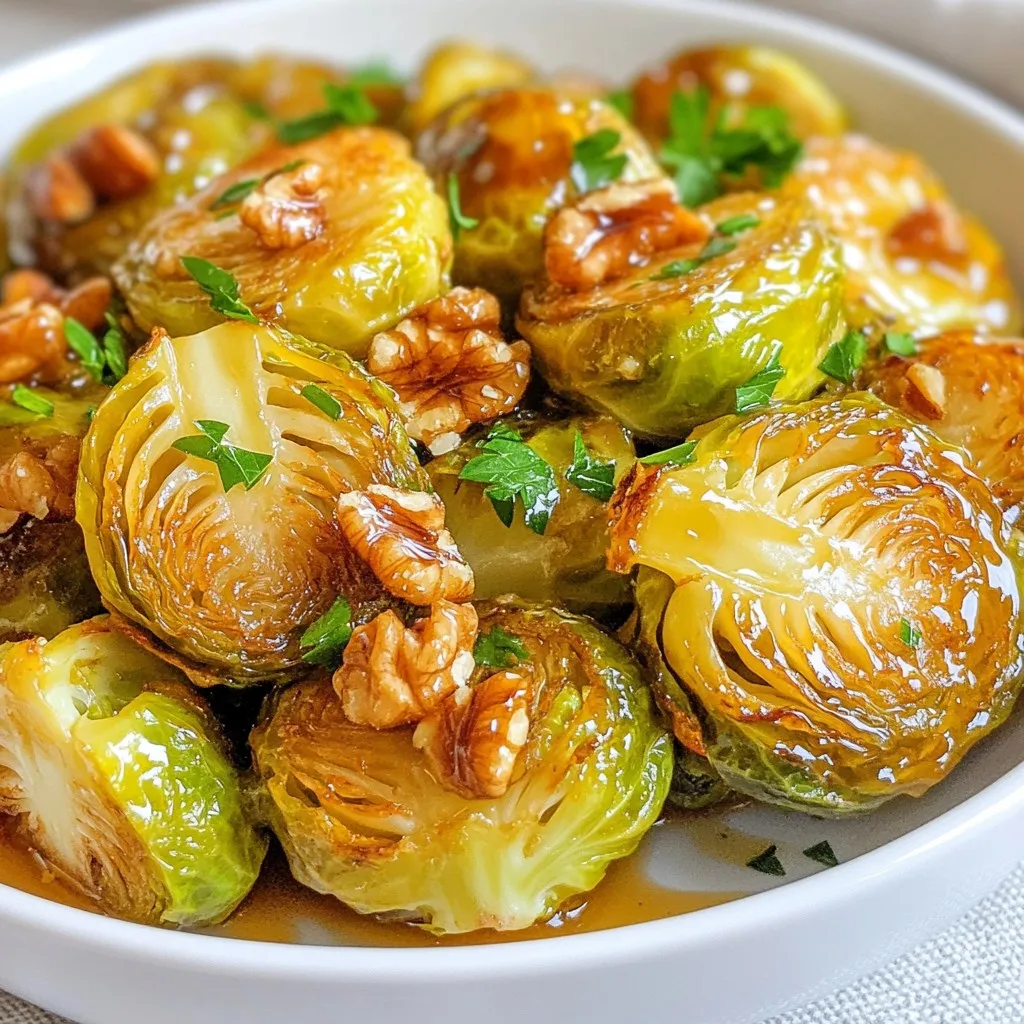
Honey Mustard Brussels Sprouts Delightful and Easy Recipe
Looking for a tasty way to enjoy Brussels sprouts? I’m here to share the perfect recipe for Honey Mustard Brussels

Looking for a tasty way to enjoy Brussels sprouts? I’m here to share the perfect recipe for Honey Mustard Brussels
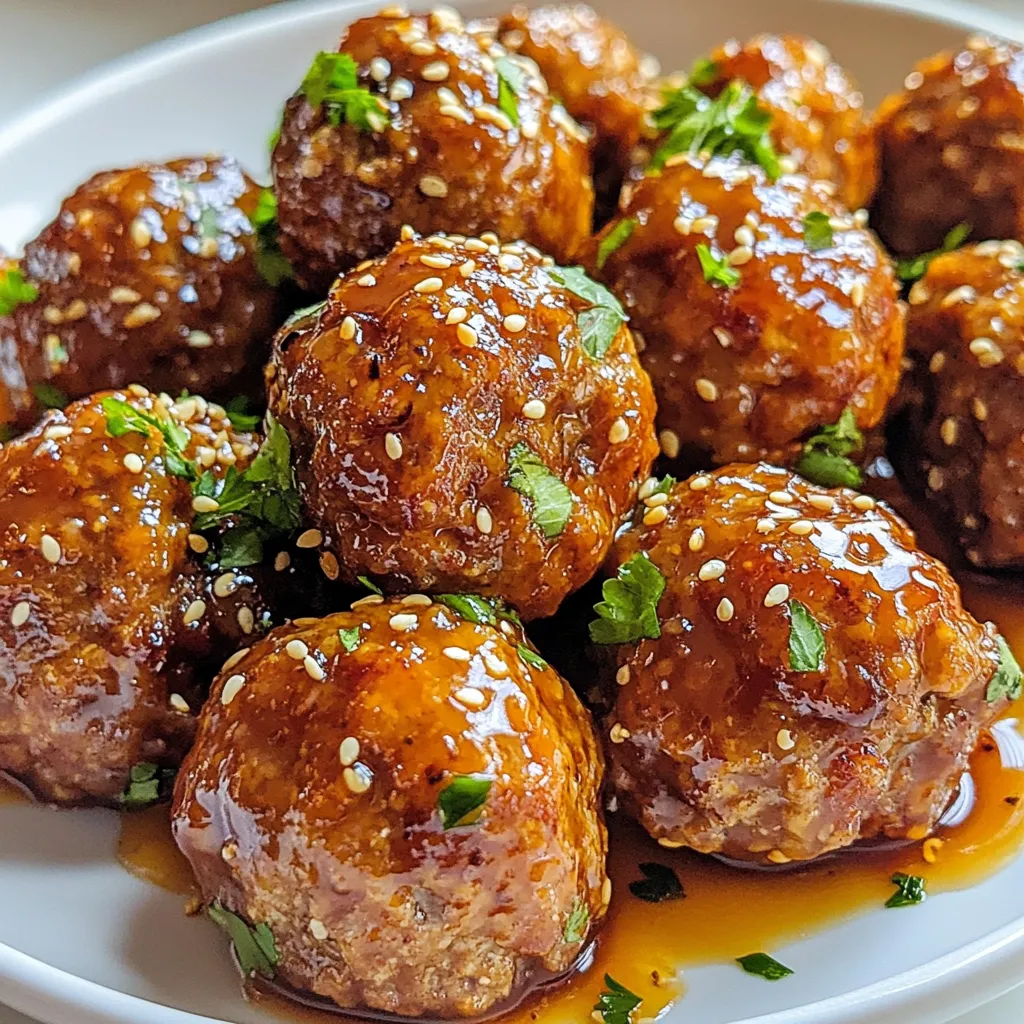
Do you want to impress your family with a simple yet tasty dish? Honey Garlic Glazed Meatballs are the answer!

Are you ready to impress your family or guests? These Garlic Parmesan Dinner Rolls are the answer! Soft, flavorful, and
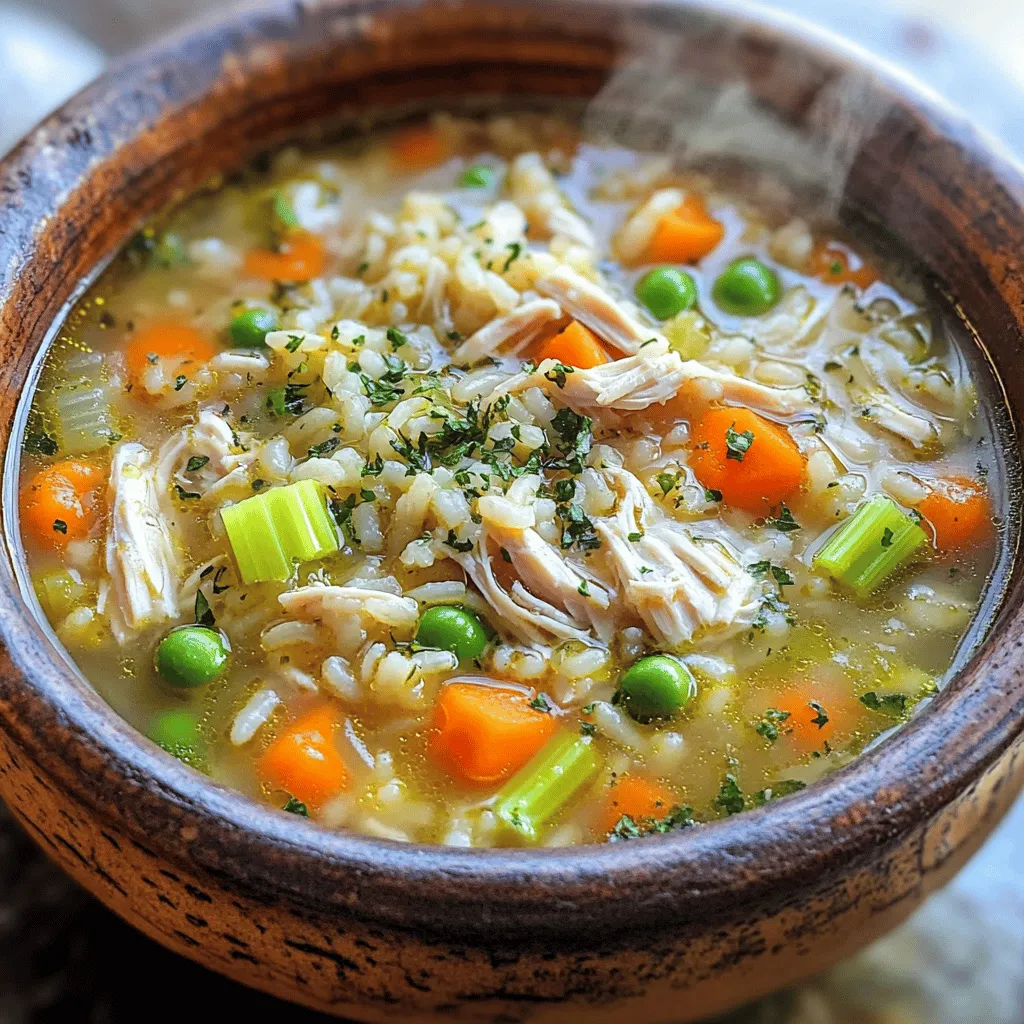
Welcome to your new favorite dish—One-Pot Chicken Rice Soup! It’s simple, healthy, and packed with flavor. You can make it
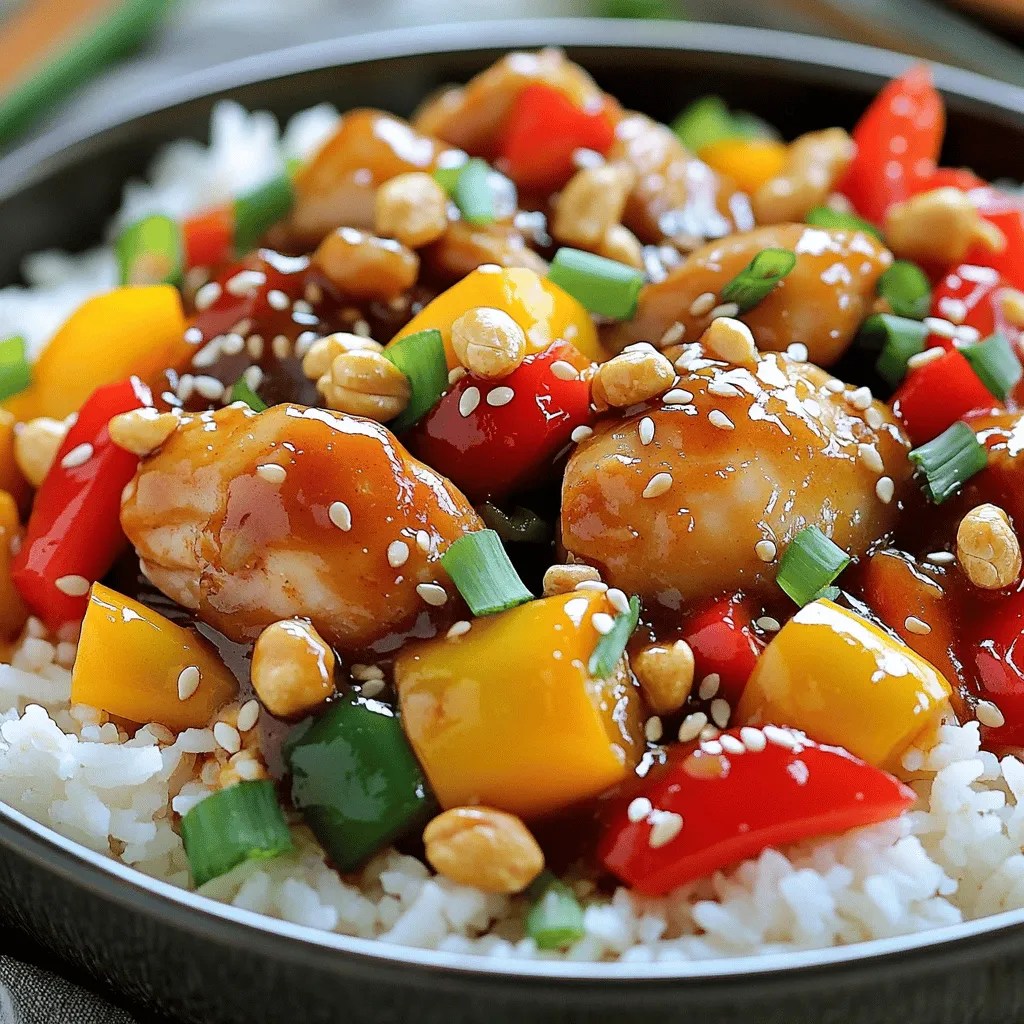
Craving a delicious dinner that hits all the right notes? “Kung Pao Chicken Fakeout Flavorful Dinner Delight” is your ticket
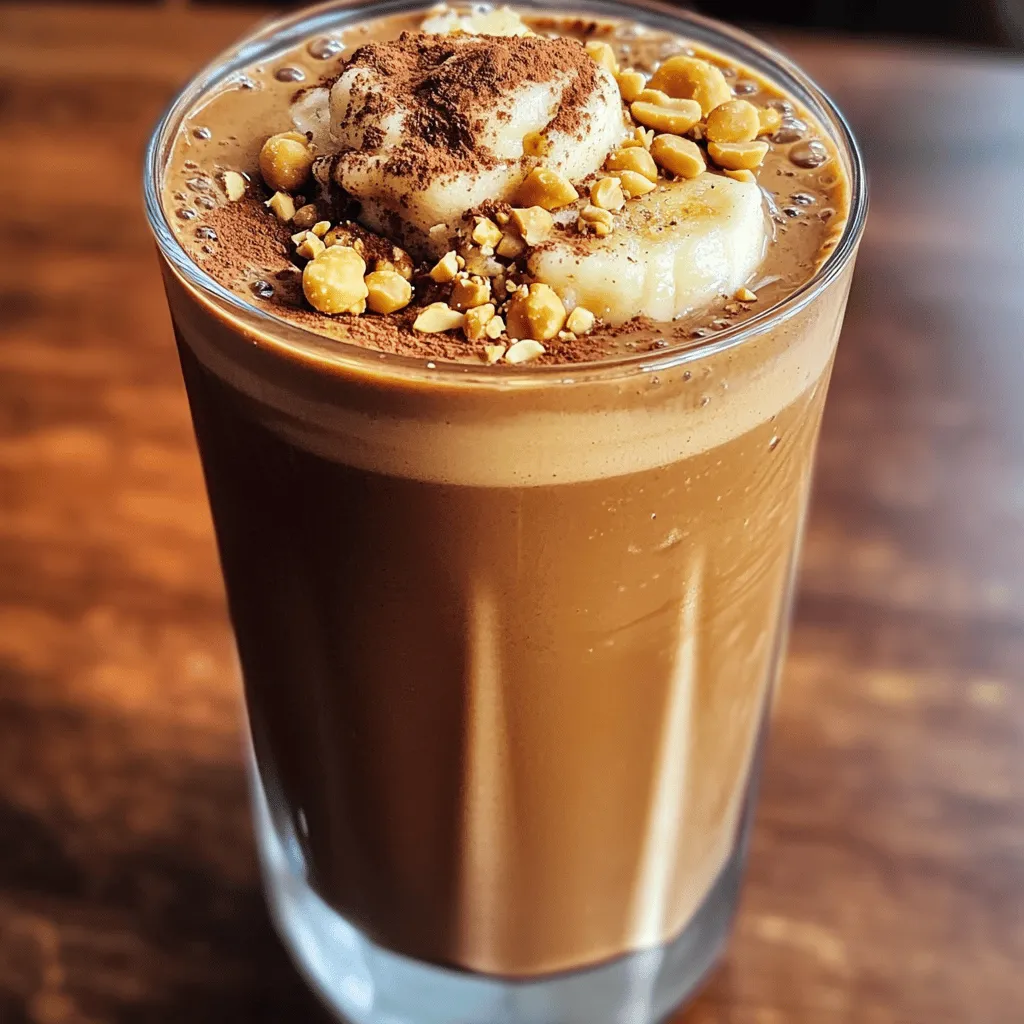
Are you ready to indulge in a shake that’s both delicious and packed with protein? The Mocha Peanut Butter Protein
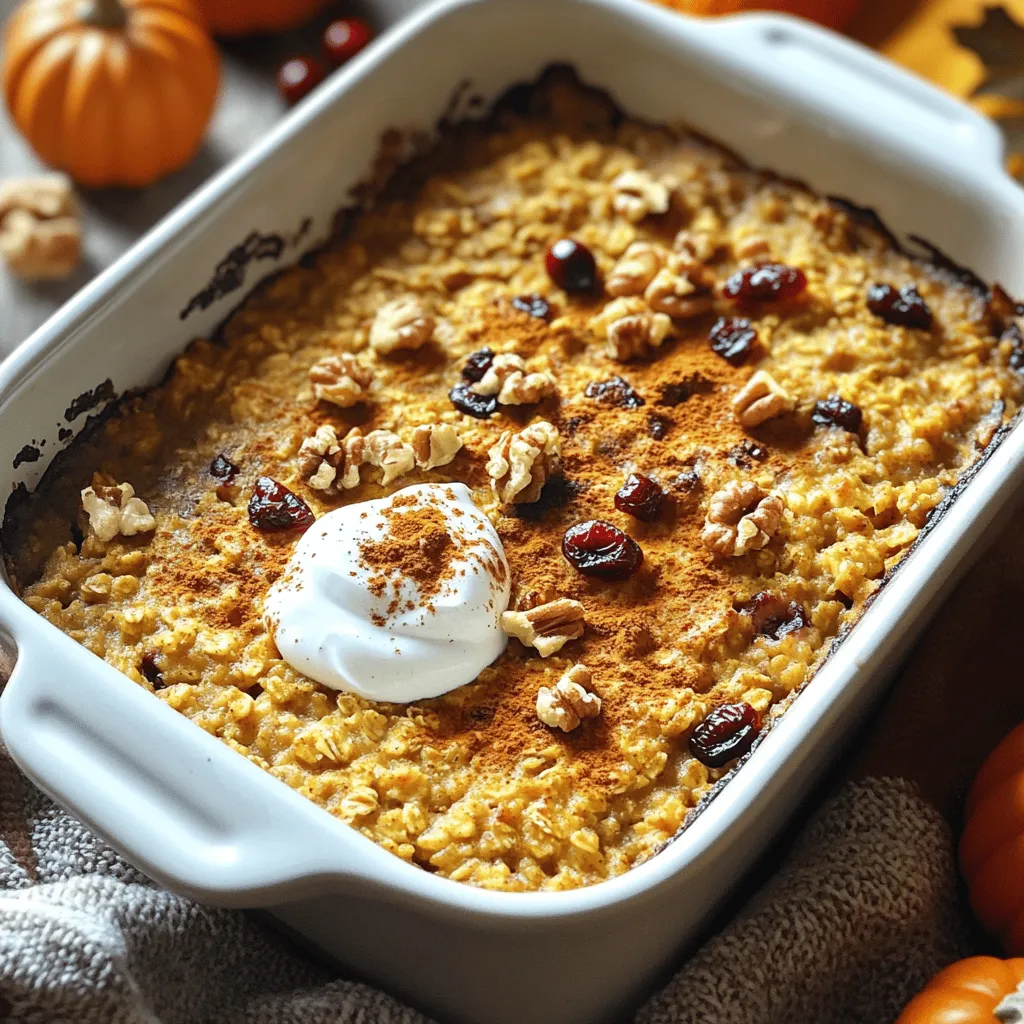
Warm, cozy fall flavors are just a baking dish away with my Pumpkin Spice Baked Oatmeal. This simple recipe combines
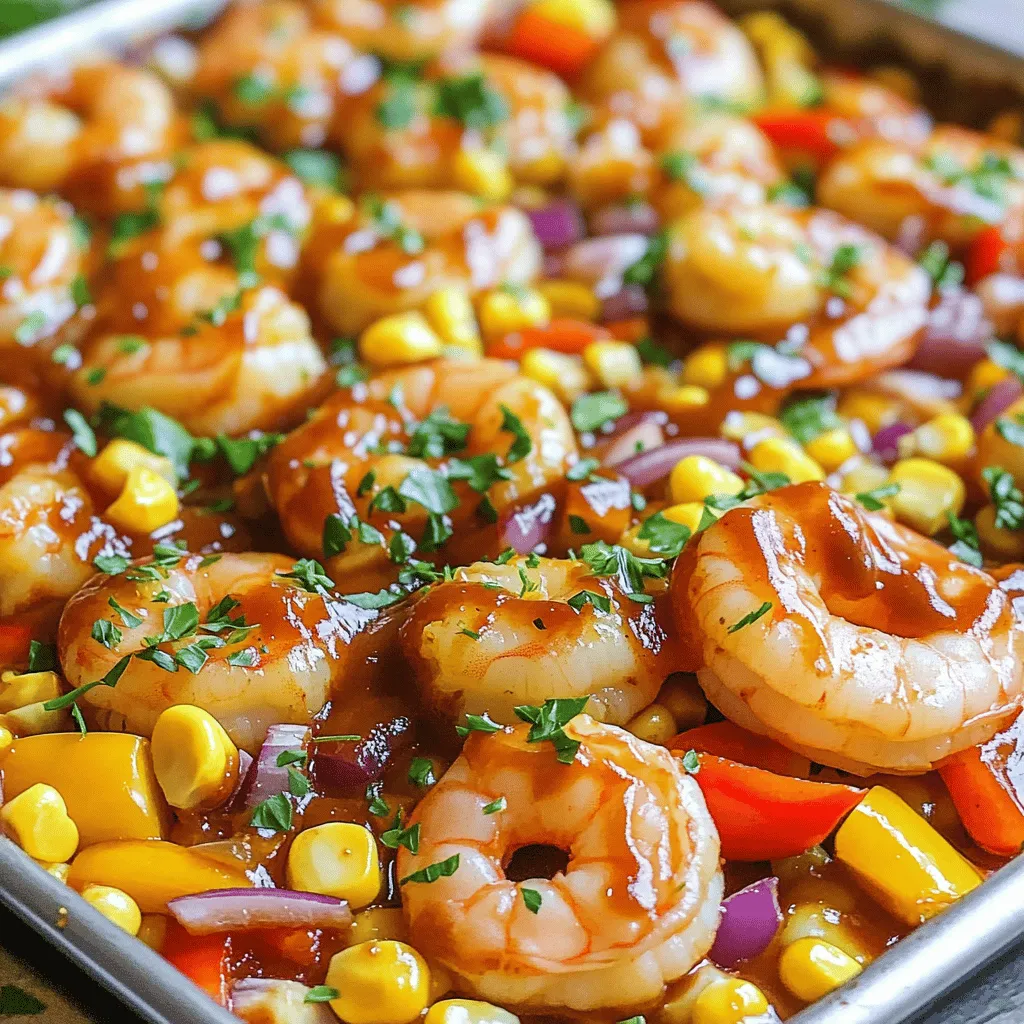
Get ready to spice up your dinner with my Sheet Pan BBQ Shrimp & Corn Bake! This recipe is simple
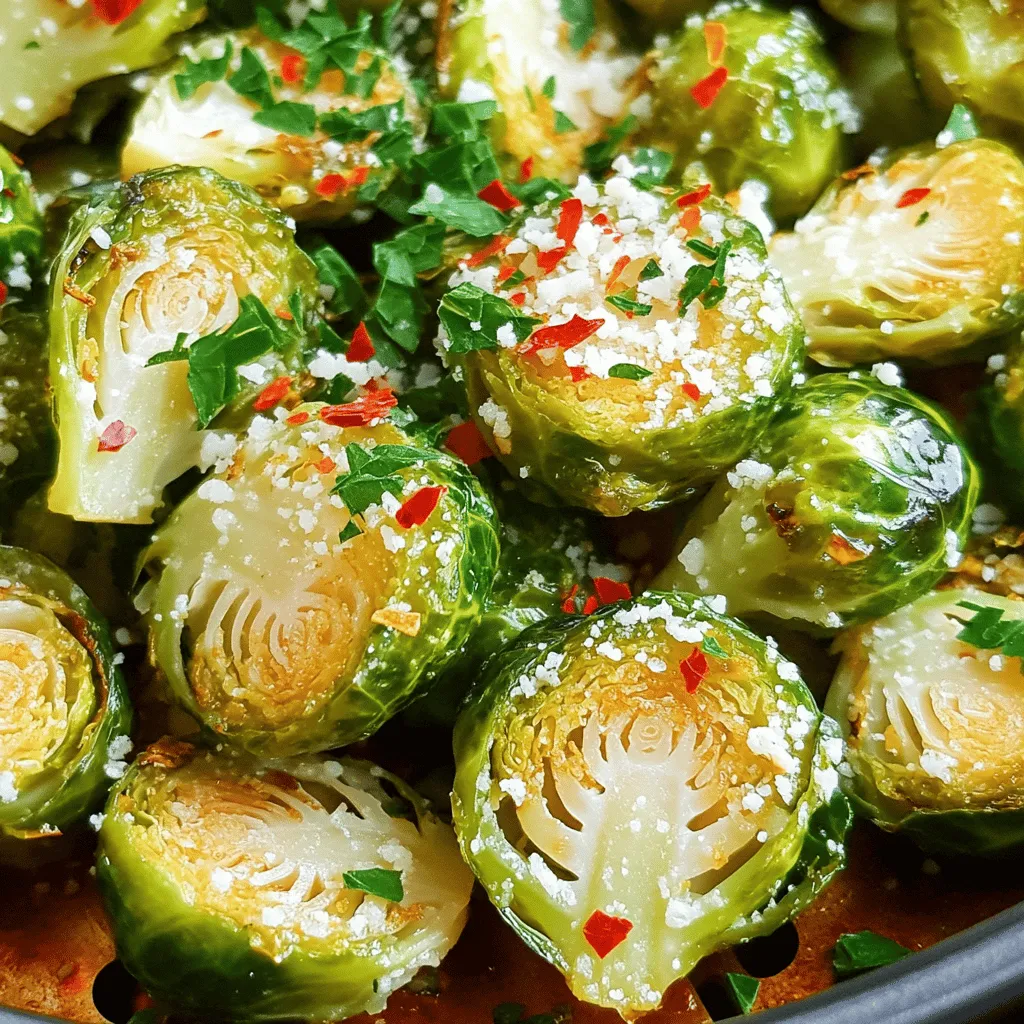
If you’re seeking a delicious way to enjoy Brussels sprouts, you’ve landed in the right place! This recipe for Air
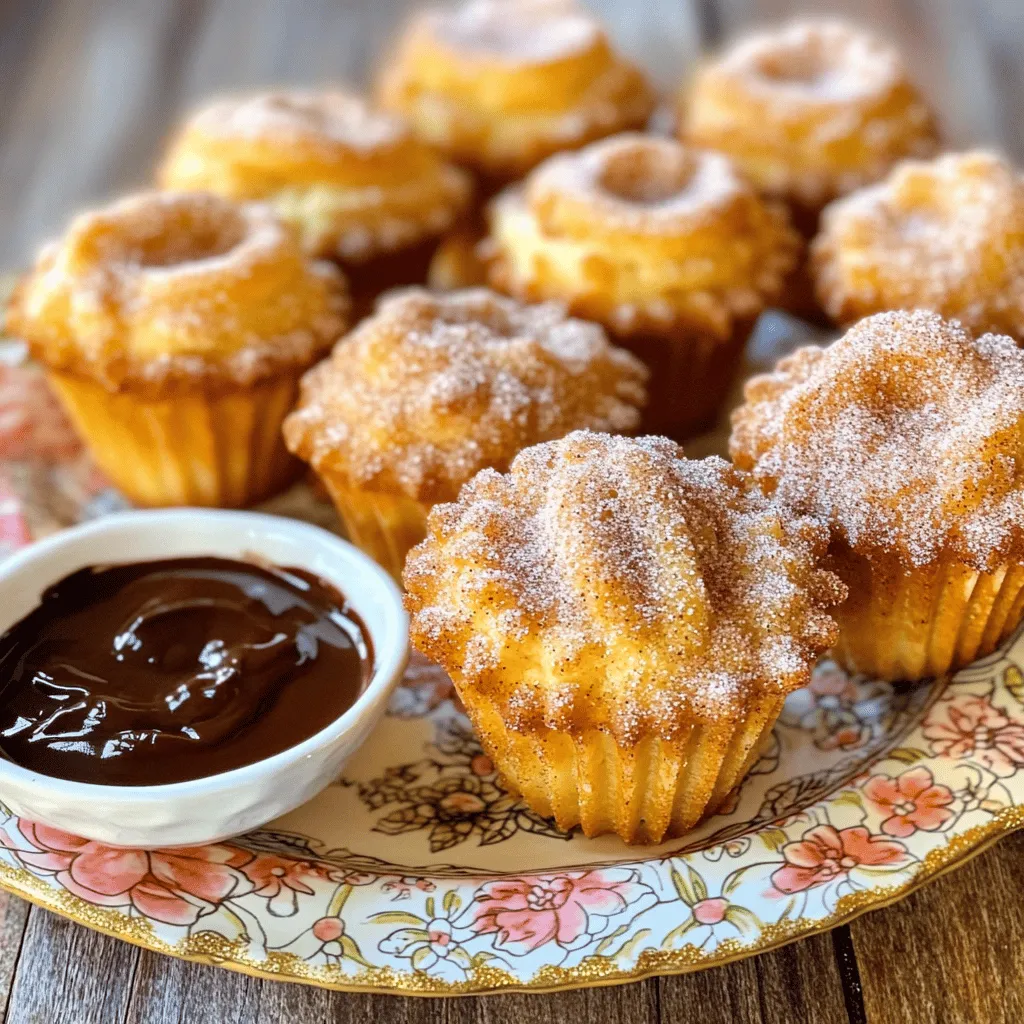
Craving a sweet treat that blends the warmth of cinnamon sugar and the comfort of muffins? Look no further! My
