Garlic Parmesan Air Fryer Baby Potatoes Delight
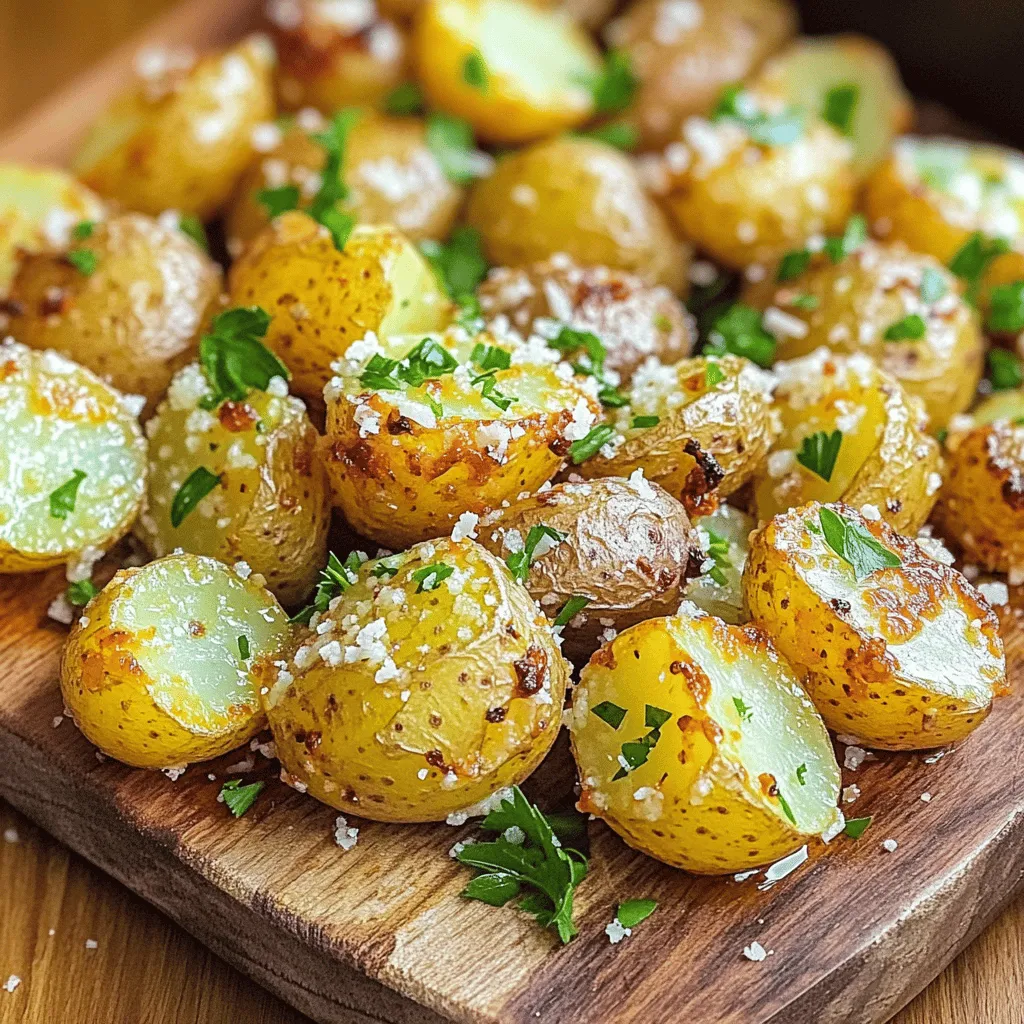
Are you ready to elevate your potato game? Garlic Parmesan Air Fryer Baby Potatoes are a tasty delight that’s simple

Are you ready to elevate your potato game? Garlic Parmesan Air Fryer Baby Potatoes are a tasty delight that’s simple
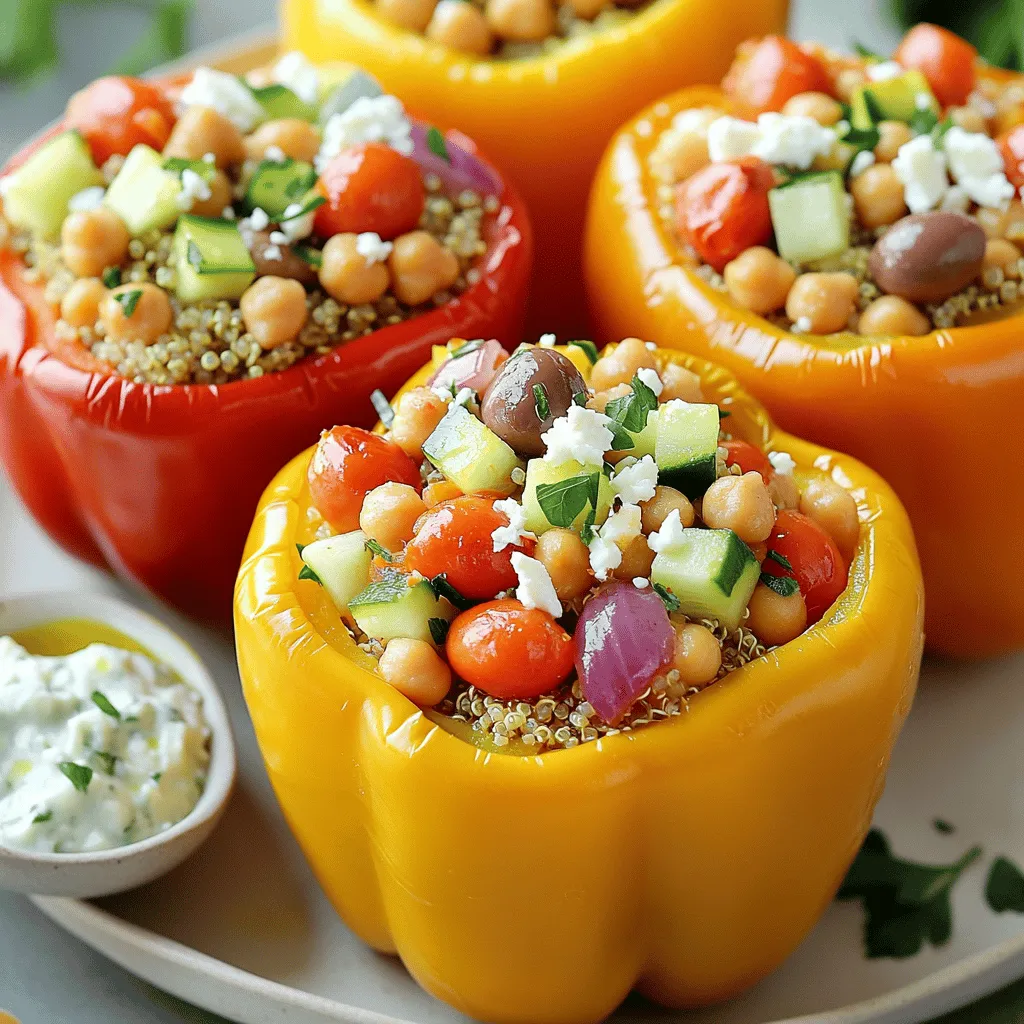
If you’re looking for a healthy and delicious meal, Mediterranean chickpea stuffed peppers are the answer. These vibrant peppers, filled

If you crave a dessert that’s rich, creamy, and 100% vegan, you’re in the right place! My Vegan Chocolate Peanut

Craving a light and flavorful meal? You’ll love these Lemon Thyme Grilled Shrimp Skewers! This easy BBQ delight brings together

If you’re craving a sweet and fruity dessert, you’re in the right place! These Triple Berry Crumble Bars are easy
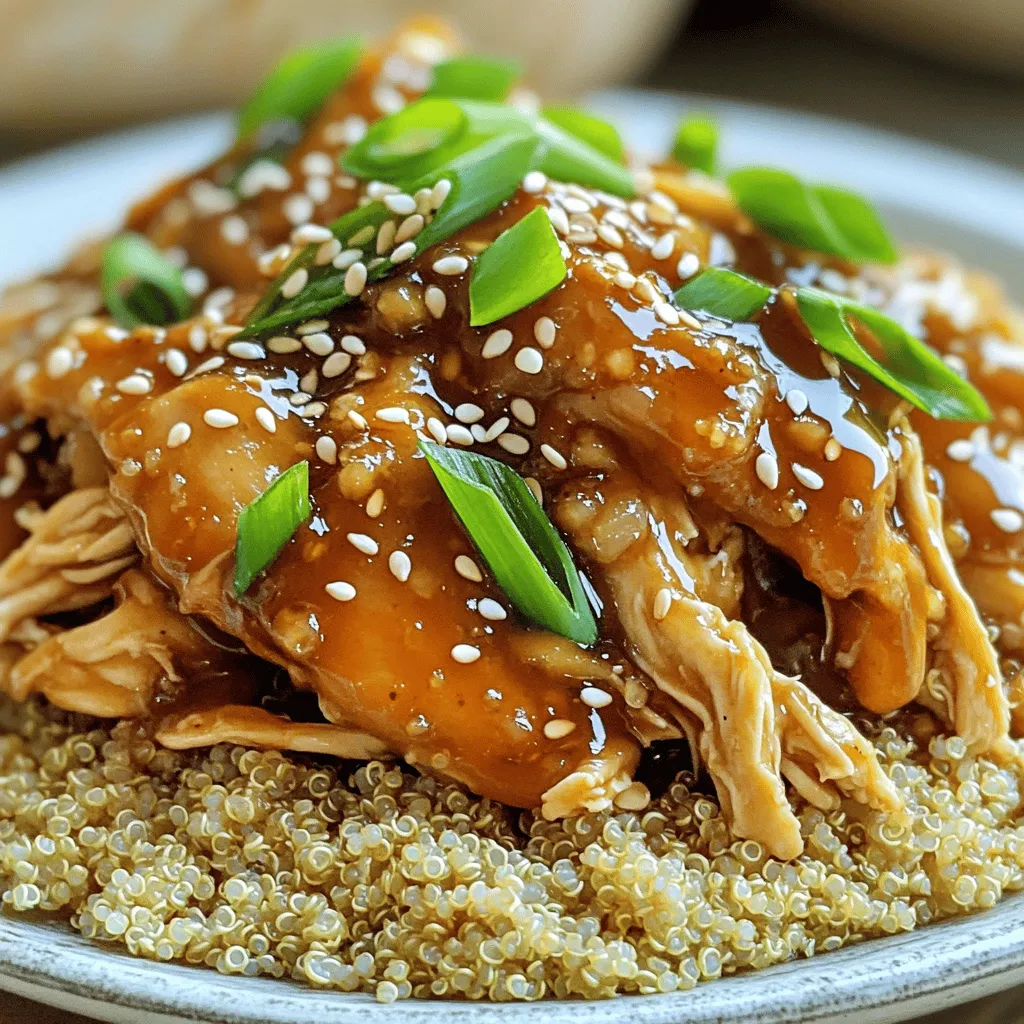
Are you ready for a quick, mouthwatering meal that takes no time to prep? Slow Cooker Sesame Garlic Chicken is
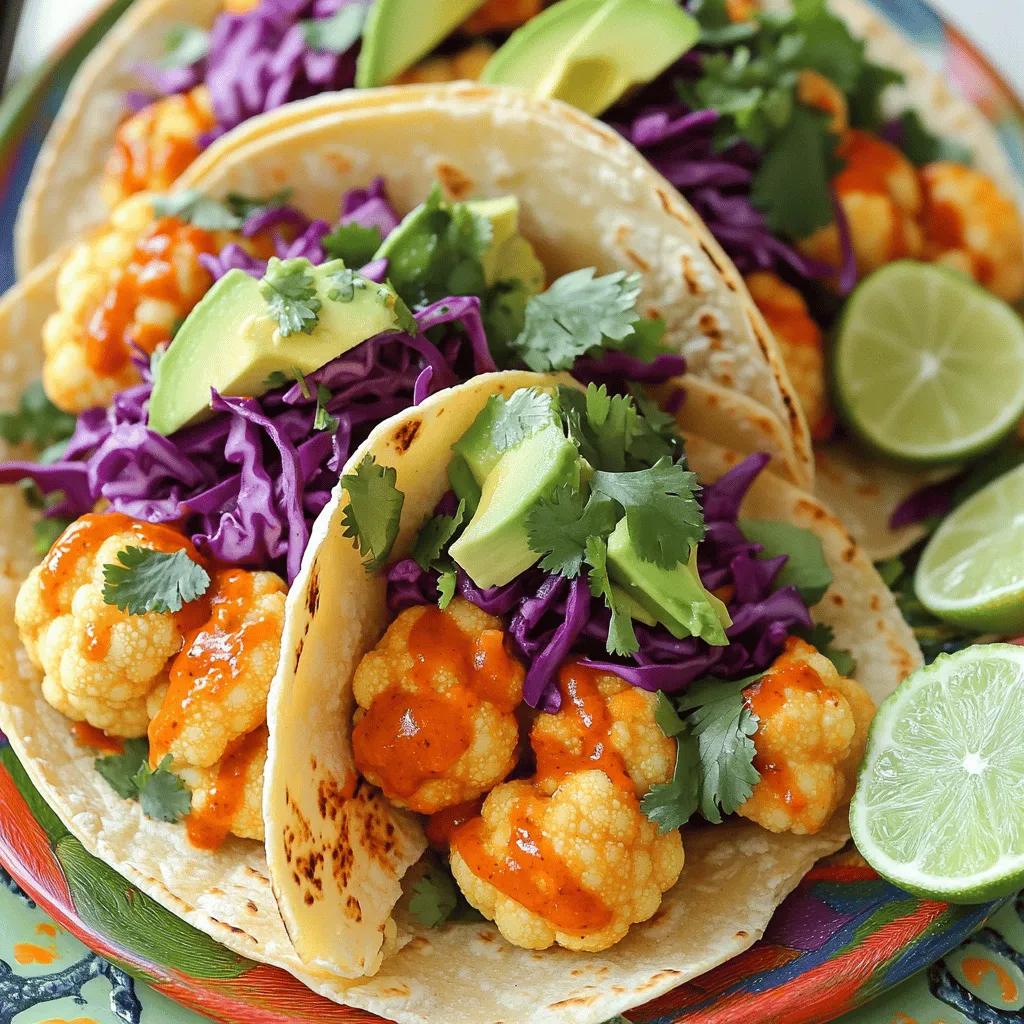
Are you ready to spice up taco night? My Irresistible Air Fryer Buffalo Cauliflower Tacos bring bold flavors and crunch
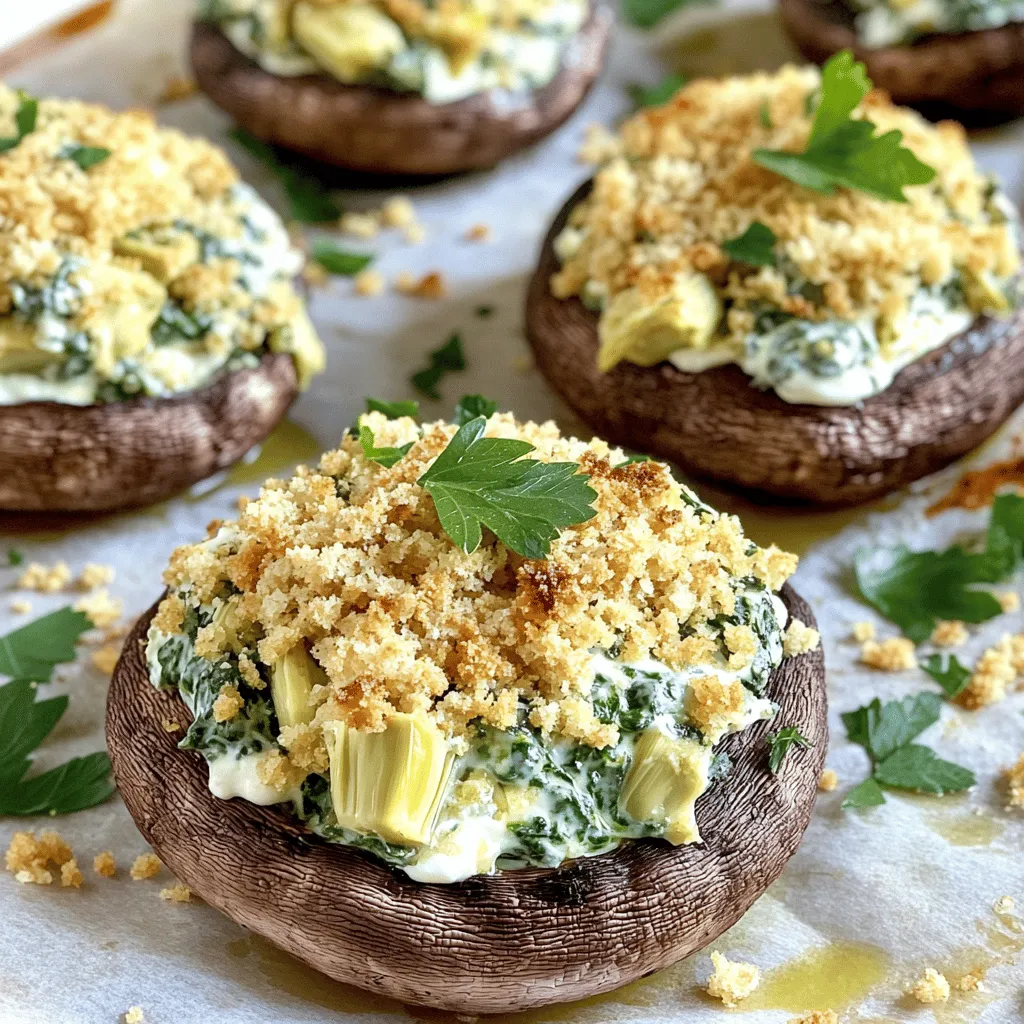
Are you ready to transform simple mushrooms into a savory delight? I’m excited to share my delicious Spinach Artichoke Stuffed

If you love coffee and cookies, you’re in for a treat! These Chocolate Dipped Espresso Cookies combine the rich flavors
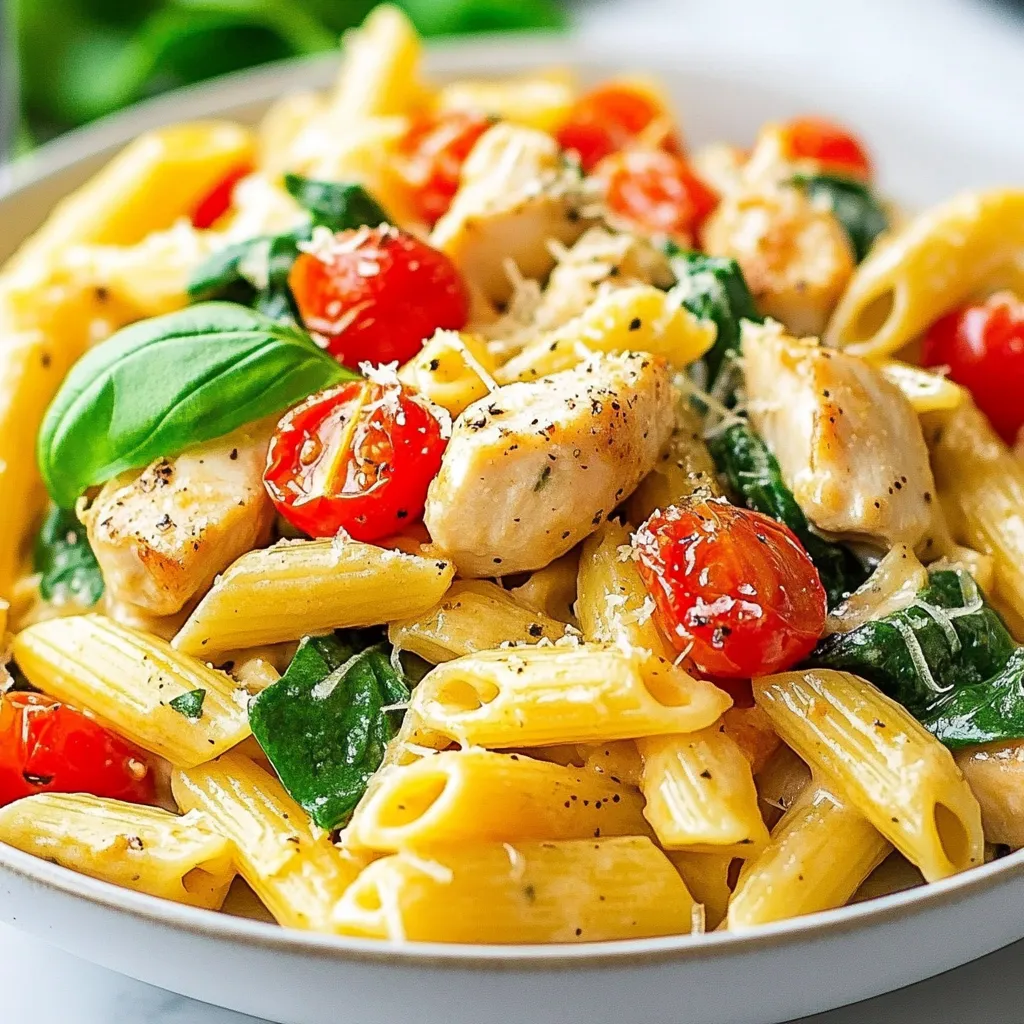
If you want a meal that’s easy and impressive, you’ve found it! This One Pot Marry Me Chicken Pasta combines
