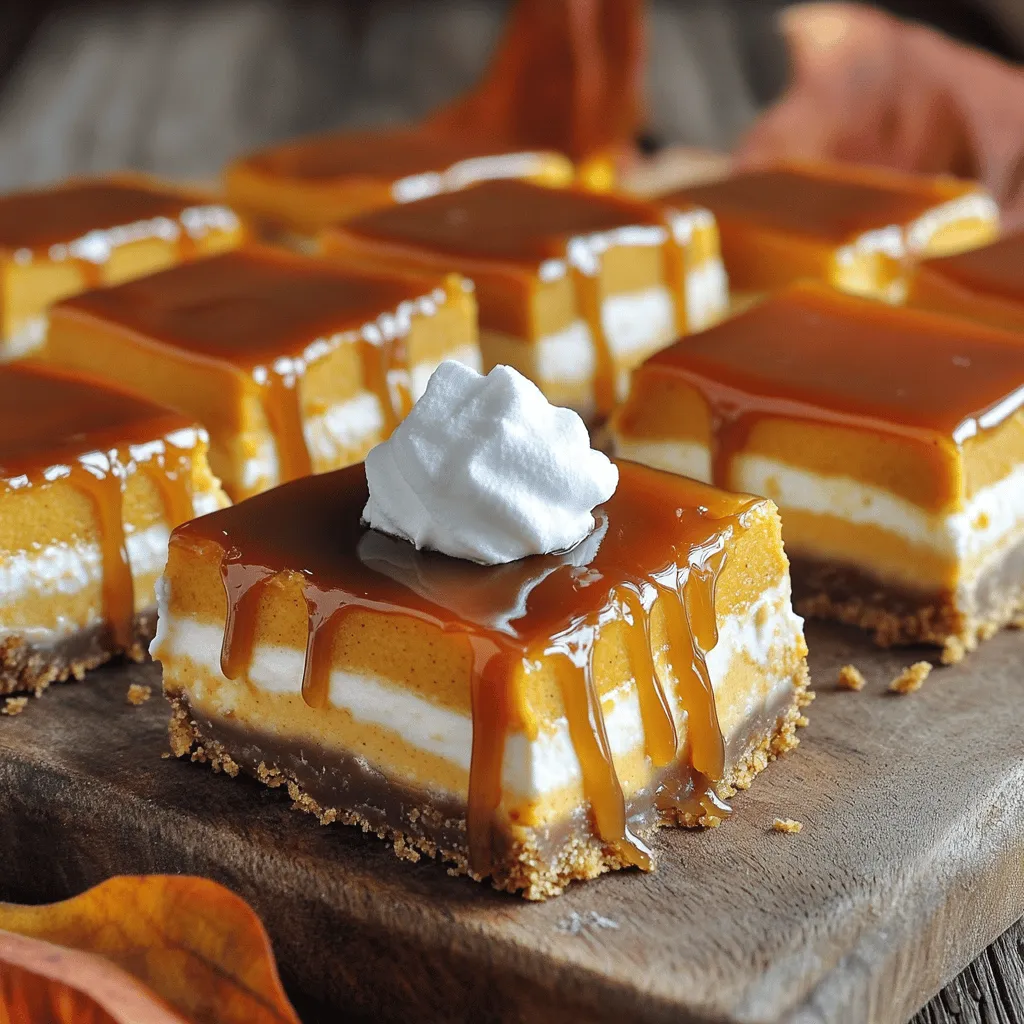
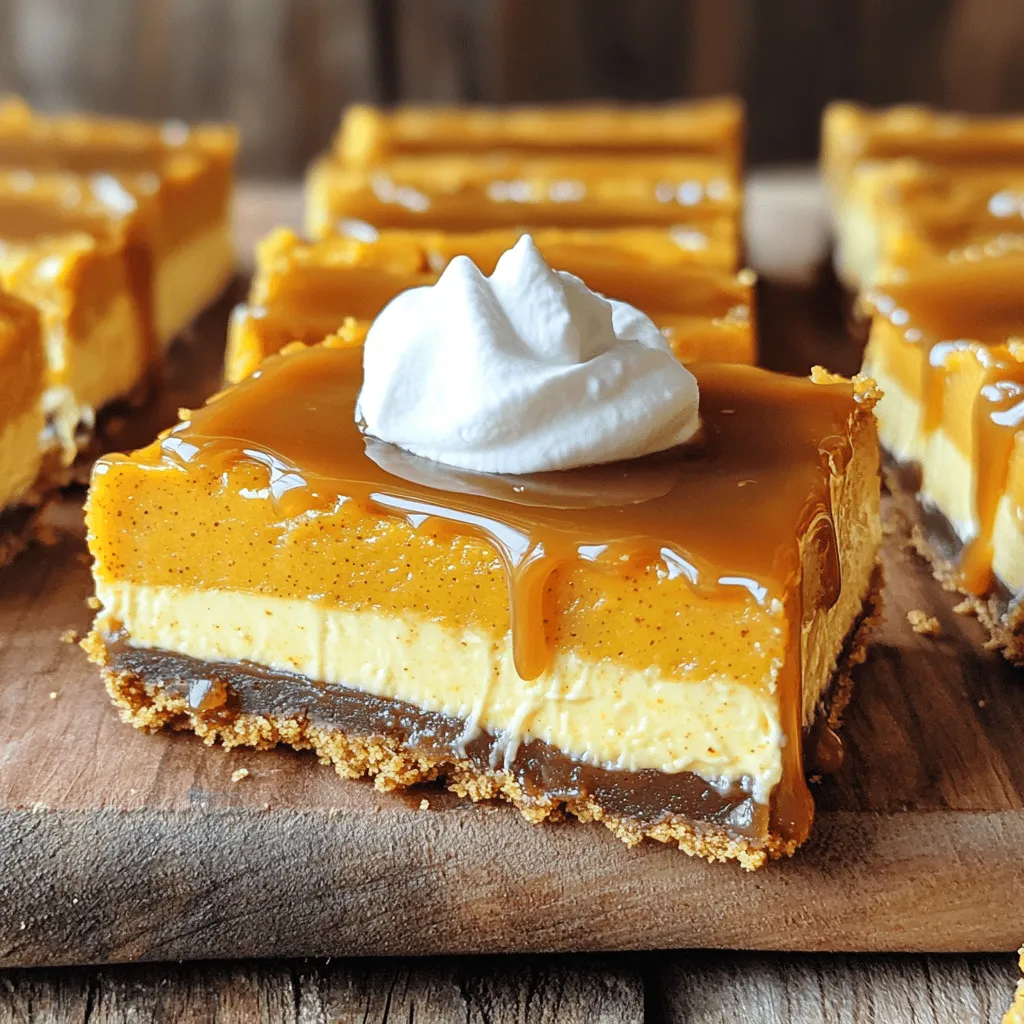
If you love pumpkin and cheesecake, you’re in for a treat! These Caramelized Pumpkin Cheesecake Bars are rich, creamy, and packed with flavor. Just imagine biting into a perfect layer of caramel drizzled over a delicious pumpkin filling. I’ll guide you through each easy step, from the crust to the chilling time. Get ready to wow your friends and family with this delightful dessert!
Ingredients
To make Caramelized Pumpkin Cheesecake Bars, you will need a mix of sweet and creamy ingredients. Here’s the complete list:
– 1 ½ cups graham cracker crumbs
– ½ cup unsalted butter, melted
– ¼ cup granulated sugar
– 2 cups cream cheese, softened
– 1 cup canned pumpkin puree
– ¾ cup brown sugar, packed
– 3 large eggs
– 1 teaspoon vanilla extract
– 1 teaspoon ground cinnamon
– ½ teaspoon ground nutmeg
– ½ teaspoon ground ginger
– Pinch of salt
– ½ cup caramel sauce (store-bought or homemade)
– Whipped cream (for serving, optional)
You can use any brand of graham crackers for the crust. The butter should be unsalted for the right flavor balance. Canned pumpkin puree works best for this recipe. It gives a smooth texture and rich taste. Feel free to use homemade caramel sauce if you want a special touch.
Always check that your cream cheese is soft. This helps it blend well with the other ingredients. The spices add warmth and depth to the bars, making them a perfect treat for fall.
For the best results, measure your ingredients carefully. This ensures every bite is as delicious as the last.
Step-by-Step Instructions
Preheat and Prepare the Baking Pan
First, preheat your oven to 350°F (175°C). This sets the perfect temperature for baking. Next, take an 8-inch square baking pan. Line it with parchment paper. Make sure to leave some paper hanging over the edges. This makes it easy to lift the bars out later.
Making the Crust
In a mixing bowl, combine 1 ½ cups of graham cracker crumbs, ½ cup of melted unsalted butter, and ¼ cup of granulated sugar. Mix well until the crumbs are evenly coated. Press this mixture firmly into the bottom of the lined pan. Bake the crust for 10 minutes. After baking, remove it from the oven and let it cool.
Preparing the Cheesecake Filling
In a large bowl, beat 2 cups of softened cream cheese with ¾ cup of brown sugar. Use an electric mixer for a smooth texture. Next, add 1 cup of canned pumpkin puree, 1 teaspoon of vanilla extract, and 3 large eggs. Then, mix in 1 teaspoon of ground cinnamon, ½ teaspoon each of ground nutmeg and ground ginger, and a pinch of salt. Mix until everything is just combined. Be careful not to overmix.
Final Assembly and Baking
Pour the creamy pumpkin cheesecake filling over the cooled graham cracker crust. Spread it evenly with a spatula. Place the pan in your preheated oven and bake for 30-35 minutes. The center should be set but still slightly jiggly when done. The edges may puff up a little.
Adding Caramel and Chilling
Once the bars are out of the oven, let them cool for about 10 minutes at room temperature. Drizzle ½ cup of caramel sauce over the warm bars. This allows the caramel to seep into the cheesecake. Chill the bars in the refrigerator for at least 4 hours. For the best flavor, consider chilling them overnight. When ready, lift the cheesecake out using the parchment paper and cut it into squares. For extra fun, you can top each bar with whipped cream.
Tips & Tricks
Achieving the Perfect Cheesecake Texture
To make your cheesecake bars smooth, avoid overmixing. Mix just until combined. This keeps the texture creamy. If you whip it too much, you can add too much air. This can cause cracks when baking.
Chilling the bars is key. After baking, let them cool at room temperature first. Then place them in the fridge for at least four hours. This ensures they set well. For the best taste, chill them overnight.
Serving Suggestions
Garnishing adds flair to your bars. A dollop of whipped cream makes them look nice. You can also drizzle extra caramel on top for a sweet touch.
For drinks, coffee pairs well with these bars. The rich taste of coffee balances the sweetness. Tea also works nicely, especially a spiced chai or herbal tea.
Tools and Equipment Needed
You will need some essential kitchen tools. Mixing bowls are a must for the filling. A sturdy baking pan helps in making the crust.
I recommend using an electric mixer for the best results. It makes mixing cream cheese and sugar easier. A hand mixer works well, but a stand mixer is even better. It saves time and effort.
Variations
Flavored Additions
You can add fun flavors to your caramelized pumpkin cheesecake bars. Try mixing in chocolate chips for a rich twist. You can also add a pinch of cayenne pepper for a little heat. If you love caramel, swap out regular caramel for salted caramel. This will give your bars a sweet and salty kick that many enjoy.
Dietary Adjustments
If you want a vegan version, use coconut cream instead of cream cheese. Replace eggs with flaxseed or chia seeds mixed with water. For gluten-free bars, use gluten-free graham cracker crumbs. You can also use maple syrup or honey instead of sugar for a healthier touch. These swaps keep the bars tasty while meeting dietary needs.
Seasonal Variations
Using fresh pumpkin gives your cheesecake bars a vibrant taste. If you prefer canned pumpkin, make sure it’s pure pumpkin, not pie filling. For summer, consider adding citrus zest, like lemon or orange, to brighten the flavor. During the holidays, you could add nutmeg or clove for a festive touch. Each season offers a chance to play with flavors in your bars.
Storage Info
How to Store Leftover Bars
To keep your caramelized pumpkin cheesecake bars fresh, store them in the fridge. Place the bars in an airtight container. You can also wrap them tightly in plastic wrap. This helps keep moisture in and prevents drying out. If you want to freeze them, use a freezer-safe container. You can also wrap individual bars in foil or plastic wrap for easy access.
Shelf Life
In the fridge, these bars last about 5 days. If you freeze them, they can last up to 3 months. Always check for signs of spoilage, like off smells or mold. If the bars feel dry or crumbly, it’s best to toss them. Enjoy your treats while they are fresh, and savor every bite!
FAQs
Can I use fresh pumpkin instead of canned?
Yes, you can use fresh pumpkin. Fresh pumpkin gives a bright taste. It also has fewer preservatives. To use fresh pumpkin, you need to cook it first. Cut the pumpkin, remove seeds, and roast it until soft. Then, mash it well for your recipe. This step adds a nice flavor to your bars.
What is the best way to cut cheesecake bars?
For clean cuts, chill the bars well before slicing. Use a sharp knife for best results. Run the knife under hot water before cutting. Wipe the knife with a clean cloth after each cut. This method helps to keep the bars looking neat and pretty.
Can I make this recipe ahead of time?
Yes, you can prepare the bars in advance. Make them one or two days before you serve them. After baking, let them cool and chill in the fridge. They taste even better after chilling overnight. Just remember to add caramel sauce just before serving.
How do I know when the cheesecake bars are done?
Check the bars after 30 minutes of baking. The edges should puff up a bit. The center should be slightly jiggly. If the center is too firm, it may overbake. Let them cool completely before cutting to avoid cracks.
What is the best way to reheat leftovers?
Reheat the bars gently in the microwave. Use a low power setting to avoid melting them. You can also let them sit at room temperature for a bit. This method keeps the texture and flavor intact. Enjoy your leftover bars with some fresh whipped cream!
Caramelized Pumpkin Cheesecake Bars are a delightful treat made with simple ingredients. We covered everything from the crust to the filling, along with tips for perfect texture. Don’t forget to chill the bars for the best taste!
Feel free to adapt the recipe with flavors or dietary needs. Enjoy serving these bars at your next gathering, and store leftovers correctly for lasting freshness. With these tips, you’re well on your way to making a delicious dessert everyone will love.