If you love cheesy, buttery flavors, you’re in for a treat! I’m excited to share my easy recipe for Cheesy Garlic Breadsticks. These tasty sticks are perfect as a snack or alongside your favorite meal. With simple ingredients and quick steps, you’ll want to whip up a batch today. Let’s dive into the details and get those delicious breadsticks baking in your kitchen!
Ingredients
Main Ingredients for Cheesy Garlic Breadsticks
To make cheesy garlic breadsticks, you need simple items. Here is the list:
– 2 cups all-purpose flour
– 1 tablespoon instant yeast
– 1 teaspoon sugar
– 1 teaspoon salt
– 3/4 cup warm water
– 2 tablespoons olive oil
– 3 cloves garlic, minced
– 1/2 teaspoon dried Italian herbs (oregano, basil, thyme)
– 1 cup shredded mozzarella cheese
– 1/4 cup grated Parmesan cheese
– 2 tablespoons unsalted butter, melted
– Fresh parsley, chopped (for garnish)
These ingredients create a tasty base. The flour, yeast, and water make the dough rise. Garlic and herbs add great flavor. Mozzarella and Parmesan make it cheesy.
Optional Additions and Substitutes
You can change this recipe to fit your taste. Here are some ideas:
– Use whole wheat flour for a healthier option.
– Swap olive oil with melted butter for a richer taste.
– Add red pepper flakes for some heat.
– Try different herbs like rosemary or thyme.
– Use garlic powder instead of fresh garlic for ease.
These changes can give your breadsticks a new twist. Feel free to get creative!
Recommended Cheeses for Extra Flavor
While mozzarella is a must, you can mix in other cheeses. Here are some great choices:
– Provolone for a sharp kick.
– Cheddar for a bold flavor.
– Gouda for a creamy texture.
– Fontina for an extra gooey bite.
Combining cheeses can elevate your breadsticks. Don’t be afraid to experiment with flavors!
Step-by-Step Instructions
Preparation of the Dough
To make the dough, start by mixing the dry ingredients. In a large bowl, combine 2 cups of all-purpose flour, 1 tablespoon of instant yeast, 1 teaspoon of sugar, and 1 teaspoon of salt. Stir them together well. Next, slowly add 3/4 cup of warm water and 2 tablespoons of olive oil. Mix until a dough forms. Knead the dough for about 5 minutes. It should feel smooth and elastic. Cover the bowl with a cloth and let it rise for 30 minutes in a warm spot. It will double in size.
Shaping the Breadsticks
After the dough rises, gently punch it down to remove air bubbles. On a floured surface, roll it out into a rectangle about 1/2 inch thick. Move the rolled dough onto a baking sheet lined with parchment paper. Use a knife to make shallow cuts in the dough. This step is key, as it will help you separate the breadsticks after baking.
Baking and Serving Suggestions
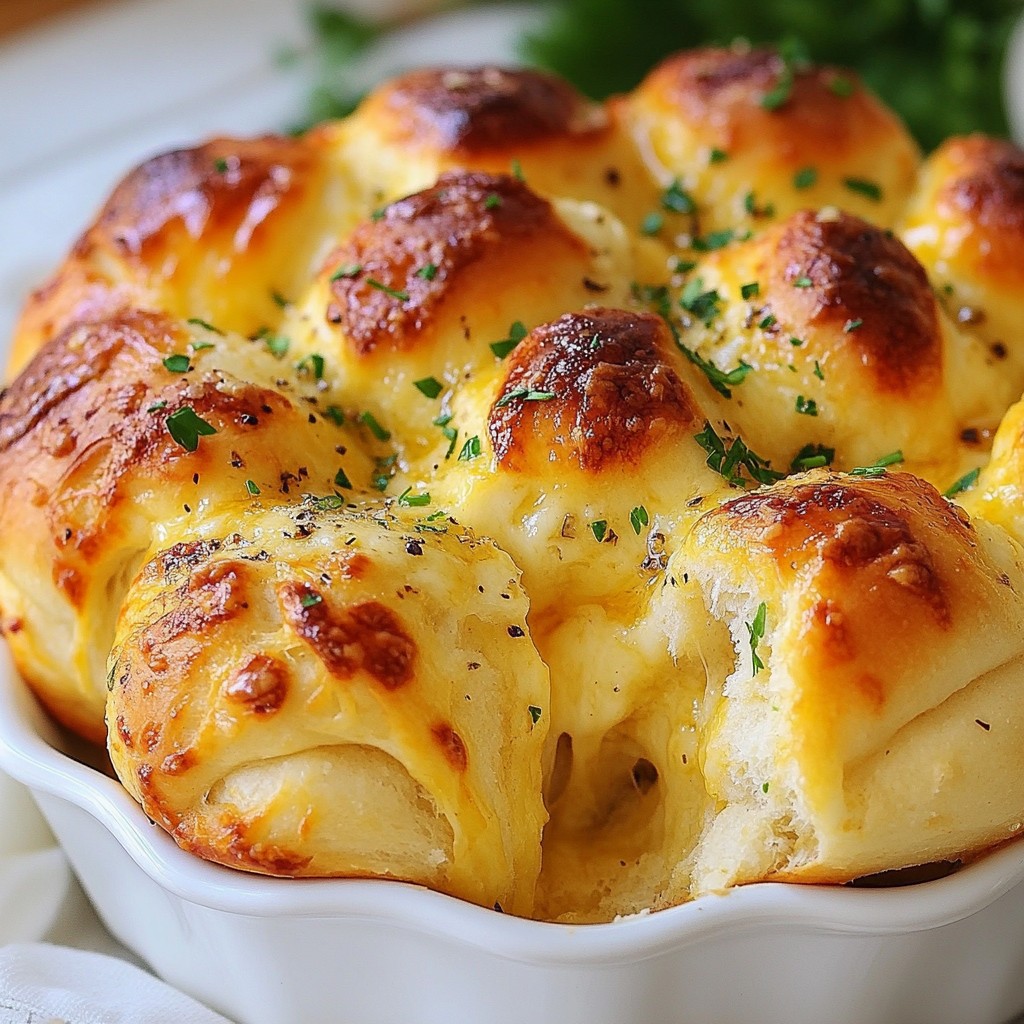
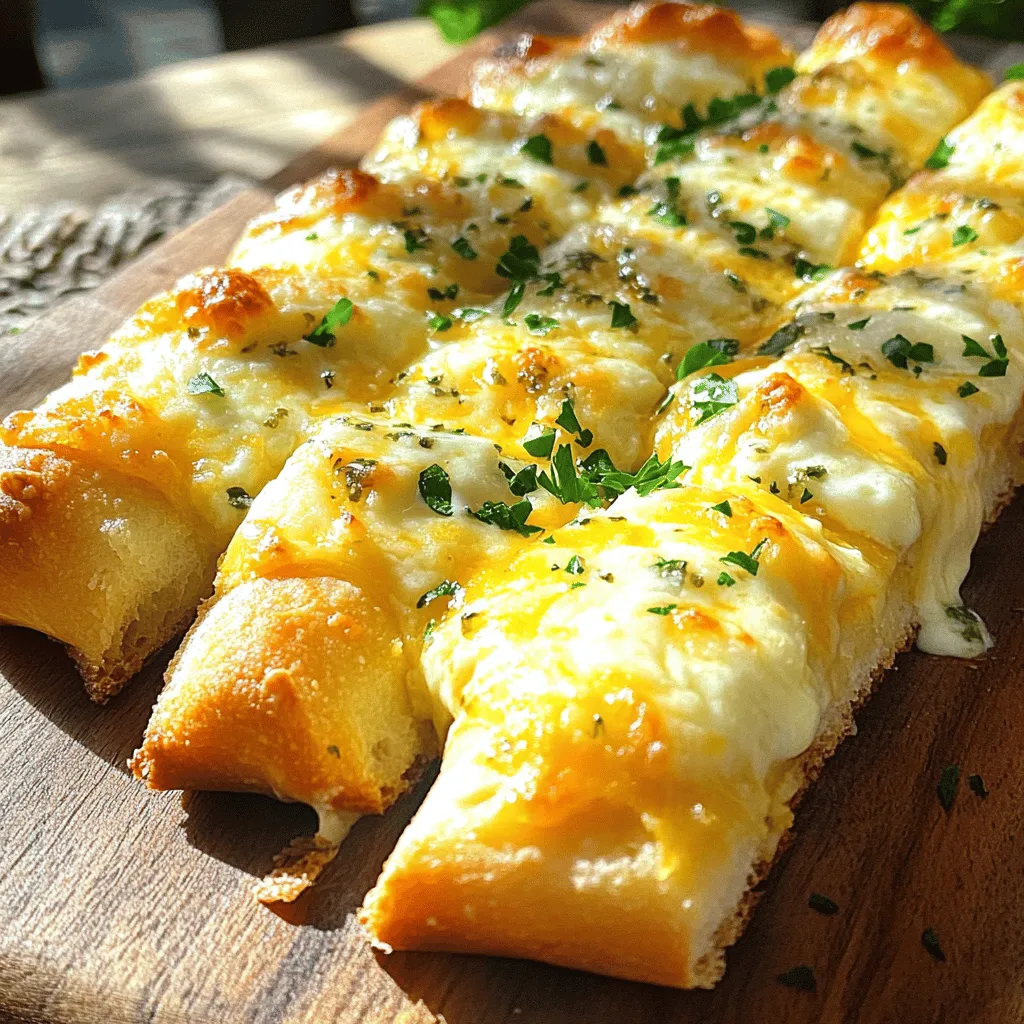
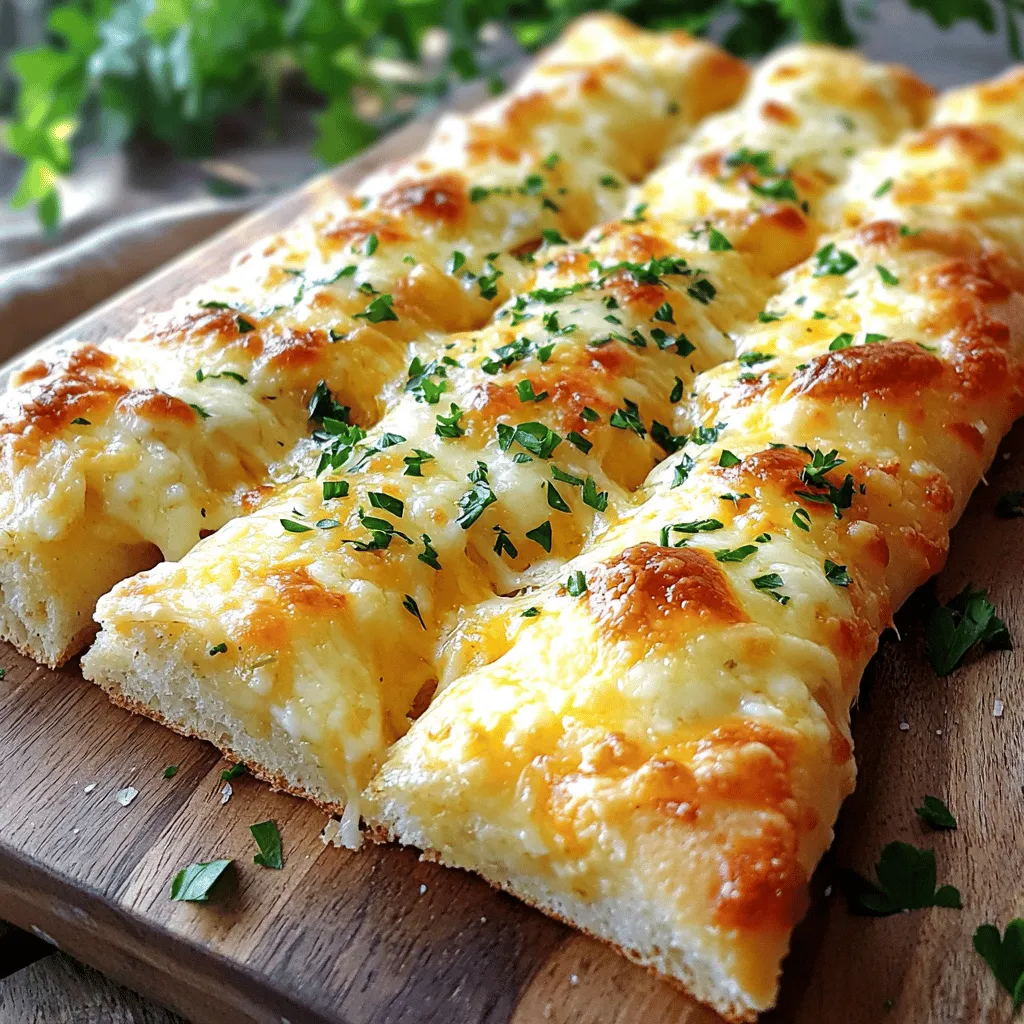
Preheat your oven to 425°F (220°C). While it heats, mix 2 tablespoons of melted butter, 3 cloves of minced garlic, and 1/2 teaspoon of dried Italian herbs in a small bowl. Brush this mixture evenly over the dough. Next, add 1 cup of shredded mozzarella cheese and 1/4 cup of grated Parmesan cheese on top. Bake for 15 to 20 minutes. Look for bubbly cheese and golden-brown edges. Once baked, let the breadsticks cool for a few minutes. Finally, cut them along the pre-scored lines and sprinkle fresh parsley on top. Enjoy your cheesy garlic breadsticks!
Tips & Tricks
How to Achieve the Perfect Texture
To get the best texture for your cheesy garlic breadsticks, focus on the dough. Mix the dry ingredients well before adding liquids. This helps the yeast activate properly. Knead the dough until it feels smooth and elastic. If the dough is sticky, add a bit more flour. Let it rise in a warm spot. This helps the breadsticks become fluffy and light.
Ways to Enhance Flavor (Herbs and Spices)
You can boost the flavor of your breadsticks easily. Use fresh garlic for a stronger taste. Add herbs like oregano, basil, or thyme. You can mix these into the dough or sprinkle them on top before baking. For a kick, try red pepper flakes. They give a nice heat without being too much.
Common Mistakes to Avoid
One common mistake is not kneading enough. This can make the breadsticks dense. Avoid using cold water; it can slow yeast growth. Always let the dough rise until it doubles in size. If you skip this step, your breadsticks may not be fluffy. Finally, don’t overbake them. Keep an eye on the oven. You want them golden, not burnt.
Variations
Different Cheese Combinations
You can swap out cheeses to create new flavors. Try using cheddar for a sharp taste. You can mix mozzarella with gouda for a creamy touch. For a kick, add pepper jack or feta. Each cheese brings its own charm, making the breadsticks unique.
Seasonal or Themed Variants
Use seasonal ingredients to match holidays. For Halloween, add some orange cheddar for fun. At Christmas, sprinkle some red pepper flakes for a festive touch. You can also use herbs like rosemary for a spring flavor. These small changes add joy to your meals.
Gluten-Free or Vegan Options
If you need gluten-free breadsticks, use almond flour or a gluten-free blend. Many brands offer ready-made options that work well. For vegan breadsticks, replace cheese with a nut-based option. You can also use plant-based butter. These choices let everyone enjoy the tasty experience.
Storage Info
Best Ways to Store Leftover Breadsticks
To keep your cheesy garlic breadsticks fresh, store them in an airtight container. Let them cool completely before sealing. This prevents moisture buildup, which can make them soggy. If you don’t have a container, wrap them tightly in plastic wrap. This keeps them safe and tasty for later.
Freezing and Reheating Instructions
To freeze your breadsticks, place them in a single layer on a baking sheet. Freeze them for about 1-2 hours. After they freeze, transfer them to a freezer bag. This method avoids sticking. When you’re ready to enjoy them, reheat in the oven. Bake at 350°F (175°C) for about 10-15 minutes, until warm and crispy.
Shelf Life and Recommendations
Stored properly, your breadsticks can last about 3-4 days at room temperature. If refrigerated, they may last up to a week. However, for the best taste and texture, enjoy them within the first few days. Remember, freshly baked breadsticks taste the best!
FAQs
How to make cheesy garlic breadsticks from scratch?
To make cheesy garlic breadsticks from scratch, follow a few simple steps. Start by mixing 2 cups of all-purpose flour, 1 tablespoon of instant yeast, 1 teaspoon of sugar, and 1 teaspoon of salt in a bowl. Gradually add 3/4 cup of warm water and 2 tablespoons of olive oil. Mix until a dough forms. Knead for about 5 minutes until smooth. Let it rise for 30 minutes. Then, roll it out, brush with garlic butter, and top with cheese. Bake at 425°F for 15-20 minutes.
Can I use different types of bread for garlic breadsticks?
Yes, you can use different types of bread for garlic breadsticks. While I recommend using a simple dough, you can try French bread or pizza dough. You can even use whole wheat bread for a healthier option. Just remember that the texture and taste may change a bit based on your choice.
What dip goes well with cheesy garlic breadsticks?
Many dips pair well with cheesy garlic breadsticks. A classic marinara sauce is always a hit. You can also try garlic butter or a creamy ranch dip. For something unique, consider a spicy salsa or a tangy pesto. Each dip adds a different flavor that enhances the breadsticks.
Cheesy garlic breadsticks are simple and fun to make. We covered the key ingredients, shaping the dough, and baking tips. Variations let you mix flavors and dietary needs. Make sure to store extras correctly; they stay tasty longer. If you follow these steps and avoid common mistakes, you’ll impress everyone with your skills. Enjoy these breadsticks as a side or a snack. Happy baking!