Are you ready to indulge in a sweet and crunchy treat? This Chocolate Covered Strawberry Bark recipe is simple yet delicious, perfect for any occasion. With just a few high-quality ingredients, you can create a delightful snack that thrills your taste buds. I’ll guide you step-by-step through making this bark, showing you how to melt chocolate and add tasty toppings. Let’s dive into this delightful recipe and make something special!
Ingredients
Primary Ingredients
– 1 cup high-quality dark chocolate chips
– 1 cup high-quality white chocolate chips
– 1 cup freeze-dried strawberries
Optional Ingredients
– 1/2 cup chopped roasted almonds
– Sea salt (for sprinkling)
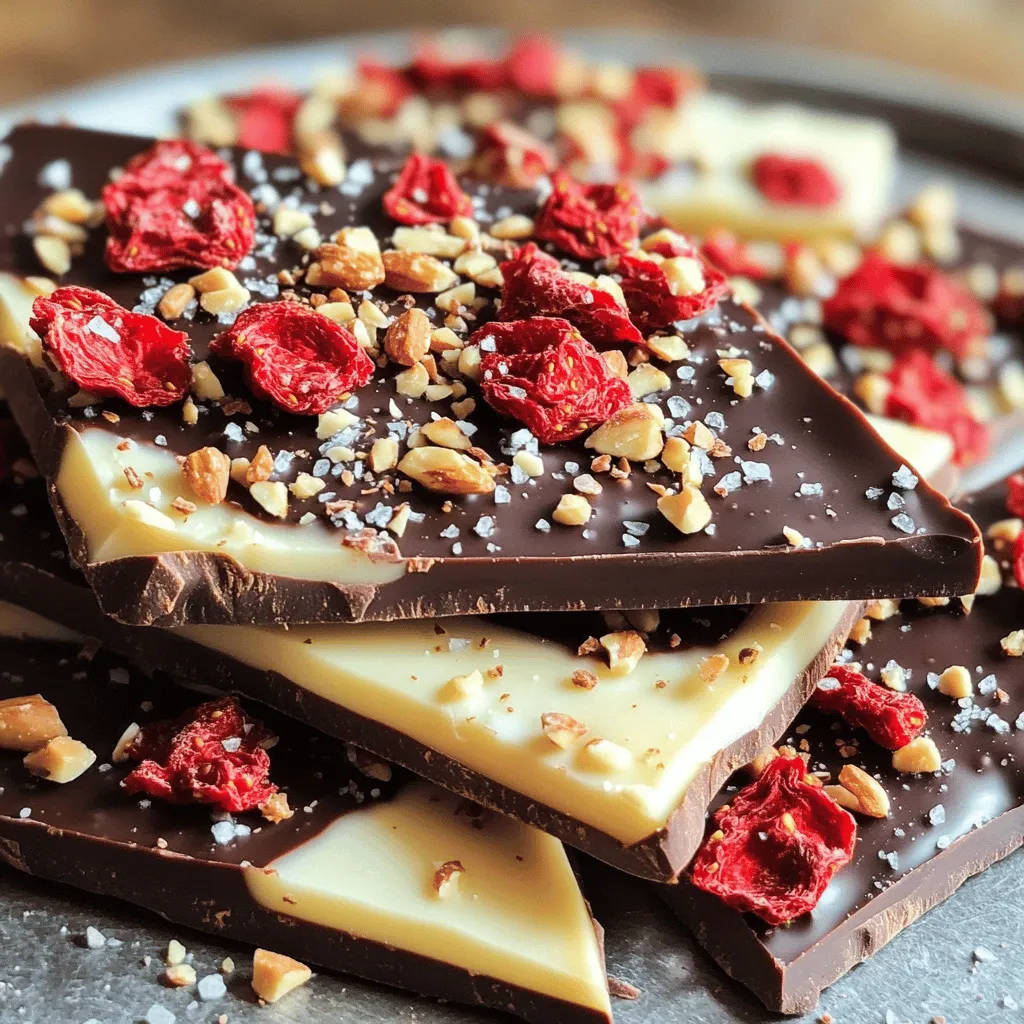
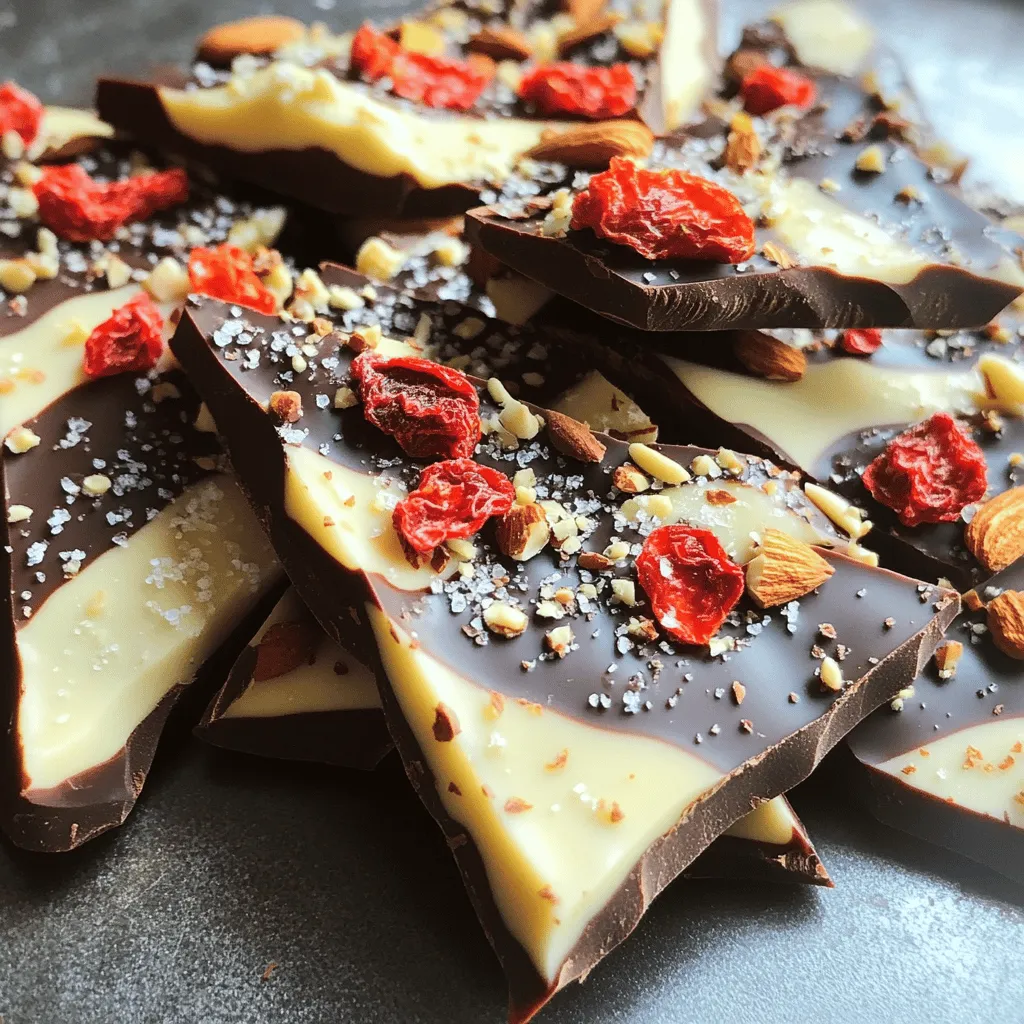
To make chocolate covered strawberry bark, you need just a few key ingredients. First, I use dark chocolate and white chocolate chips. High-quality chocolate gives the best taste. I also add freeze-dried strawberries for a fruity crunch.
You can make it even better with optional ingredients. Chopped roasted almonds add a nice nutty flavor. A sprinkle of sea salt on top enhances the sweetness. It’s a great way to balance the flavors.Enjoy creating this treat!
Step-by-Step Instructions
Melting the Chocolates
To melt the chocolates, grab two microwave-safe bowls. Place dark chocolate chips in one bowl and white chocolate chips in another. Heat each bowl in the microwave. Start with 30 seconds. Then, take them out and stir. If they aren’t smooth, heat for another 30 seconds. Repeat until melted. This makes sure the chocolate stays nice and shiny.
Preparing the Baking Pan
Next, you need to prepare the baking pan. Take a baking sheet and lay down parchment paper. This will help when you want to remove the bark later. Make sure the paper covers the whole sheet. It should hang over the edges too. This way, you can lift the bark out easily.
Creating Layers
Now, let’s create the layers of chocolate. Pour the melted dark chocolate onto the prepared baking sheet. Use a spatula to spread it out evenly. Aim for about 1/4 inch thick. Once it looks good, put it in the fridge for about 10 minutes. This helps it set.
After the dark chocolate layer is firm, pour the melted white chocolate on top. Spread it gently to cover the dark chocolate. Try to create a marbled look. This adds a fun twist to the bark.
Adding Toppings
While the white chocolate is still warm, it’s time to add toppings. Sprinkle freeze-dried strawberries over the white chocolate layer. If you like, add chopped roasted almonds too. Press them lightly into the chocolate. This helps them stick. They will add extra crunch and flavor.
Chilling and Setting
Now, place the baking sheet back into the fridge. Chill it for another 30 to 60 minutes. This lets the bark set completely. You want it nice and firm before you break it apart.
Breaking the Bark
Once the bark is set, take it out of the fridge. Carefully lift the parchment paper from the baking sheet. Place it on a clean surface. Use your hands to break the bark into irregular pieces. This makes each piece unique. Now, you have delicious chocolate-covered strawberry bark ready to enjoy!
Tips & Tricks
Perfecting Chocolate Melting
To melt chocolate well, use a microwave. Place dark and white chocolate chips in separate bowls. Heat them in short bursts of 30 seconds. Stir after each burst. This helps prevent burning. If the chocolate is not melting, heat it a bit longer. Avoid overheating, as it can ruin the taste and texture.
Presentation Tips
When your bark is ready, break it into pieces. Arrange the pieces on a nice platter. You can add extra freeze-dried strawberries on top for color. This makes your treat look fancy. Use a mix of big and small pieces for a fun look. You want it to be inviting and eye-catching.
Flavor Enhancements
Feel free to get creative with your flavors! Use milk chocolate for a sweeter taste. You can also try adding nuts, like walnuts or pecans. Want more crunch? Consider using toasted coconut flakes. Each topping adds its own twist. Experiment to find your perfect combination.
Variations
Flavor Combinations
You can make chocolate-covered strawberry bark even more fun by using other freeze-dried fruits. Here are some ideas:
– Bananas: Add a sweet hint with freeze-dried bananas. They pair well with dark chocolate.
– Raspberries: Use freeze-dried raspberries for a tart flavor that contrasts nicely with the sweet chocolate.
– Mangoes: Freeze-dried mangoes bring a tropical twist to your bark. They add a bright color too.
– Blueberries: These tiny gems give a pop of flavor and color. They are also very nutritious.
Feel free to mix and match these fruits. You can create a bark that suits your taste!
Different Chocolate Types
You can also switch up the chocolate types in your bark. Here are some options:
– Milk Chocolate: This type is sweeter and creamier than dark chocolate. It makes a rich, tasty bark.
– White Chocolate: If you like a sweeter treat, use white chocolate. The creamy texture works well with fruity flavors.
You can even swirl different chocolates together. This adds a fun look and unique taste!
Dietary Considerations
When making chocolate-covered strawberry bark, keep dietary needs in mind. Here are some alternatives:
– Nut Allergies: If you need to avoid nuts, skip the chopped almonds. You can use seeds like pumpkin or sunflower instead.
– Vegan Options: Use dairy-free chocolate chips. This way, everyone can enjoy your bark.
These simple changes let you share this treat with everyone. Enjoy making it your own!
Storage Info
Best Practices for Storage
To keep your chocolate-covered strawberry bark fresh, store it in an airtight container. This helps to keep moisture out. You can also layer the bark between sheets of parchment paper. This prevents it from sticking together. Keep the container in a cool, dry place. Avoid direct sunlight and heat, as they can cause the chocolate to melt or lose its shine.
Shelf Life
When stored properly, your chocolate-covered strawberry bark can last up to two weeks. Over time, it may lose some flavor and texture. If you notice any white spots, this is called “bloom.” It happens when chocolate cools unevenly. While it looks odd, the bark is still safe to eat.
Freezing Instructions
To freeze your chocolate-covered strawberry bark, cut it into pieces first. Place the pieces in a single layer on a baking sheet. Freeze them for about an hour. Once frozen, transfer the bark into a freezer-safe bag. Remove as much air as possible before sealing. This method keeps the bark fresh for about three months. When ready to enjoy, thaw it in the fridge for a few hours before serving.
FAQs
Can I use fresh strawberries instead of freeze-dried?
You can use fresh strawberries, but they change the texture. Fresh strawberries add moisture, which can make the bark soggy. If you use fresh strawberries, slice them thinly. Pat them dry with a paper towel. Place them on top of the chocolate before it sets. The flavor will be yummy, but the bark will not last as long.
How to make this recipe less sweet?
To lower the sweetness in your chocolate bark, choose dark chocolate with a higher cocoa content. You can also mix in a pinch of sea salt. Using less white chocolate helps too. Another tip is to add some nuts or seeds. They add crunch and balance the sweetness.
What are some serving suggestions?
Serve your chocolate-covered strawberry bark in fun ways. Break it into pieces and place them on a nice plate. You can add extra freeze-dried strawberries for color. It’s great for parties or as a gift. Pair it with coffee or tea for a special treat.
Where can I buy pre-made chocolate-covered strawberry bark?
You can find pre-made chocolate-covered strawberry bark at many stores. Look in the candy aisle or gourmet sections. Online shops also sell it. Check websites like Amazon or specialty candy stores. Make sure to read reviews for quality.
In this blog post, we covered a simple recipe for chocolate-covered strawberry bark. We discussed the key ingredients, like dark and white chocolate, and freeze-dried strawberries. I shared step-by-step instructions to melt the chocolates and create layers. You learned about tips for perfecting your bark, variations to try, and best storage methods.
Making this bark is fun and easy. Enjoy the sweet flavors and share it with friends!