If you’re searching for a delicious, easy side dish, look no further than crispy garlic green beans! This crunchy delight packs a punch of flavor with every bite. With fresh green beans and fragrant garlic, this dish transforms simple ingredients into a tasty treat. In this article, I’ll share step-by-step instructions, helpful tips, and tasty variations. Get ready to impress your family and friends with this flavorful addition to any meal!
Ingredients
Fresh Ingredients
– 1 pound fresh green beans, trimmed
– 4 cloves garlic, thinly sliced
Oils and Seasoning
– 2 tablespoons olive oil
– 1 tablespoon sesame oil
– 1 teaspoon red pepper flakes
– Salt and pepper to taste
Garnish and Serving
– 1 tablespoon toasted sesame seeds
– Lemon wedges
To make crispy garlic green beans, you need fresh ingredients. Start with one pound of green beans, trimmed to remove the tough ends. The green beans should be bright and firm. You also need four cloves of garlic, thinly sliced. This will give the dish its strong flavor.
Next, we move to the oils and seasoning. Use two tablespoons of olive oil for cooking. It adds richness and helps the beans crisp up nicely. Combine this with one tablespoon of sesame oil. It brings a nutty flavor that pairs well with the green beans. For heat, add one teaspoon of red pepper flakes. You can adjust the amount if you prefer a milder dish. Don’t forget salt and pepper to taste.
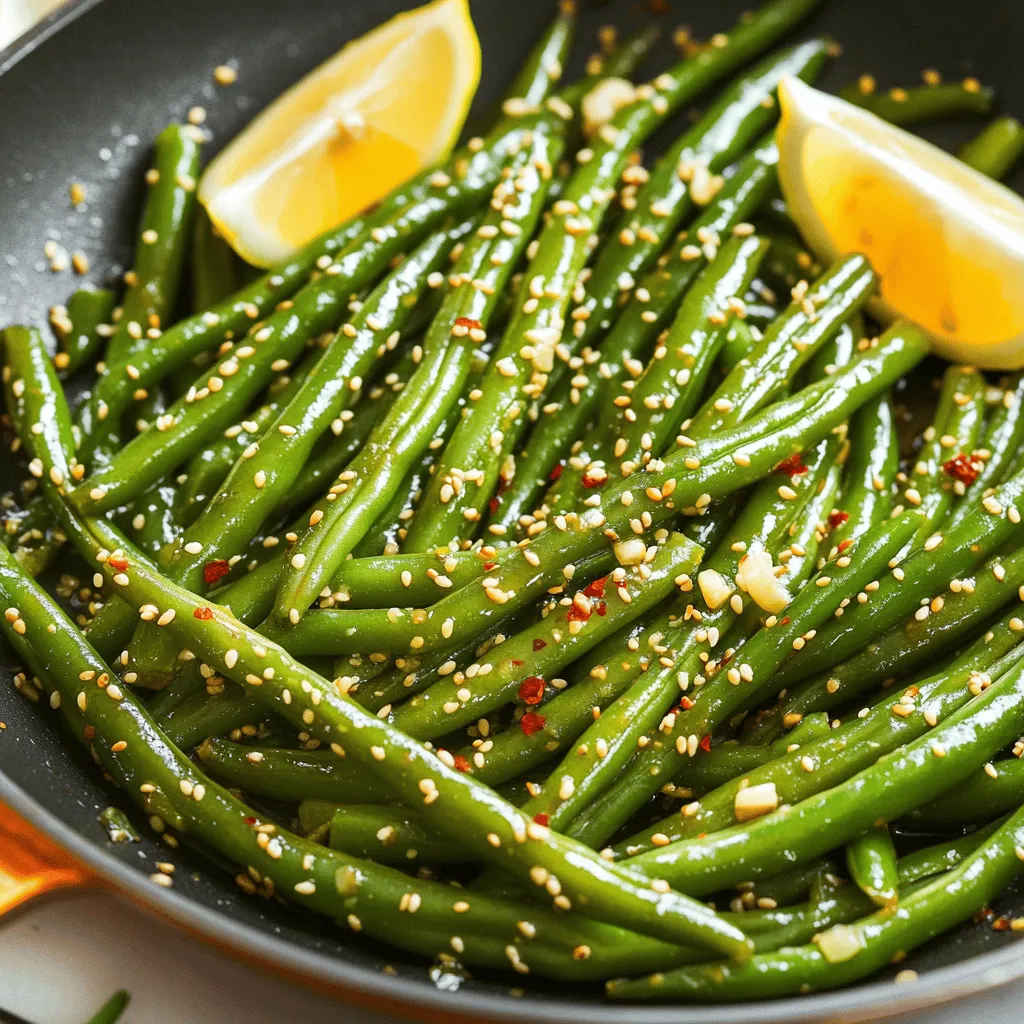
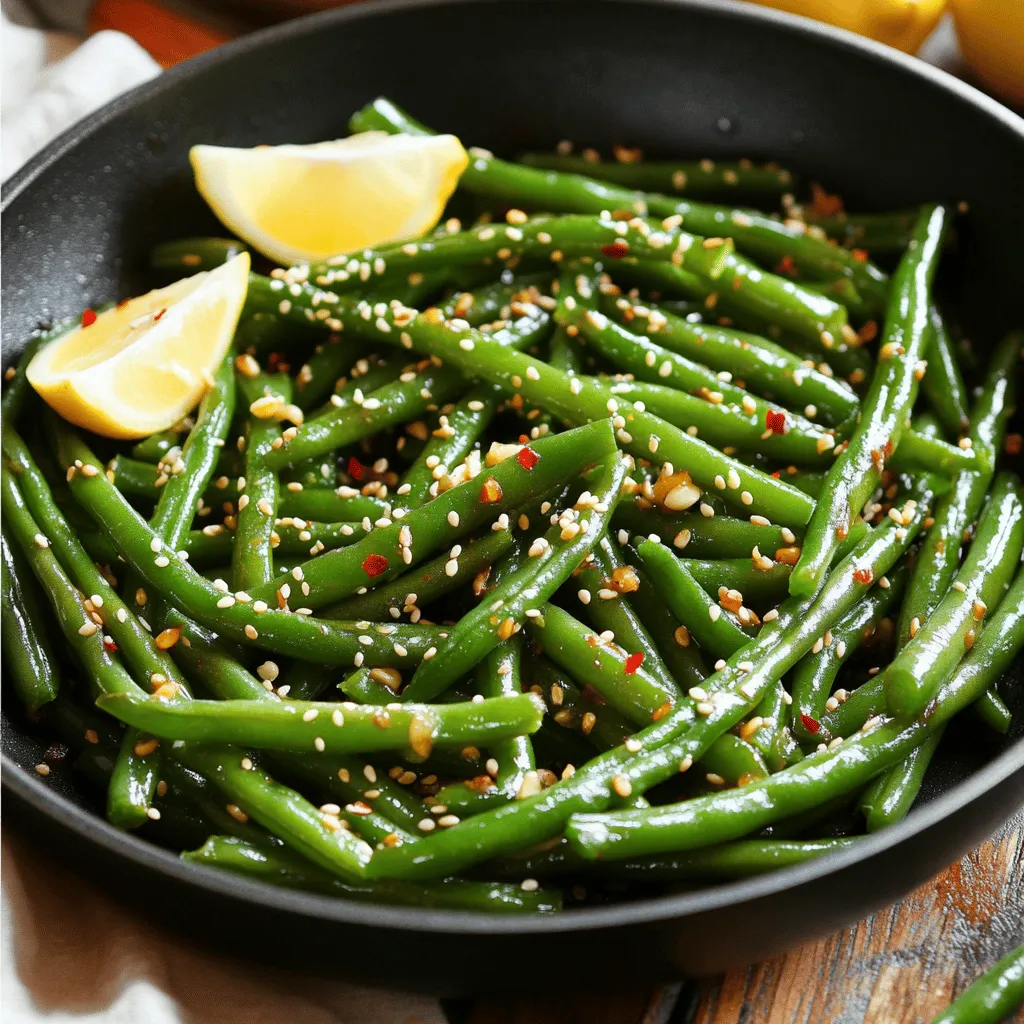
Finally, for garnish and serving, include one tablespoon of toasted sesame seeds. They add a nice crunch and visual appeal. Serve with lemon wedges on the side. The lemon juice brightens the dish and enhances the flavors. This combination of fresh ingredients, oils, and garnishes makes crispy garlic green beans a delightful side dish.
Step-by-Step Instructions
Preparing the Green Beans
To start, we need to blanch the green beans. Bring a large pot of salted water to a boil. Once boiling, add 1 pound of fresh green beans. Blanch them for 2-3 minutes until they turn bright green but stay crisp. This step helps keep their color and crunch. After blanching, drain the beans and quickly transfer them to an ice bath. This stops the cooking and helps maintain that lovely crispness. Let them sit in the ice bath for a few minutes, then drain again and pat them dry with a kitchen towel.
Cooking the Garlic
Next, let’s heat the oils. In a large skillet or wok, pour in 2 tablespoons of olive oil and 1 tablespoon of sesame oil over medium-high heat. Allow the oils to warm up. When hot, it’s time to sauté the garlic. Add 4 cloves of thinly sliced garlic to the skillet. Cook it for about 1 minute until it becomes fragrant and golden. Be careful not to burn the garlic, as it can turn bitter.
Stir-Frying the Green Beans
Now it’s time to stir-fry the green beans. Toss the blanched green beans into the skillet along with 1 teaspoon of red pepper flakes. Stir-fry everything together for about 5-7 minutes. During this time, the green beans will become crispy and take on a nice golden color. Make sure to season with salt and pepper to taste while cooking. Once they reach your desired crispy texture, remove them from heat. For a finishing touch, sprinkle 1 tablespoon of toasted sesame seeds on top for extra crunch. Serve with lemon wedges for a zesty kick.
Tips & Tricks
Perfecting the Crispiness
To get the best crispy garlic green beans, blanching is key. Blanching means boiling the beans briefly before cooking them. This step keeps them bright green and crisp. It also helps them cook faster.
After blanching, drain the beans and cool them in an ice bath. This stops the cooking quickly. Pat them dry with a towel to remove excess water. This helps them get crispy later.
When sautéing, keep a close eye on the time. Aim for about 5-7 minutes in the skillet. Stir them often. You want a nice golden color but not burnt garlic.
Flavor Enhancements
You can add more spice to your green beans. Try adding a pinch of garlic powder or smoked paprika. These spices boost the flavor and make the dish pop.
Experiment with oils too. Instead of just olive oil, try adding avocado or coconut oil. Each oil gives a unique taste. Discover which ones you like best!
Presentation Tips
For a great look, garnish with toasted sesame seeds. They add crunch and a nutty taste. A sprinkle on top makes the dish more appealing.
Serve your crispy garlic green beans with lemon wedges. The fresh lemon juice brightens the flavors. You can also place them on a colorful plate for extra flair.Enjoy your cooking!
Variations
Different Cooking Methods
You can make crispy garlic green beans in different ways.
Oven-roasted crispy garlic green beans: Preheat your oven to 425°F. Toss the blanched green beans with olive oil, garlic, and red pepper flakes. Spread them on a baking sheet. Roast for 15-20 minutes until crispy. This method gives them a nice, smoky flavor.
Air fryer option: Set your air fryer to 400°F. Mix the blanched green beans with oil and spices. Place them in the air fryer basket. Cook for about 8-10 minutes. Shake the basket halfway through. This makes them super crunchy and quick!
Flavor Variations
You can also change up the flavors to make this dish your own.
Adding nuts for crunch: Toss in some slivered almonds or chopped walnuts. They add a great crunch and healthy fats. You can mix them in during the last few minutes of cooking.
Incorporating different herbs: Try adding fresh herbs like basil or cilantro. They bring a fresh taste that pairs well with garlic. Just sprinkle them in right before serving.
Dietary Modifications
If you have dietary needs, there are simple ways to adjust this dish.
Making it gluten-free: This recipe is already gluten-free! Just make sure your oils and seasonings are certified gluten-free.
Vegan options available: This recipe is vegan too! All the ingredients are plant-based. You can enjoy crispy garlic green beans without any animal products.
Storage Info
Refrigeration Guidelines
To store leftover green beans, place them in an airtight container. Make sure they are fully cooled before sealing. This helps keep them fresh and tasty. For best results, eat them within 3 days. To maintain crispiness, avoid stacking them too tightly. A single layer works best. You can also cover them with a damp paper towel. This keeps moisture in without making them soggy.
Freezing Instructions
If you want to freeze crispy garlic green beans, do this right after cooking. Allow them to cool completely. Then, place them in a freezer-safe bag. Remove as much air as possible before sealing. These beans freeze well for up to 3 months. When you’re ready to eat them, reheat in the oven or skillet. This helps keep them crispy. Avoid using the microwave, as it can make them mushy.
Shelf Life
In the fridge, crispy garlic green beans stay fresh for about 3 to 4 days. Check for signs of spoilage before eating. If they smell off or look slimy, it’s time to toss them. Always trust your senses when it comes to food safety. Enjoy your green beans while they are still vibrant and crisp!
FAQs
Can I use frozen green beans?
Yes, you can use frozen green beans for this recipe. They are convenient and save time. To use them, first, thaw the beans in the fridge. Then, blanch them in boiling water for 2-3 minutes. This helps keep them bright and crisp. After blanching, dry them well with a towel. Frozen green beans may not be as crunchy as fresh ones, but they still taste great when cooked right.
How do I make my green beans less bitter?
Bitter green beans can be a bummer. To reduce bitterness, select younger, tender green beans. Trim the ends and remove any tough strings. Blanching the beans helps, too. The hot water takes away some of the bitter flavor. Adding salt during cooking can also balance the taste. Finally, a squeeze of lemon juice brightens the flavor and masks bitterness.
What can I serve with Crispy Garlic Green Beans?
Crispy Garlic Green Beans pair well with many dishes. They complement grilled chicken or fish beautifully. Try serving them with a savory beef stir-fry. You can also enjoy them with rice or quinoa for a wholesome meal. If you want a vegetarian option, serve them alongside pasta or a hearty salad. They add crunch and flavor to any dish.
This recipe for crispy garlic green beans offers fresh ingredients and tasty tips. You learned how to select the best green beans, season well, and ensure that perfect crunch. Remember, techniques like blanching and tossing in the right oils make a big difference. You can try different cooking methods and flavors to make it your own. Store leftovers properly to keep them fresh. With these ideas, you can elevate your green beans and impress your guests. Enjoy your cooking journey!