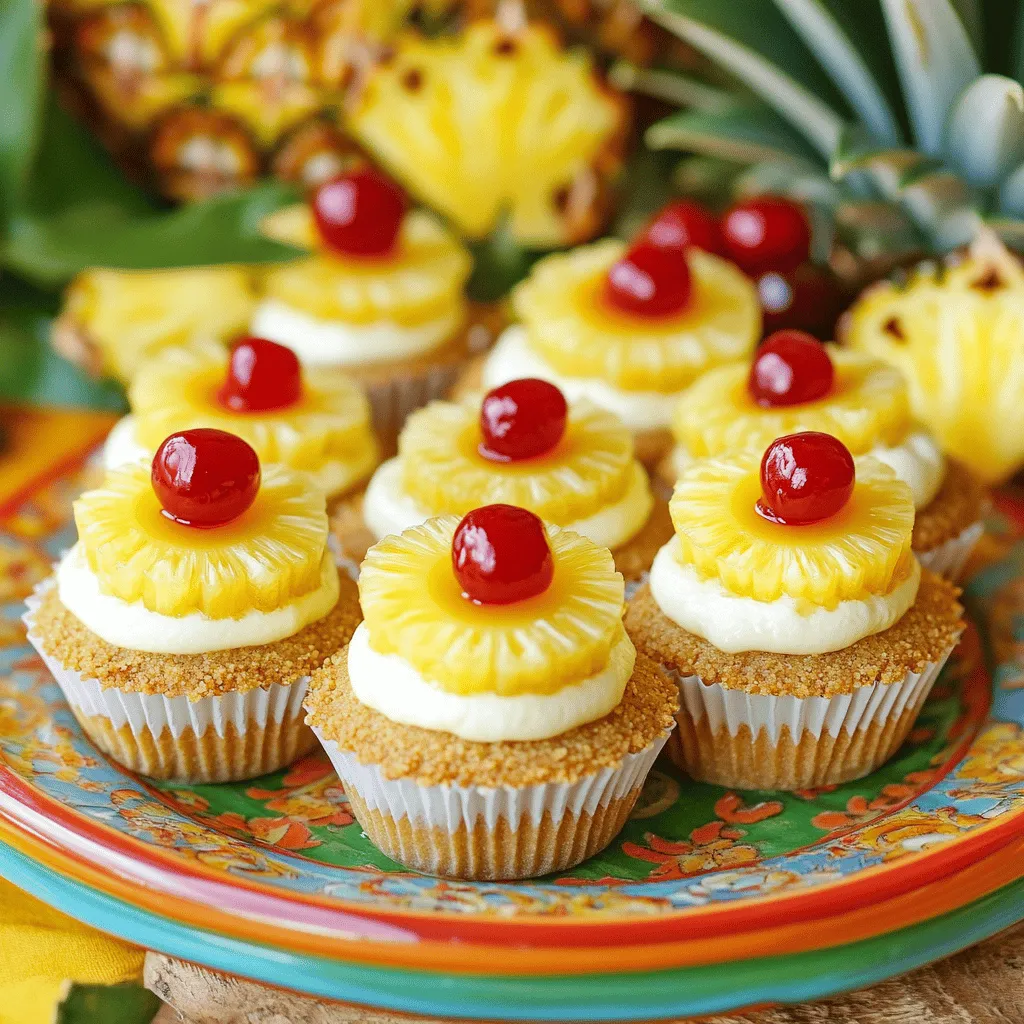
Are you ready to indulge in a treat that blends creamy goodness with tropical flair? My Mini Pineapple Upside-Down Cheesecakes are the perfect dessert for any occasion, and they’re surprisingly simple to make! In this article, I’ll guide you through the key ingredients, essential kitchen tools, and step-by-step instructions to create these delightful bite-sized desserts. Let’s get baking and bring a taste of paradise to your kitchen!
Ingredients
Essential Ingredients
To make mini pineapple upside-down cheesecakes, you need specific ingredients. Here’s a list of the primary ingredients:
– 1 cup graham cracker crumbs
– 1/2 cup unsalted butter, melted
– 1/4 cup sugar
– 8 oz cream cheese, softened
– 1/2 cup sour cream
– 1/2 cup powdered sugar
– 1 teaspoon vanilla extract
– 1/4 cup crushed pineapple, drained
– 12 pineapple rings, canned or fresh
– Maraschino cherries for garnish
The quality of these ingredients matters a lot. Fresh cream cheese creates a smooth filling. Use ripe, sweet pineapples for the best flavor. High-quality butter enhances the crust’s taste. Always choose fresh and natural ingredients when you can.
Kitchen Tools Needed
You will need some essential baking tools for this recipe:
– Muffin tin
– Cupcake liners or cooking spray
– Mixing bowls
– Electric mixer
– Measuring cups and spoons
– Spatula
Optional tools can improve your baking experience:
– Food processor for quicker crumb mixing
– Silicone spatula for easy filling transfer
– Instant-read thermometer to check cheesecake doneness
These tools help ensure your mini cheesecakes turn out just right. You will enjoy making them more with the right tools.
Step-by-Step Instructions
Preparing the Crust
Start by preheating your oven to 325°F (160°C). In a large bowl, mix 1 cup of graham cracker crumbs, 1/2 cup of melted unsalted butter, and 1/4 cup of sugar. Stir until everything blends well. This mix will create the crust.
Next, line a muffin tin with cupcake liners or spray it with cooking spray. Press about 2 tablespoons of the crust mix into each liner. Make sure it forms a firm base. Bake the crust for 8-10 minutes until it is set and slightly golden. Once done, take it out and let it cool.
Tips for Achieving the Perfect Crust Texture:
– Make sure to pack the crumbs tightly.
– Do not overbake; you want it set but not hard.
Making the Cheesecake Filling
Now, let’s make the filling! In a bowl, beat 8 oz of softened cream cheese with an electric mixer until it is smooth. Then, add 1/2 cup of sour cream, 1/2 cup of powdered sugar, and 1 teaspoon of vanilla extract. Mix these well until combined.
The next step is important: gently fold in 1/4 cup of crushed pineapple. This adds flavor and moisture to the filling. Be careful not to overmix; we want to keep the air in the batter.
Assembling and Baking the Cheesecakes
For assembly, place a pineapple ring at the bottom of each crust. If needed, trim the ring to fit. After that, spoon the cheesecake batter over the pineapple, filling it just below the rim of the crust.
Now, it’s time to bake! Place the muffin tin in the oven and bake for 20-25 minutes. The edges should set, but the center should still jiggle a bit. After baking, turn off the oven and leave the cheesecakes inside for 10 more minutes.
To cool, remove them from the oven and let them sit at room temperature for 30 minutes. Then, refrigerate them for at least 2 hours or until they are fully chilled.
Techniques for Checking Doneness:
– Look for set edges and a slightly wobbly center.
– If unsure, a toothpick inserted should come out clean from the edges.Enjoy your baking!
Tips & Tricks
Common Mistakes to Avoid
When making mini cheesecakes, it’s easy to make a few common mistakes. Here are some tips to help you avoid them:
– Overmixing the batter: This can add too much air and cause cracks. Mix just until smooth.
– Ignoring the cooling time: Letting them cool too fast can lead to cracks. Always cool at room temperature first.
– Not using enough pineapple: Pineapple adds flavor and moisture. Don’t skip it; use the right amount.
Expert Tips for Flavor Enhancement
To make your mini cheesecakes even tastier, try these expert tips:
– Add coconut cream: Mixing in coconut cream can give a tropical twist that pairs well with pineapple.
– Experiment with extracts: You can swap vanilla extract for rum or almond extract for a unique flavor.
– Use fresh pineapple: If you have fresh pineapple, use it instead of canned for a brighter taste.
For a creamy texture, make sure your cream cheese is at room temperature before mixing. This helps it blend smoothly without lumps.
Presentation Ideas
Presentation can make your mini cheesecakes stand out. Here are some fun ideas:
– Serve on a colorful platter: A vibrant plate adds excitement to your dessert.
– Add extra pineapple slices: Place them around the cheesecakes for a fresh look.
– Top with whipped cream: A dollop of whipped cream adds elegance and taste.
Finish with a maraschino cherry on each cheesecake. This gives a pop of color and sweetness that everyone loves.

Variations
Alternative Fruit Options
You can create fun twists on mini pineapple upside-down cheesecakes by using other fruits. Think about juicy peaches, tart cherries, or sweet strawberries. These fruits can add a new taste and color to your dessert.
To use these fruits, simply replace the pineapple rings with your choice. For example, slice fresh peaches and place them at the bottom of each crust. If using cherries, pit and slice them. Strawberries can be sliced and added too.
When you switch fruits, you might want to adjust the sugar. Some fruits are sweeter than others. For tart fruit, you may add a bit more sugar to the cheesecake filling. Keep tasting as you go to get the right balance.
Gluten-Free and Dairy-Free Adaptations
If you need to make these cheesecakes gluten-free or dairy-free, it’s easy with a few swaps. For a gluten-free crust, use gluten-free graham crackers or crushed nuts. Almond flour can also work well for a nutty flavor.
For the filling, try using dairy-free cream cheese made from nuts or soy. Coconut cream is another great option for a rich texture. Use a dairy-free sour cream or yogurt to keep it creamy.
Make sure to check the labels on all ingredients. This way, you ensure they are gluten-free or dairy-free. With these small changes, everyone can enjoy these delicious mini cheesecakes!
Storage Info
How to Store Mini Cheesecakes
To keep your mini cheesecakes fresh, place them in an airtight container. Store them in the fridge for up to five days. This helps maintain their creamy texture and flavor. If you notice any condensation, wipe it off gently. Avoid stacking them to prevent crushing.
Freezing Directions
You can freeze mini cheesecakes for longer storage. Wrap each cheesecake tightly in plastic wrap, then place them in a freezer bag. They last about three months in the freezer. Thaw them overnight in the fridge before serving. This keeps them tasting fresh and delicious.
Reheating Tips
If you want to serve your cheesecakes warm, you can reheat them safely. Place them in the oven at a low temperature, around 250°F (120°C), for about 10 to 15 minutes. Make sure to keep an eye on them to avoid overheating. Enjoy them warm for a nice twist on this classic dessert.
FAQs
Can I make these mini cheesecakes ahead of time?
Yes, you can make these mini cheesecakes ahead of time. I suggest preparing them a day prior to serving. After baking, let them cool completely. Then, store them in the fridge. This chilling time allows the flavors to blend well. You can also freeze them for up to a month. Just be sure to wrap them tightly. Thaw them in the fridge before serving.
How do I prevent the crust from being soggy?
To prevent a soggy crust, bake it until slightly golden. This step helps to firm it up. Use a mixture of graham cracker crumbs, melted butter, and sugar. Press it firmly into the muffin tin. Make sure the crust is compact. Also, avoid adding too much liquid to the cheesecake filling. This keeps your crust nice and crunchy.
What can I use instead of maraschino cherries for garnish?
If you want to switch it up, try fresh berries instead of maraschino cherries. Strawberries or blueberries work great. You can also use toasted coconut for a tropical touch. Another option is a slice of fresh kiwi for a pop of color. These alternatives add a nice twist while still looking pretty on top!
This blog post covered how to make mini pineapple upside-down cheesecakes. We discussed key ingredients and tools needed for success. We explored step-by-step instructions for preparing the crust, filling, and baking. I shared tips to avoid common mistakes and enhance flavor. You can experiment with different fruits and adjust for dietary needs. Lastly, we reviewed storage methods for freshness. Now, you have the tools to create delicious treats. Enjoy your baking and impress your friends!