Lemon Ricotta Pancakes Fluffy and Delicious Recipe
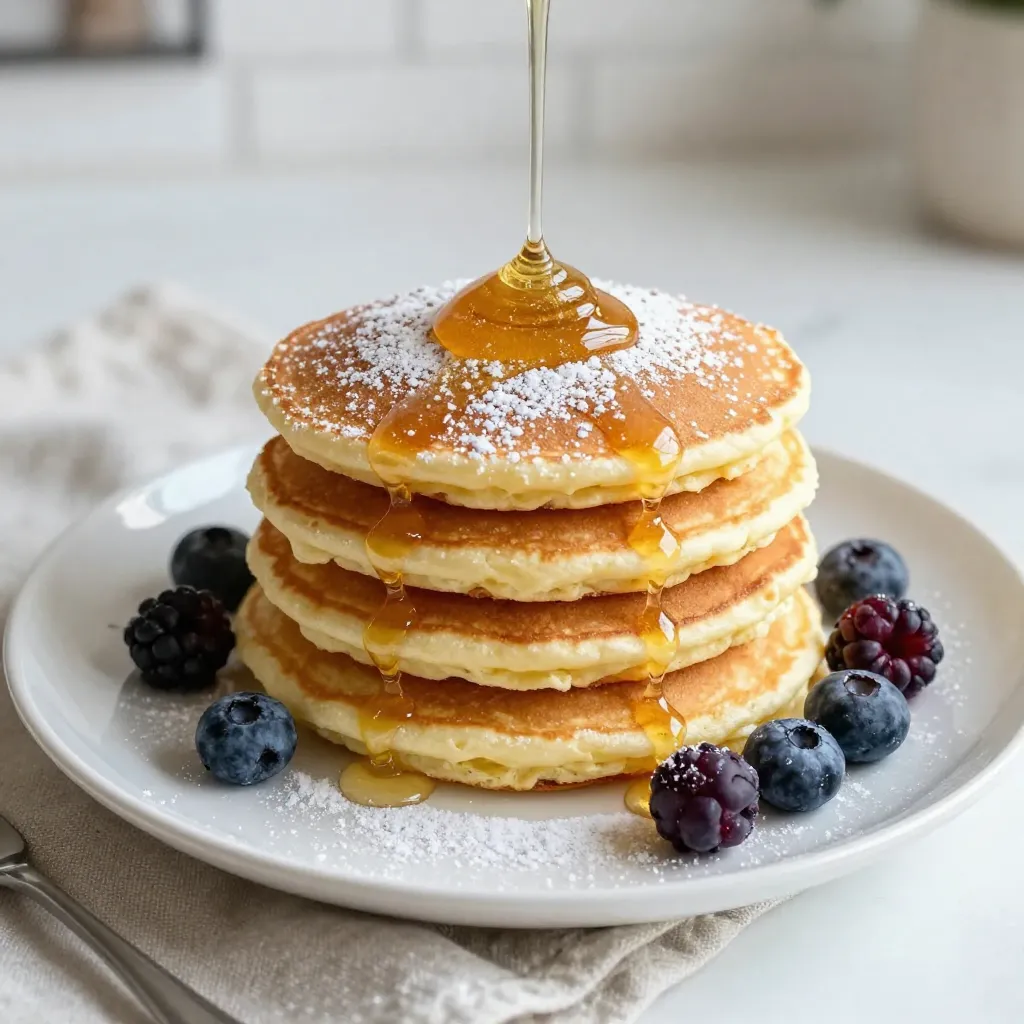
If you’re craving a breakfast that’s light, fluffy, and bursting with flavor, you’re in the right place! My Lemon Ricotta

If you’re craving a breakfast that’s light, fluffy, and bursting with flavor, you’re in the right place! My Lemon Ricotta
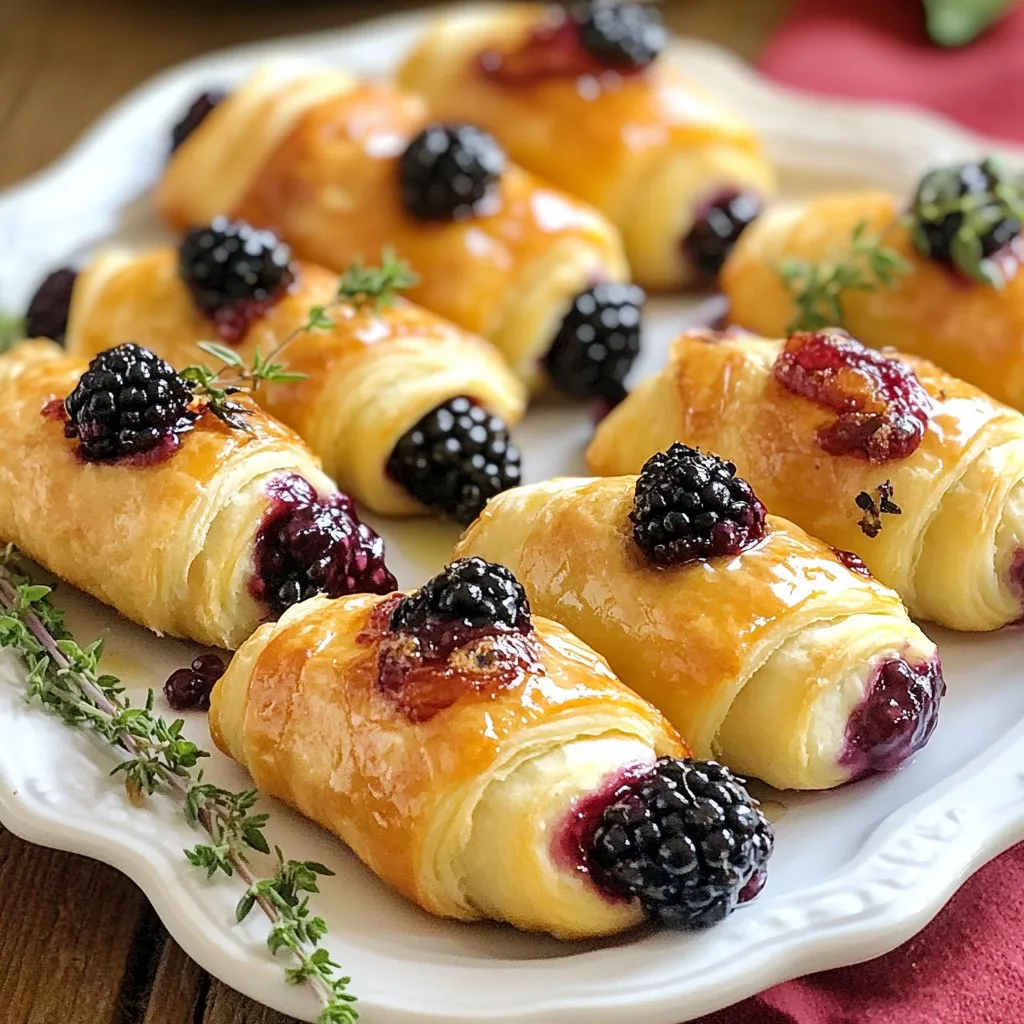
Looking for a snack that’s simple, delightful, and bursts with flavor? You’ll love my Blackberry Brie Crescent Bites! This easy
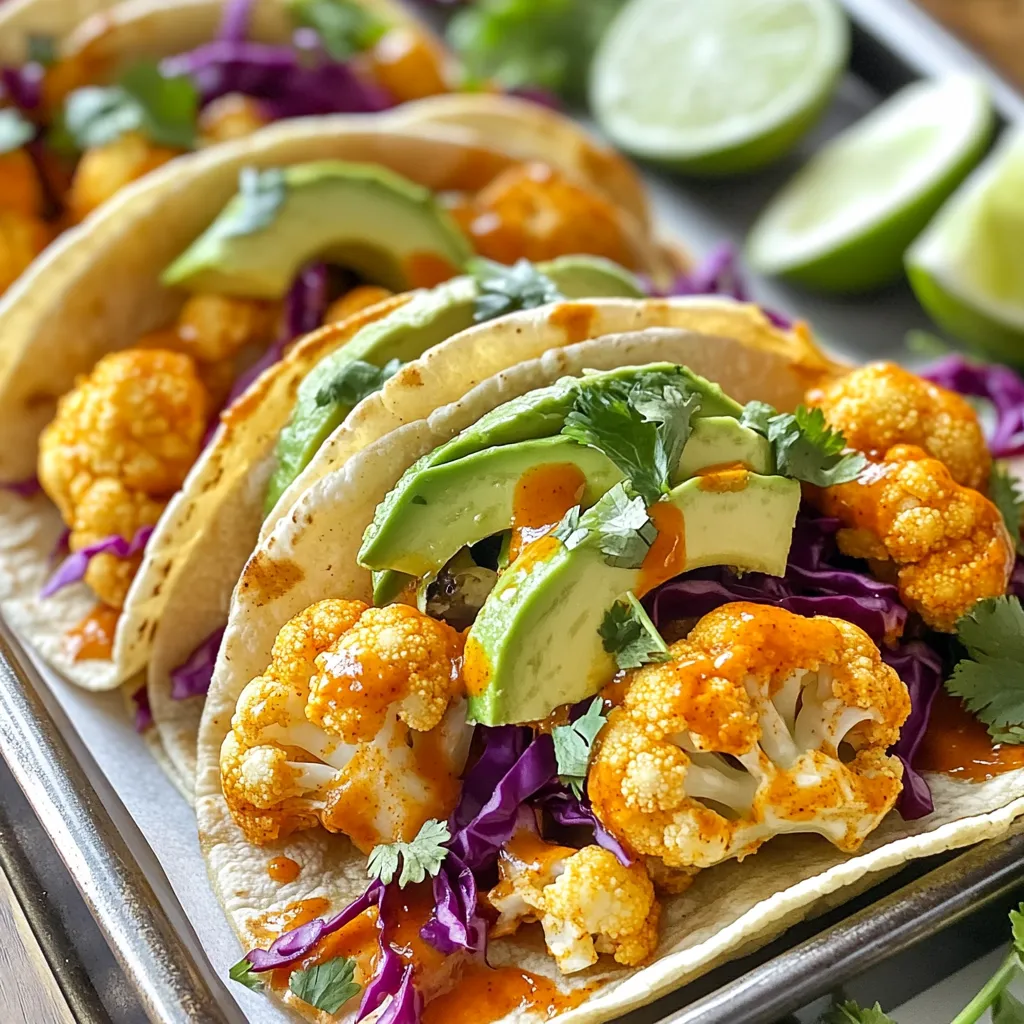
Are you ready to spice up taco night with a twist? Buffalo Cauliflower Tacos are not only flavorful but also
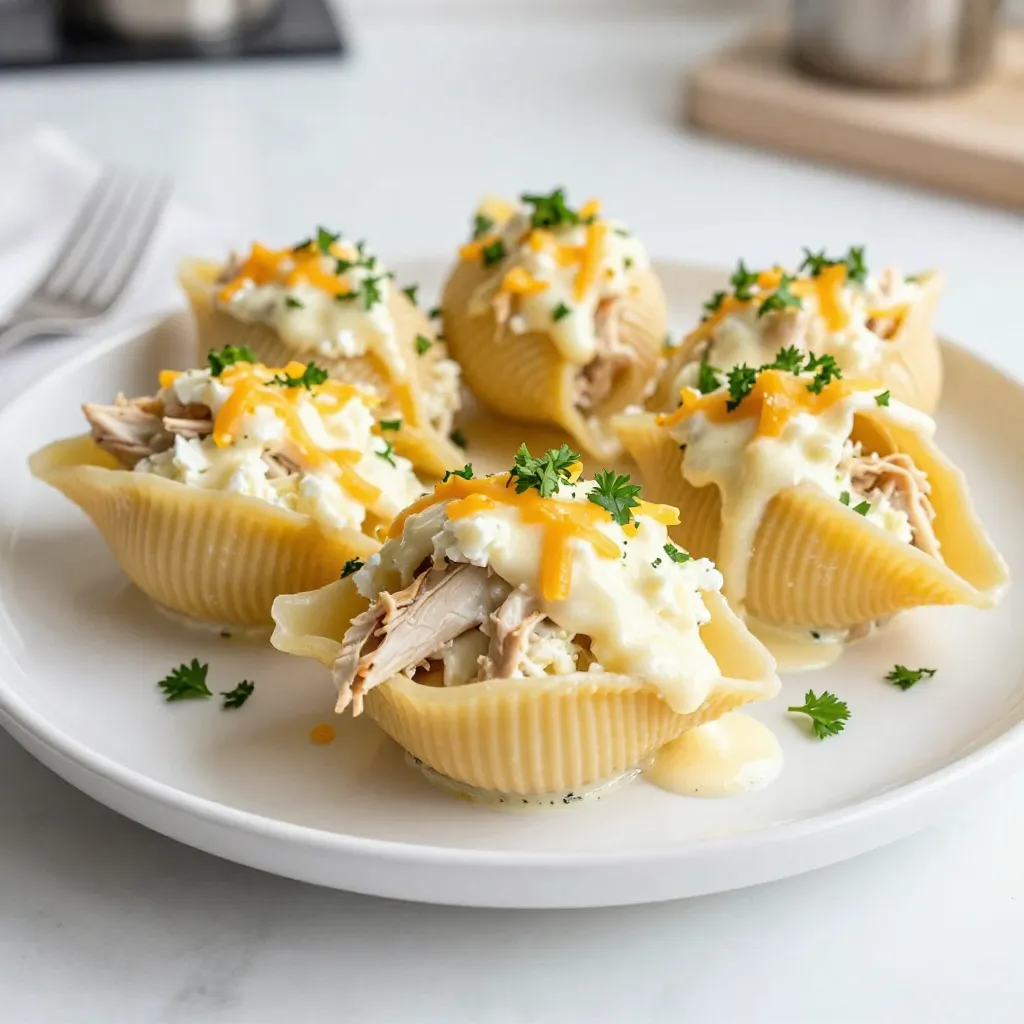
If you’re looking for a quick and tasty meal, Chicken Alfredo Stuffed Shells are perfect! This dish combines creamy Alfredo
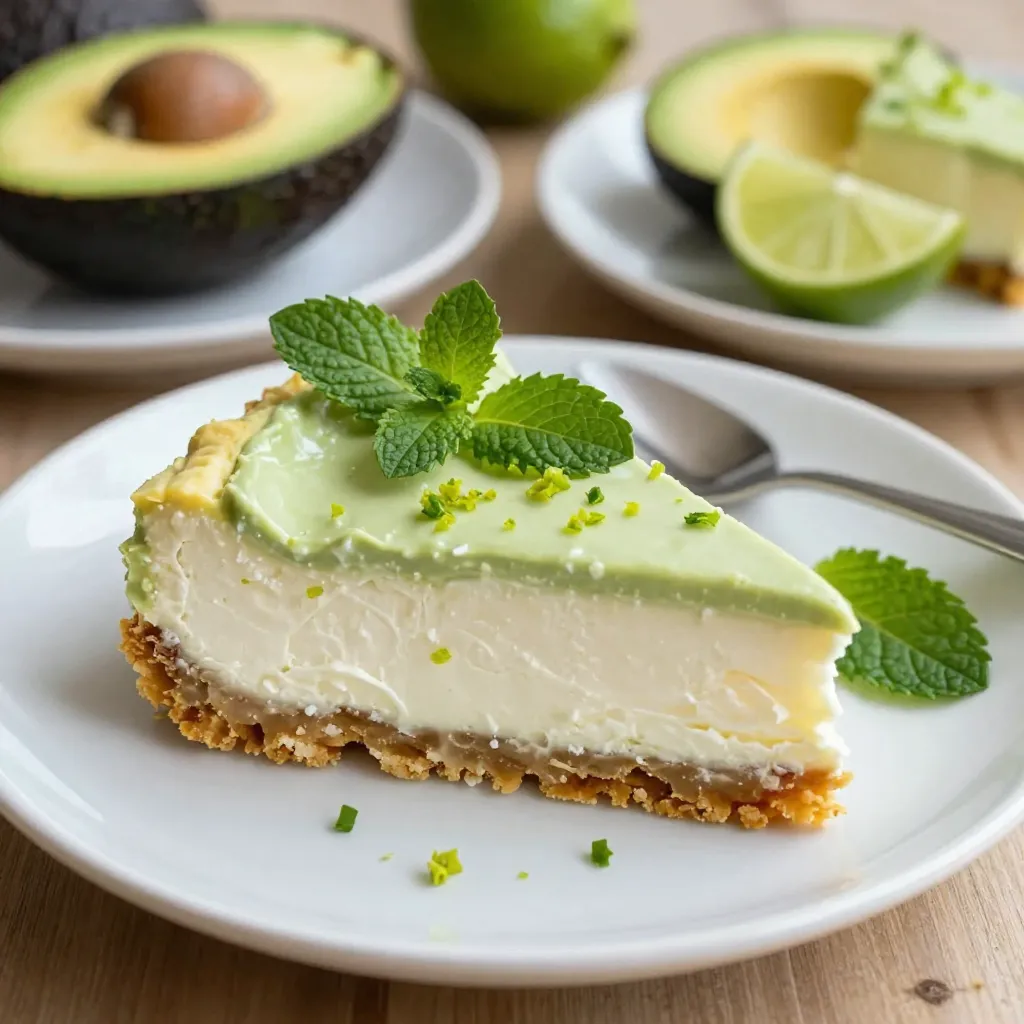
Craving a dessert that’s both fresh and creamy? Let me introduce you to Avocado Lime Cheesecake! This delightful treat combines

Are you ready to wow your guests with an easy and tasty appetizer? A Garlic Herb Butter Board is the
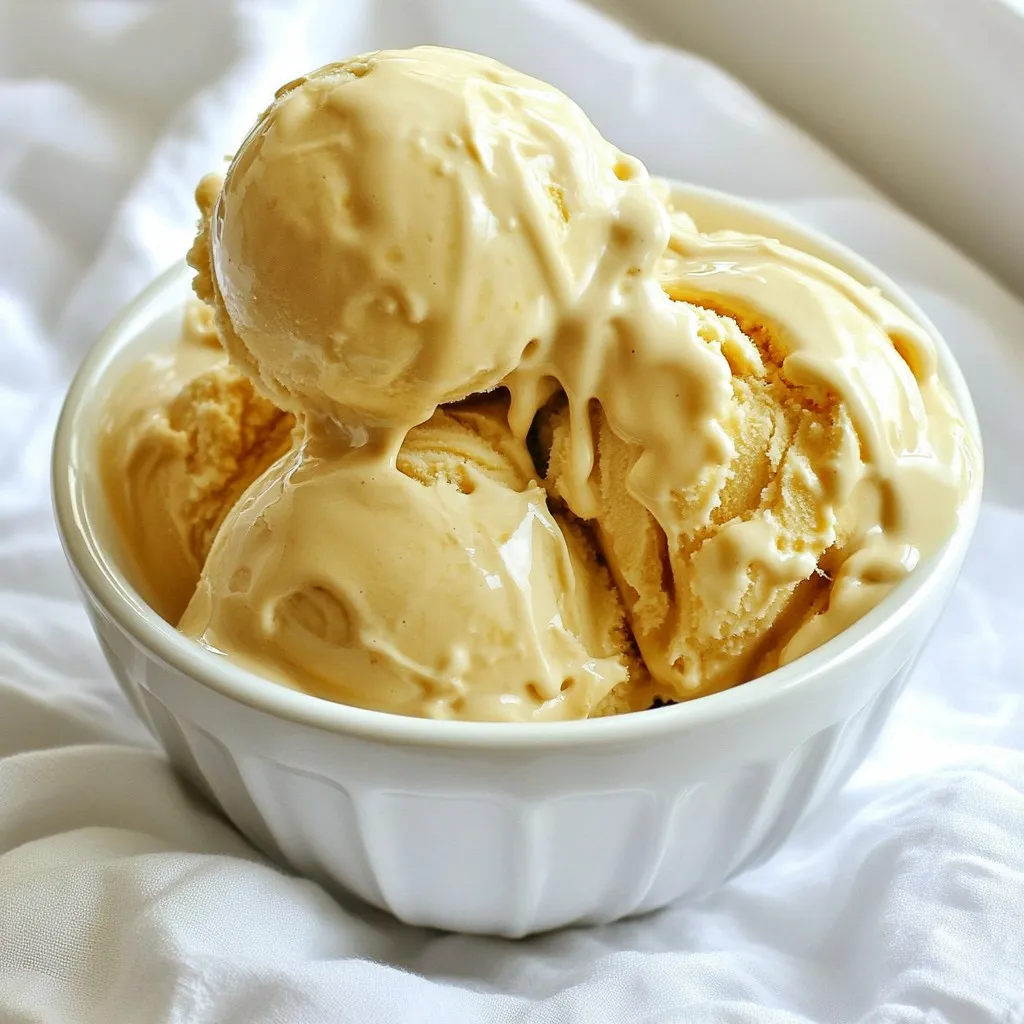
If you love rich flavors and creamy textures, Vietnamese coffee ice cream is your new go-to treat! This delightful dessert
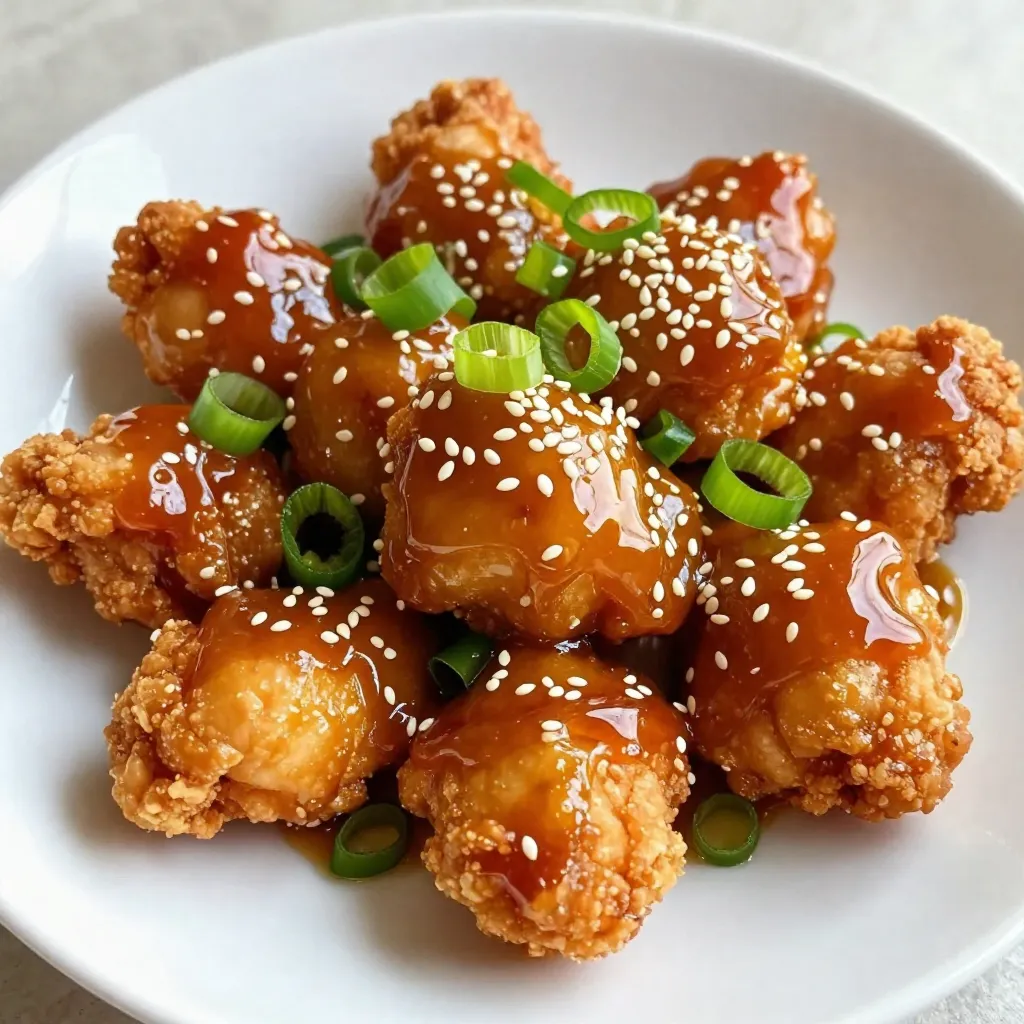
Are you ready to spice up your meal with a tasty treat? Honey Sriracha Chicken Bites deliver a perfect blend
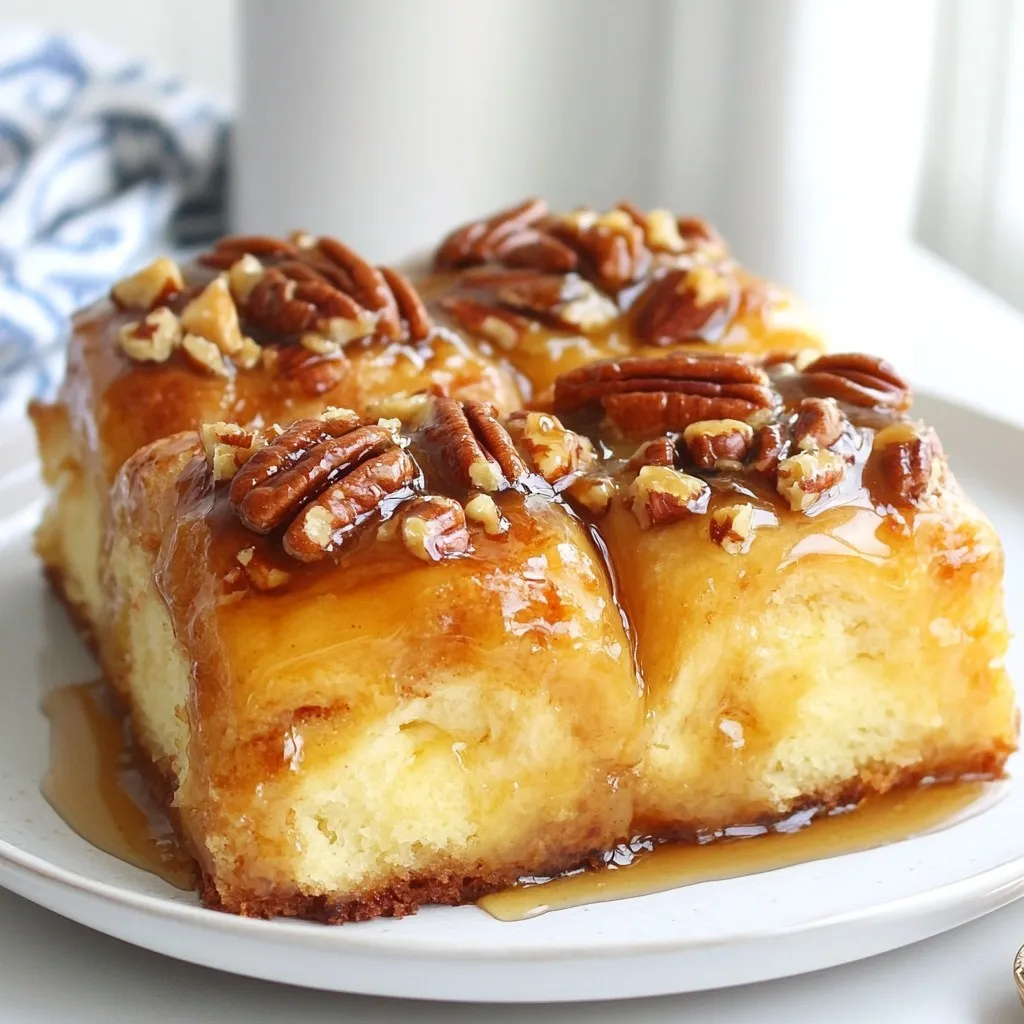
If you crave warm, sweet treats that are easy to make, you’re in the right place! My Maple Pecan Sticky
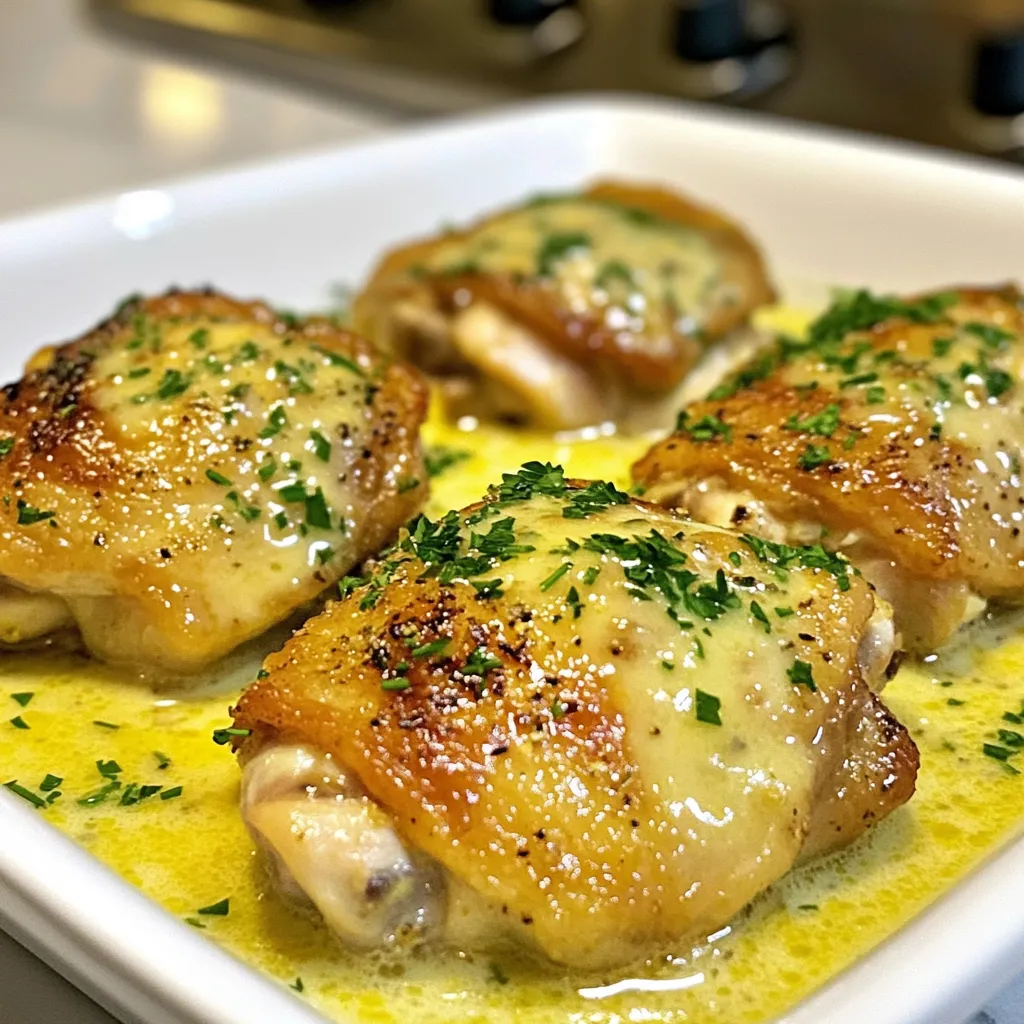
Are you ready to whip up a bold and tasty dinner? Let me introduce you to my Carnivore Chicken Thighs
