What Are the Key Ingredients Needed for the Best Cheesecake Crescent Rolls Casserole?
To make the best cheesecake crescent rolls casserole, you need simple, key ingredients. First, you need two cans of refrigerated crescent roll dough. This dough creates the base and top layer of the casserole. It brings a flaky, buttery taste that pairs perfectly with the creamy filling.
Next, you need 8 ounces of softened cream cheese. This gives the filling a rich, smooth texture. To sweeten it, add half a cup of granulated sugar. This sugar balances the cream cheese’s tang and enhances the overall flavor.
You will also need one teaspoon of vanilla extract. This adds warmth and depth to the filling. Additionally, two large eggs help bind the mixture, giving it a stable structure when baked.
A third cup of sour cream adds a slight tang and creaminess. Optionally, you can add one teaspoon of lemon zest for a fresh, bright note. Lastly, don’t forget about the powdered sugar! Dusting the top with a quarter cup adds a sweet finishing touch.
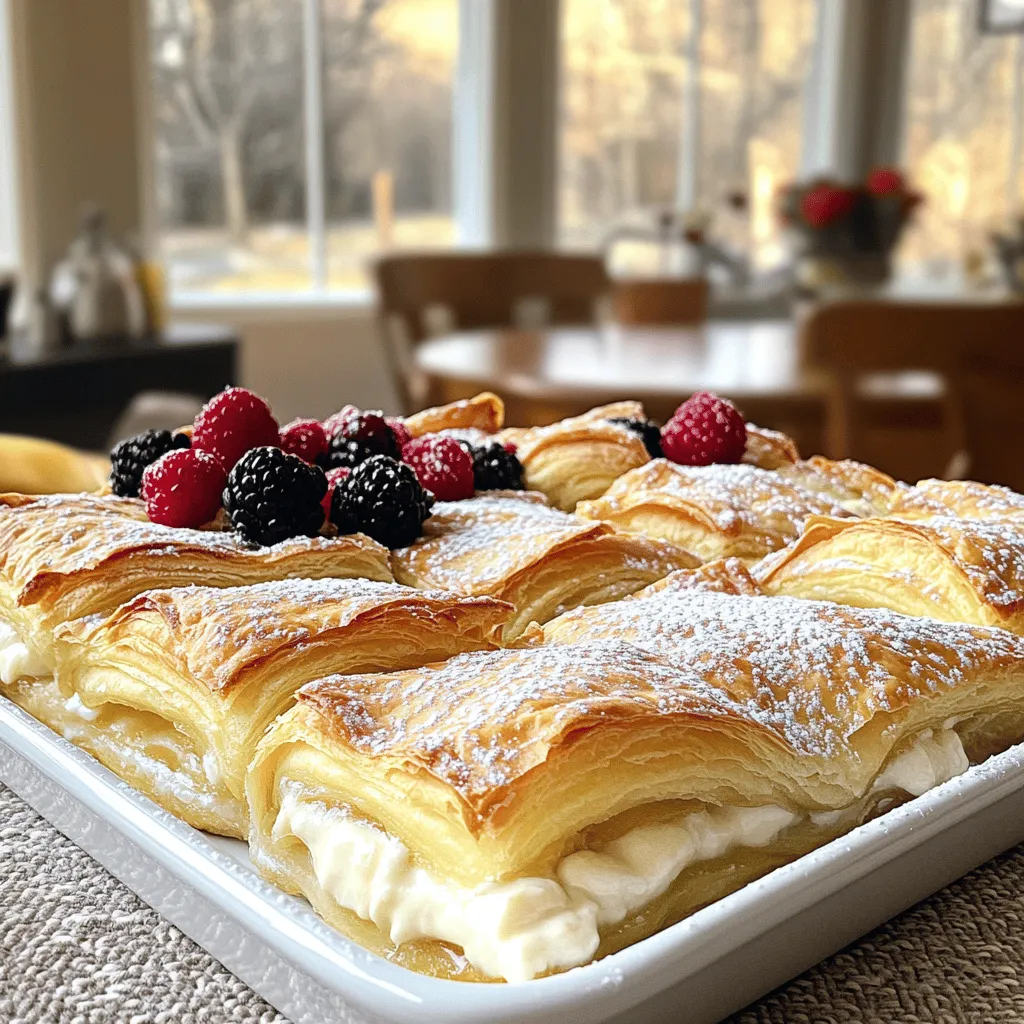
Fresh berries are great for garnish. They not only look pretty but also add a burst of flavor. This combination of ingredients creates a delightful dessert that everyone will love.
How Do You Prepare the Cheesecake Crescent Rolls Casserole Step-by-Step?
To make cheesecake crescent rolls, follow these steps closely for great results.
What are the detailed steps to assemble the casserole?
1. Preheat your oven to 350°F (175°C). Grease a 9×13-inch baking dish.
2. Open one can of crescent roll dough. Carefully press it into the bottom of the dish.
3. In a bowl, mix softened cream cheese, granulated sugar, vanilla extract, and lemon zest. Beat until smooth.
4. Add eggs one at a time and mix well after each. Then, mix in sour cream.
5. Pour the cream cheese mixture over the crescent roll dough in the dish.
6. Open the second can of dough. Lay it over the cream cheese layer and pinch the seams.
7. Bake for 25–30 minutes until the top is golden and filling is set.
8. Cool for a few minutes, dust with powdered sugar, and slice.
9. Serve warm or chilled, garnished with fresh berries for extra flavor.
How do you ensure a smooth cream cheese mixture?
To get a smooth mixture, use softened cream cheese. Take it out of the fridge an hour before mixing. This helps it blend better. Use a hand mixer or stand mixer to beat the cream cheese. Mixing at medium speed works best. Scrape down the sides of the bowl to catch any lumps. This way, you get a perfect, creamy filling.
What tips can improve the baking process?
Always preheat your oven. This helps the casserole bake evenly. Check it a few minutes before the timer goes off. Ovens can vary, and you want to avoid overbaking. If the top gets too brown, cover it with foil. Let it cool a bit before slicing. This helps it set better and makes cutting easier. Enjoy the sweet results!
What Are Some Serving Suggestions for Cheesecake Crescent Rolls Casserole?
You can serve this casserole warm or chilled for brunch. I like to cut it into squares and place them on a large platter. This makes it easy for guests to grab a piece. Add a dollop of whipped cream on top for a fun touch.
For a festive presentation, dust the top with powdered sugar. It gives a sweet look and contrasts well with fresh berries. I recommend using strawberries, blueberries, or raspberries. They not only look pretty but also add fresh flavors.
When it comes to drinks, coffee pairs well with this casserole. A hot cup balances the creamy, sweet flavors. You might also try serving it with a fruity tea or a light sparkling juice. These drinks complement the dish without overpowering it.
If you’re feeling adventurous, serve it with a side of yogurt. A scoop of vanilla or berry yogurt adds creaminess and a tangy kick. You could even create a mini breakfast bar with toppings like nuts or chocolate chips. This allows everyone to personalize their plate and enjoy every bite!
Can You Share Variations of the Cheesecake Crescent Rolls Casserole?
What unique flavor combinations could you try?
You can mix flavors to change this dish. Try adding chocolate chips for a sweet twist. You could also add peanut butter for a nutty touch. Fresh fruit, like strawberries or blueberries, can add a burst of taste. Swapping in flavored cream cheese, like strawberry or pumpkin, gives a fun twist too.
How can you make it healthier or adapt it for dietary restrictions?
To make it healthier, use low-fat cream cheese. You can also switch regular sugar for a sugar substitute. If you need it gluten-free, look for gluten-free crescent roll dough. For a vegan option, use plant-based cream cheese and eggs made from flaxseed. These swaps help everyone enjoy this dish.
What are some seasonal variations for holiday baking?
For fall, add pumpkin puree and spices like cinnamon and nutmeg. In winter, try peppermint extract and crushed candy canes. For spring, lemon zest and fresh berries brighten up the dish. In summer, use peaches or cherries for a refreshing touch. Each season brings new flavors to explore.
How to Store and Reheat Leftover Cheesecake Crescent Rolls Casserole?
To keep your leftovers fresh, store them in an airtight container. Make sure the casserole cools down first. Place it in the fridge. It should last for about 3 to 4 days.
When you want to enjoy it again, reheating is key. To reheat without drying it out, preheat your oven to 350°F. Cover the casserole with foil to keep moisture in. Heat for about 15 to 20 minutes. Check if it’s warm all the way through. This way, you keep that creamy goodness.
If you want to save it longer, freezing is a great option. Cut the casserole into individual pieces. Wrap each piece tightly in plastic wrap, then place them in a freezer-safe bag. It will last up to 2 months in the freezer. When you’re ready to eat, thaw it in the fridge overnight. Reheat as mentioned above for the best results.
With these tips, you can enjoy your delicious cheesecake crescent rolls casserole even after the main meal!This recipe includes all the steps and ingredients you need. It is easy to follow and perfect for any skill level.
What details are included in the printable recipe?
The printable recipe features a list of ingredients and detailed instructions. You will see prep time and cooking time listed, too. This helps you plan your cooking session. The recipe also includes tips for serving and storage.
How can having a downloadable recipe enhance your cooking experience?
Having a downloadable recipe allows you to cook without distractions. You can print it out and keep it handy in your kitchen. This way, you can easily refer to it while cooking. You won’t have to switch between screens, making it easier to focus. Plus, you can highlight or annotate it as you go.
Are there any additional resources or tips for successful preparation?
Yes, there are many helpful resources online. You can watch video tutorials to see the recipe in action. Many blogs also offer tips and tricks for perfecting the casserole. Don’t forget to check community forums for advice and personal stories. These can help you learn from others’ experiences and avoid common mistakes.
In this post, we explored how to make the best cheesecake crescent rolls casserole. We covered essential ingredients, preparation steps, and serving tips. You learned how to create a creamy filling and enhance flavors with optional add-ins.
For the best results, remember to follow the steps closely and use fresh ingredients. Enjoy this dish at brunch or as a delightful dessert. With variations and storage tips, you can enjoy it anytime. Now you’re ready to impress your friends and family with this tasty treat!