The key to a great chocolate lava cake lies in a few simple ingredients. You need: - 1/2 cup unsalted butter (plus extra for greasing) - 1 cup semi-sweet chocolate chips - 2 large eggs - 2 large egg yolks - 1/4 cup granulated sugar - 1 teaspoon vanilla extract - 2 tablespoons all-purpose flour - 1/4 teaspoon salt - Powdered sugar for dusting Butter and chocolate form the base of this dessert. Use high-quality chocolate chips for the best flavor. Melted butter adds richness and helps create a gooey center. Make sure your eggs are at room temperature. This helps them mix well and create a smooth batter. Cold eggs can lead to clumps, which you want to avoid. Now let's talk toppings! While the lava cake is rich on its own, you can enhance it with some tasty sides. I recommend: - Vanilla ice cream for a creamy contrast - Fresh berries like raspberries or strawberries for tartness - Mint leaves for a pop of color and freshness Pairing your cake with vanilla ice cream creates a delightful balance. The cool ice cream melts into the warm cake, making each bite even better. Fresh berries add a burst of flavor, while mint leaves brighten up the dish. For the full recipe, check out the [Full Recipe]. Enjoy your sweet creation! First, preheat your oven to 425°F (220°C). This temperature helps create the best lava effect. While the oven heats, take four ramekins and grease them with butter. Make sure to cover the sides well. Then, lightly dust each ramekin with flour. This step stops the cakes from sticking. Now, grab a medium microwave-safe bowl. Add 1/2 cup of unsalted butter and 1 cup of semi-sweet chocolate chips. Microwave them in 30-second bursts. Stir after each burst to keep it smooth. Watch closely so the chocolate doesn’t burn. You want a thick, shiny mixture. In a separate bowl, whisk together two large eggs, two egg yolks, and 1/4 cup of granulated sugar. Whisk for about 2-3 minutes. The mix should turn pale and slightly thick. Once ready, stir the melted chocolate mixture into the egg mix. Add 1 teaspoon of vanilla extract. Mix until everything blends well. Sift in 2 tablespoons of flour and 1/4 teaspoon of salt. Gently fold it in. Don’t overmix, or the cakes might not rise. Pour the batter evenly into the prepared ramekins. Set them on a baking sheet for easy moving. Bake for 12-14 minutes. Look for firm edges but a soft center that jiggles slightly. When done, let them cool for about 1 minute. Carefully run a knife around the edges to loosen the cakes. Flip the ramekins onto plates, giving a gentle tap to release the cakes. Dust with powdered sugar. Serve warm, with a scoop of vanilla ice cream if you like. Enjoy your rich and decadent dessert! To get that gooey center in your chocolate lava cake, timing is key. Bake the cakes for 12 to 14 minutes. The edges should be firm, but the center must still jiggle. If you bake too long, you lose that molten magic. Temperature also matters when serving. Serve the cakes right out of the oven. They taste best warm. If you let them sit too long, they cool down and firm up. What if your cakes are undercooked? If the center is too runny, bake for another minute next time. Check the edges—they should look set. If your cakes are overcooked, they won’t have that molten center. For a next attempt, reduce the baking time slightly. Cakes sticking to ramekins can be frustrating. To prevent this, grease your ramekins well with butter. Dust them with flour after greasing. This helps the cakes slide out easily. For more tips, check out the [Full Recipe]. {{image_2}} To make a gluten-free chocolate lava cake, you need to swap the flour in the recipe. Instead of all-purpose flour, use gluten-free flour blends. These blends often mix rice flour, tapioca starch, and potato starch. They work well to keep the cake light and moist. Another option is almond flour. It adds a nice nutty flavor. Just remember, when using almond flour, reduce the amount slightly since it is denser. You can also try coconut flour, but use it in smaller amounts. Coconut flour absorbs more liquid. Adjust the other ingredients to keep the batter smooth. To create a vegan chocolate lava cake, you need to replace the eggs and butter. For eggs, use flaxseed meal or applesauce. Mix one tablespoon of flaxseed meal with three tablespoons of water. Let it sit for five minutes to thicken. This mix acts like one egg. For butter, try coconut oil or vegan butter. Melt it just like you would regular butter. To get a similar texture, keep an eye on baking time. Vegan cakes may bake a little faster. Check the center to ensure it remains soft and gooey. For a richer taste, use dark chocolate that is dairy-free. This adds depth to the flavor. For both variations, follow the full recipe closely to ensure a delicious outcome. Enjoy your delightful, gooey cakes! To keep your leftover lava cakes fresh, place them in airtight containers. You can use small plastic or glass containers with lids. Store them in the fridge for up to two days. I recommend letting them cool first. This will help avoid moisture buildup inside the container. If you want to store them longer, you can freeze them. Wrap each cooled cake tightly in plastic wrap, then place them in a freezer bag. They can last for up to three months in the freezer. When you’re ready to enjoy your lava cakes again, reheating them properly is key. The best method is to use the oven. Preheat your oven to 350°F (175°C). Place the cakes on a baking sheet and heat them for about 10 minutes. This method warms the cakes evenly and preserves that gooey center. You can also microwave them, but be careful. Heat each cake on a microwave-safe plate for about 15-20 seconds. Keep an eye on them so that they do not overcook. For serving, I suggest pairing reheated lava cakes with a scoop of vanilla ice cream. This adds a creamy contrast to the warm, molten chocolate. You can also add a sprinkle of powdered sugar on top for extra sweetness. Enjoying them warm is the best part! Yes, you can prepare Chocolate Lava Cake ahead of time. To do this, follow these steps: - Make the batter as per the Full Recipe. - Pour the batter into greased ramekins. - Cover them with plastic wrap and store in the fridge for up to 24 hours. - When ready to bake, remove the cover and bake directly from the fridge. You may need to add a couple of extra minutes to the baking time. To check if your cake is done, look for these signs: - The edges should be firm and set. - The center should be soft and jiggly. - A toothpick inserted in the center should come out with a few moist crumbs. Yes, you can use different types of chocolate. Here’s how they affect your cake: - Dark chocolate gives a rich and bold flavor. - Milk chocolate makes the cake sweeter and creamier. - White chocolate provides a sweeter and lighter taste, but it may change the texture. Chocolate Lava Cake has a fun history. It first appeared in the U.S. in the 1980s. Chef Jean-Georges Vongerichten created it by accident. He pulled the cake out of the oven too soon. The gooey center became a hit! Now, it is loved worldwide. Yes, you can use different pans. Here are some points to consider: - Muffin tins work well but check baking time. They may bake faster. - Larger pans will need longer baking time. Adjust as needed for even cooking. - Just ensure to grease them well to prevent sticking. This blog post covered how to make a perfect chocolate lava cake. We explored the key ingredients, like chocolate, butter, and room temperature eggs. You learned step-by-step instructions, including baking tips and optional toppings. We also discussed variations for gluten-free and vegan options, plus storage and reheating info. Now you can enjoy a delicious dessert that impresses. With practice, you'll master this sweet treat for any occasion. Happy baking!

Chocolate Lava Cake Rich and Decadent Dessert Recipe

WANT TO SAVE THIS RECIPE?

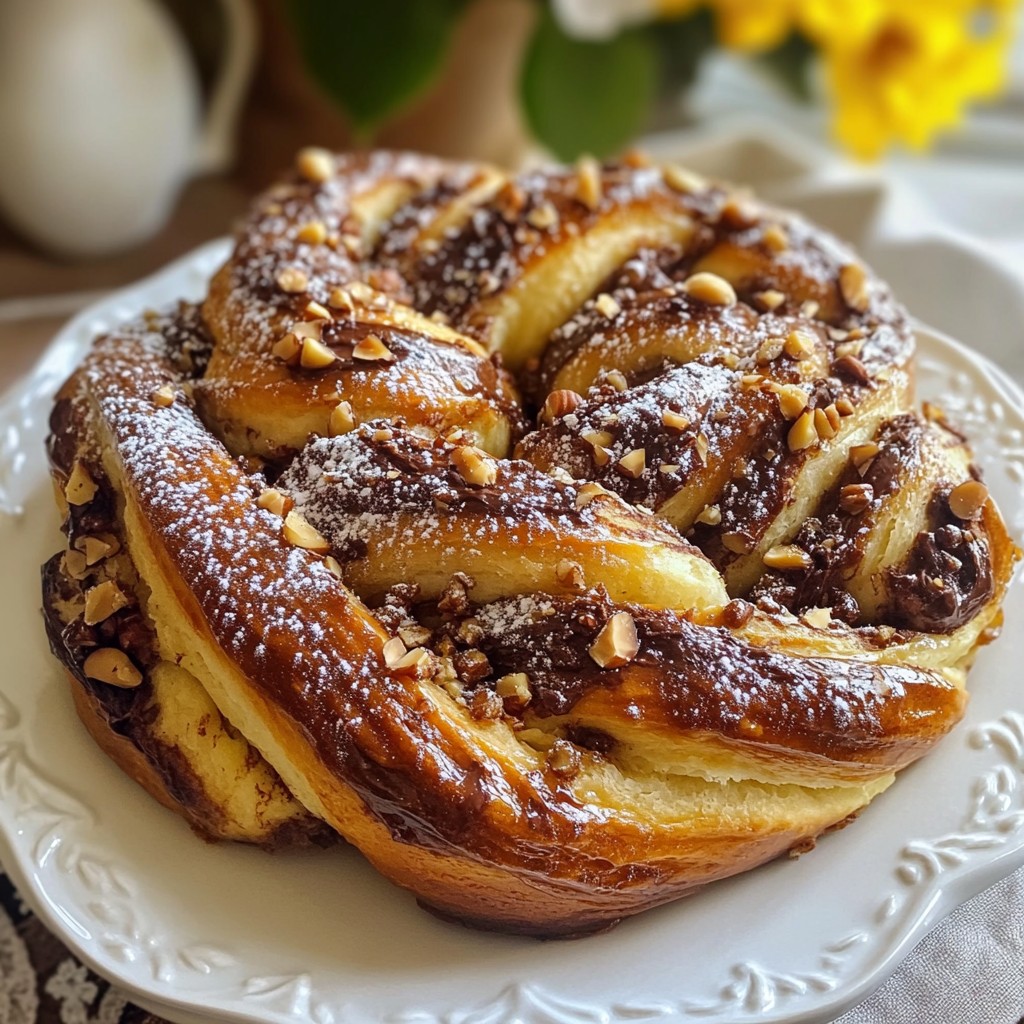
If you crave something rich and decadent, Chocolate Lava Cake is your answer! This dessert steals the show with its gooey, molten center and rich chocolate flavor. In this blog, I will guide you through the simple steps to create this indulgent treat. You’ll learn about essential ingredients, tips for perfection, and even gluten-free and vegan options. Get ready to wow your friends and family with this delicious dessert!

Ingredients

Essential Ingredients for Chocolate Lava Cake

The key to a great chocolate lava cake lies in a few simple ingredients. You need:

– 1/2 cup unsalted butter (plus extra for greasing)

– 1 cup semi-sweet chocolate chips

– 2 large eggs

– 2 large egg yolks

– 1/4 cup granulated sugar

– 1 teaspoon vanilla extract

– 2 tablespoons all-purpose flour

– 1/4 teaspoon salt

– Powdered sugar for dusting

Butter and chocolate form the base of this dessert. Use high-quality chocolate chips for the best flavor. Melted butter adds richness and helps create a gooey center.

Make sure your eggs are at room temperature. This helps them mix well and create a smooth batter. Cold eggs can lead to clumps, which you want to avoid.

Optional Toppings and Pairings

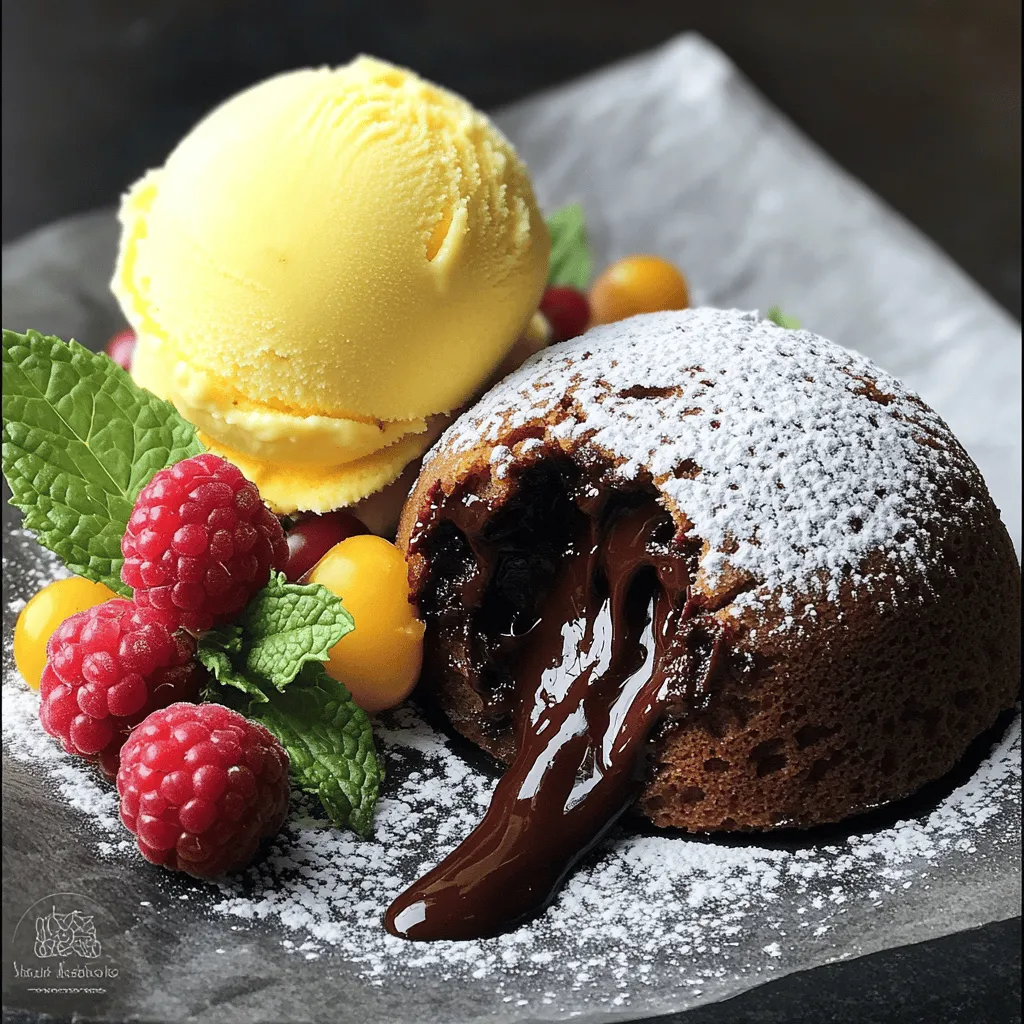
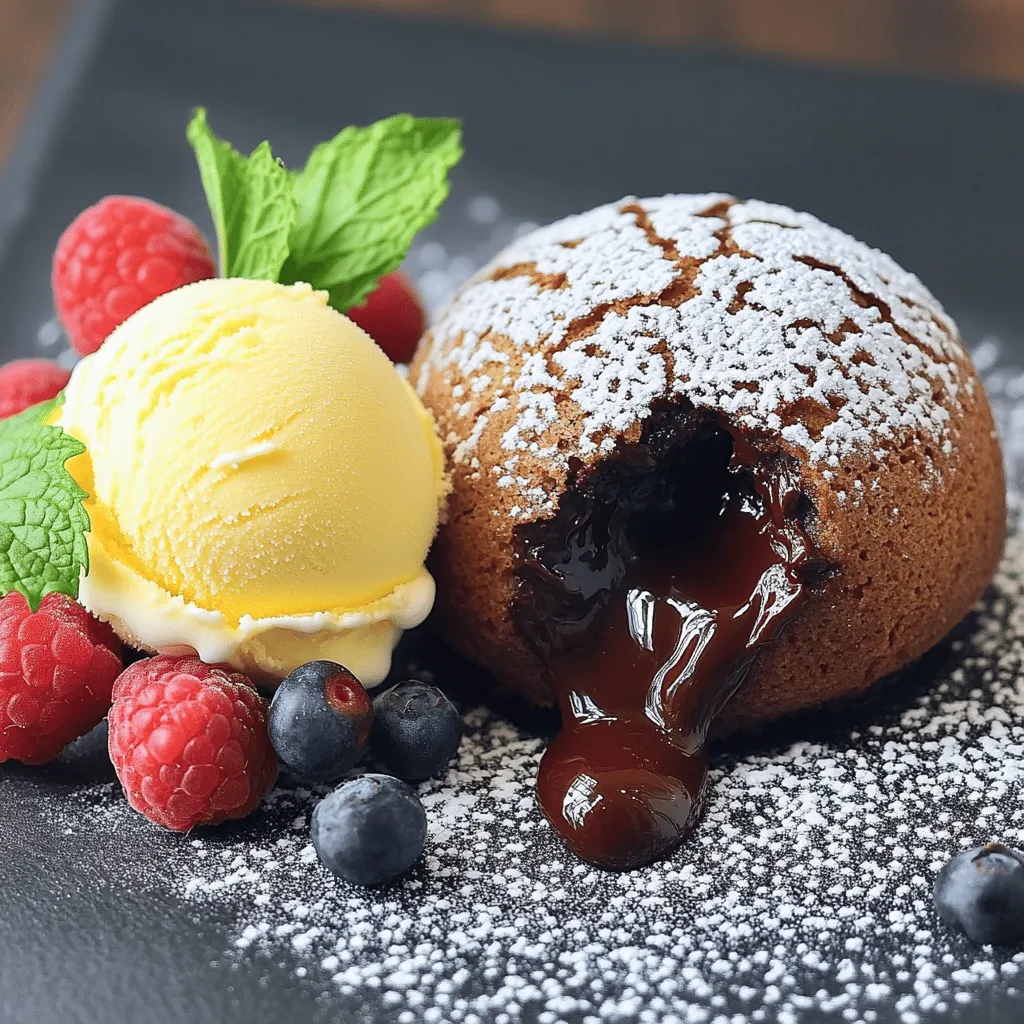
Now let’s talk toppings! While the lava cake is rich on its own, you can enhance it with some tasty sides. I recommend:

– Vanilla ice cream for a creamy contrast

– Fresh berries like raspberries or strawberries for tartness

– Mint leaves for a pop of color and freshness

Pairing your cake with vanilla ice cream creates a delightful balance. The cool ice cream melts into the warm cake, making each bite even better. Fresh berries add a burst of flavor, while mint leaves brighten up the dish.

For the full recipe, check out the [Full Recipe]. Enjoy your sweet creation!

Step-by-Step Instructions

Prepping the Oven and Ramekins

First, preheat your oven to 425°F (220°C). This temperature helps create the best lava effect. While the oven heats, take four ramekins and grease them with butter. Make sure to cover the sides well. Then, lightly dust each ramekin with flour. This step stops the cakes from sticking.

Melting the Chocolate and Butter

Now, grab a medium microwave-safe bowl. Add 1/2 cup of unsalted butter and 1 cup of semi-sweet chocolate chips. Microwave them in 30-second bursts. Stir after each burst to keep it smooth. Watch closely so the chocolate doesn’t burn. You want a thick, shiny mixture.

Combining Ingredients

In a separate bowl, whisk together two large eggs, two egg yolks, and 1/4 cup of granulated sugar. Whisk for about 2-3 minutes. The mix should turn pale and slightly thick. Once ready, stir the melted chocolate mixture into the egg mix. Add 1 teaspoon of vanilla extract. Mix until everything blends well. Sift in 2 tablespoons of flour and 1/4 teaspoon of salt. Gently fold it in. Don’t overmix, or the cakes might not rise.

Baking and Serving

Pour the batter evenly into the prepared ramekins. Set them on a baking sheet for easy moving. Bake for 12-14 minutes. Look for firm edges but a soft center that jiggles slightly. When done, let them cool for about 1 minute. Carefully run a knife around the edges to loosen the cakes. Flip the ramekins onto plates, giving a gentle tap to release the cakes. Dust with powdered sugar. Serve warm, with a scoop of vanilla ice cream if you like. Enjoy your rich and decadent dessert!

Tips & Tricks

Achieving the Perfect Molten Center

To get that gooey center in your chocolate lava cake, timing is key. Bake the cakes for 12 to 14 minutes. The edges should be firm, but the center must still jiggle. If you bake too long, you lose that molten magic.

Temperature also matters when serving. Serve the cakes right out of the oven. They taste best warm. If you let them sit too long, they cool down and firm up.

Troubleshooting Common Issues

What if your cakes are undercooked? If the center is too runny, bake for another minute next time. Check the edges—they should look set.

If your cakes are overcooked, they won’t have that molten center. For a next attempt, reduce the baking time slightly.

Cakes sticking to ramekins can be frustrating. To prevent this, grease your ramekins well with butter. Dust them with flour after greasing. This helps the cakes slide out easily.

For more tips, check out the [Full Recipe].

Variations

Gluten-Free Chocolate Lava Cake

To make a gluten-free chocolate lava cake, you need to swap the flour in the recipe. Instead of all-purpose flour, use gluten-free flour blends. These blends often mix rice flour, tapioca starch, and potato starch. They work well to keep the cake light and moist.

Another option is almond flour. It adds a nice nutty flavor. Just remember, when using almond flour, reduce the amount slightly since it is denser.

You can also try coconut flour, but use it in smaller amounts. Coconut flour absorbs more liquid. Adjust the other ingredients to keep the batter smooth.

Vegan Chocolate Lava Cake

To create a vegan chocolate lava cake, you need to replace the eggs and butter. For eggs, use flaxseed meal or applesauce. Mix one tablespoon of flaxseed meal with three tablespoons of water. Let it sit for five minutes to thicken. This mix acts like one egg.

For butter, try coconut oil or vegan butter. Melt it just like you would regular butter.

To get a similar texture, keep an eye on baking time. Vegan cakes may bake a little faster. Check the center to ensure it remains soft and gooey.

For a richer taste, use dark chocolate that is dairy-free. This adds depth to the flavor.

For both variations, follow the full recipe closely to ensure a delicious outcome. Enjoy your delightful, gooey cakes!

Storage Info

How to Store Leftover Lava Cakes

To keep your leftover lava cakes fresh, place them in airtight containers. You can use small plastic or glass containers with lids. Store them in the fridge for up to two days. I recommend letting them cool first. This will help avoid moisture buildup inside the container. If you want to store them longer, you can freeze them. Wrap each cooled cake tightly in plastic wrap, then place them in a freezer bag. They can last for up to three months in the freezer.

Reheating Instructions

When you’re ready to enjoy your lava cakes again, reheating them properly is key. The best method is to use the oven. Preheat your oven to 350°F (175°C). Place the cakes on a baking sheet and heat them for about 10 minutes. This method warms the cakes evenly and preserves that gooey center.

You can also microwave them, but be careful. Heat each cake on a microwave-safe plate for about 15-20 seconds. Keep an eye on them so that they do not overcook.

For serving, I suggest pairing reheated lava cakes with a scoop of vanilla ice cream. This adds a creamy contrast to the warm, molten chocolate. You can also add a sprinkle of powdered sugar on top for extra sweetness. Enjoying them warm is the best part!

FAQs

Can I make Chocolate Lava Cake ahead of time?

Yes, you can prepare Chocolate Lava Cake ahead of time. To do this, follow these steps:

– Make the batter as per the Full Recipe.

– Pour the batter into greased ramekins.

– Cover them with plastic wrap and store in the fridge for up to 24 hours.

– When ready to bake, remove the cover and bake directly from the fridge. You may need to add a couple of extra minutes to the baking time.

How do I know when my cake is done?

To check if your cake is done, look for these signs:

– The edges should be firm and set.

– The center should be soft and jiggly.

– A toothpick inserted in the center should come out with a few moist crumbs.

Can I use different types of chocolate for this recipe?

Yes, you can use different types of chocolate. Here’s how they affect your cake:

Dark chocolate gives a rich and bold flavor.

Milk chocolate makes the cake sweeter and creamier.

White chocolate provides a sweeter and lighter taste, but it may change the texture.

What’s the origins of Chocolate Lava Cake?

Chocolate Lava Cake has a fun history. It first appeared in the U.S. in the 1980s. Chef Jean-Georges Vongerichten created it by accident. He pulled the cake out of the oven too soon. The gooey center became a hit! Now, it is loved worldwide.

Can I bake this in a different pan?

Yes, you can use different pans. Here are some points to consider:

– Muffin tins work well but check baking time. They may bake faster.

– Larger pans will need longer baking time. Adjust as needed for even cooking.

– Just ensure to grease them well to prevent sticking.

This blog post covered how to make a perfect chocolate lava cake. We explored the key ingredients, like chocolate, butter, and room temperature eggs. You learned step-by-step instructions, including baking tips and optional toppings. We also discussed variations for gluten-free and vegan options, plus storage and reheating info.

Now you can enjoy a delicious dessert that impresses. With practice, you’ll master this sweet treat for any occasion. Happy baking!

The key to a great chocolate lava cake lies in a few simple ingredients. You need: - 1/2 cup unsalted butter (plus extra for greasing) - 1 cup semi-sweet chocolate chips - 2 large eggs - 2 large egg yolks - 1/4 cup granulated sugar - 1 teaspoon vanilla extract - 2 tablespoons all-purpose flour - 1/4 teaspoon salt - Powdered sugar for dusting Butter and chocolate form the base of this dessert. Use high-quality chocolate chips for the best flavor. Melted butter adds richness and helps create a gooey center. Make sure your eggs are at room temperature. This helps them mix well and create a smooth batter. Cold eggs can lead to clumps, which you want to avoid. Now let's talk toppings! While the lava cake is rich on its own, you can enhance it with some tasty sides. I recommend: - Vanilla ice cream for a creamy contrast - Fresh berries like raspberries or strawberries for tartness - Mint leaves for a pop of color and freshness Pairing your cake with vanilla ice cream creates a delightful balance. The cool ice cream melts into the warm cake, making each bite even better. Fresh berries add a burst of flavor, while mint leaves brighten up the dish. For the full recipe, check out the [Full Recipe]. Enjoy your sweet creation! First, preheat your oven to 425°F (220°C). This temperature helps create the best lava effect. While the oven heats, take four ramekins and grease them with butter. Make sure to cover the sides well. Then, lightly dust each ramekin with flour. This step stops the cakes from sticking. Now, grab a medium microwave-safe bowl. Add 1/2 cup of unsalted butter and 1 cup of semi-sweet chocolate chips. Microwave them in 30-second bursts. Stir after each burst to keep it smooth. Watch closely so the chocolate doesn’t burn. You want a thick, shiny mixture. In a separate bowl, whisk together two large eggs, two egg yolks, and 1/4 cup of granulated sugar. Whisk for about 2-3 minutes. The mix should turn pale and slightly thick. Once ready, stir the melted chocolate mixture into the egg mix. Add 1 teaspoon of vanilla extract. Mix until everything blends well. Sift in 2 tablespoons of flour and 1/4 teaspoon of salt. Gently fold it in. Don’t overmix, or the cakes might not rise. Pour the batter evenly into the prepared ramekins. Set them on a baking sheet for easy moving. Bake for 12-14 minutes. Look for firm edges but a soft center that jiggles slightly. When done, let them cool for about 1 minute. Carefully run a knife around the edges to loosen the cakes. Flip the ramekins onto plates, giving a gentle tap to release the cakes. Dust with powdered sugar. Serve warm, with a scoop of vanilla ice cream if you like. Enjoy your rich and decadent dessert! To get that gooey center in your chocolate lava cake, timing is key. Bake the cakes for 12 to 14 minutes. The edges should be firm, but the center must still jiggle. If you bake too long, you lose that molten magic. Temperature also matters when serving. Serve the cakes right out of the oven. They taste best warm. If you let them sit too long, they cool down and firm up. What if your cakes are undercooked? If the center is too runny, bake for another minute next time. Check the edges—they should look set. If your cakes are overcooked, they won’t have that molten center. For a next attempt, reduce the baking time slightly. Cakes sticking to ramekins can be frustrating. To prevent this, grease your ramekins well with butter. Dust them with flour after greasing. This helps the cakes slide out easily. For more tips, check out the [Full Recipe]. {{image_2}} To make a gluten-free chocolate lava cake, you need to swap the flour in the recipe. Instead of all-purpose flour, use gluten-free flour blends. These blends often mix rice flour, tapioca starch, and potato starch. They work well to keep the cake light and moist. Another option is almond flour. It adds a nice nutty flavor. Just remember, when using almond flour, reduce the amount slightly since it is denser. You can also try coconut flour, but use it in smaller amounts. Coconut flour absorbs more liquid. Adjust the other ingredients to keep the batter smooth. To create a vegan chocolate lava cake, you need to replace the eggs and butter. For eggs, use flaxseed meal or applesauce. Mix one tablespoon of flaxseed meal with three tablespoons of water. Let it sit for five minutes to thicken. This mix acts like one egg. For butter, try coconut oil or vegan butter. Melt it just like you would regular butter. To get a similar texture, keep an eye on baking time. Vegan cakes may bake a little faster. Check the center to ensure it remains soft and gooey. For a richer taste, use dark chocolate that is dairy-free. This adds depth to the flavor. For both variations, follow the full recipe closely to ensure a delicious outcome. Enjoy your delightful, gooey cakes! To keep your leftover lava cakes fresh, place them in airtight containers. You can use small plastic or glass containers with lids. Store them in the fridge for up to two days. I recommend letting them cool first. This will help avoid moisture buildup inside the container. If you want to store them longer, you can freeze them. Wrap each cooled cake tightly in plastic wrap, then place them in a freezer bag. They can last for up to three months in the freezer. When you’re ready to enjoy your lava cakes again, reheating them properly is key. The best method is to use the oven. Preheat your oven to 350°F (175°C). Place the cakes on a baking sheet and heat them for about 10 minutes. This method warms the cakes evenly and preserves that gooey center. You can also microwave them, but be careful. Heat each cake on a microwave-safe plate for about 15-20 seconds. Keep an eye on them so that they do not overcook. For serving, I suggest pairing reheated lava cakes with a scoop of vanilla ice cream. This adds a creamy contrast to the warm, molten chocolate. You can also add a sprinkle of powdered sugar on top for extra sweetness. Enjoying them warm is the best part! Yes, you can prepare Chocolate Lava Cake ahead of time. To do this, follow these steps: - Make the batter as per the Full Recipe. - Pour the batter into greased ramekins. - Cover them with plastic wrap and store in the fridge for up to 24 hours. - When ready to bake, remove the cover and bake directly from the fridge. You may need to add a couple of extra minutes to the baking time. To check if your cake is done, look for these signs: - The edges should be firm and set. - The center should be soft and jiggly. - A toothpick inserted in the center should come out with a few moist crumbs. Yes, you can use different types of chocolate. Here’s how they affect your cake: - Dark chocolate gives a rich and bold flavor. - Milk chocolate makes the cake sweeter and creamier. - White chocolate provides a sweeter and lighter taste, but it may change the texture. Chocolate Lava Cake has a fun history. It first appeared in the U.S. in the 1980s. Chef Jean-Georges Vongerichten created it by accident. He pulled the cake out of the oven too soon. The gooey center became a hit! Now, it is loved worldwide. Yes, you can use different pans. Here are some points to consider: - Muffin tins work well but check baking time. They may bake faster. - Larger pans will need longer baking time. Adjust as needed for even cooking. - Just ensure to grease them well to prevent sticking. This blog post covered how to make a perfect chocolate lava cake. We explored the key ingredients, like chocolate, butter, and room temperature eggs. You learned step-by-step instructions, including baking tips and optional toppings. We also discussed variations for gluten-free and vegan options, plus storage and reheating info. Now you can enjoy a delicious dessert that impresses. With practice, you'll master this sweet treat for any occasion. Happy baking!

Chocolate Lava Cake

Indulge in the ultimate Chocolate Lava Cake that oozes with molten chocolate goodness! This rich and decadent dessert is easy to make and perfect for impressing guests. Learn essential tips, explore delicious variations including gluten-free and vegan options, and find the best ways to serve it. Ready to take your dessert game to the next level? Click through to discover the full recipe and create your own show-stopping treat!

Ingredients
  

1/2 cup unsalted butter (plus extra for greasing)

1 cup semi-sweet chocolate chips

2 large eggs

2 large egg yolks

1/4 cup granulated sugar

1 teaspoon vanilla extract

2 tablespoons all-purpose flour

1/4 teaspoon salt

Powdered sugar for dusting

Optional: Vanilla ice cream for serving

Instructions
 

Preheat your oven to 425°F (220°C). Grease four ramekins generously with butter and lightly dust them with flour to prevent sticking.

    In a medium microwave-safe bowl, combine the unsalted butter and chocolate chips. Microwave in 30-second intervals, stirring after each, until melted and smooth. Be careful not to overheat.

      In a separate bowl, whisk together the eggs, egg yolks, and granulated sugar until pale and slightly thickened, approximately 2-3 minutes.

        Stir the melted chocolate mixture into the egg mixture until fully combined. Add the vanilla extract and mix well.

          Sift in the flour and salt, then fold gently into the mixture until just combined—do not overmix.

            Divide the batter evenly among the prepared ramekins. Place them on a baking sheet for easy handling.

              Bake in the preheated oven for 12-14 minutes, or until the edges are firm but the center is still soft and jiggly.

                Remove from the oven and allow the ramekins to cool for about 1 minute. Carefully run a knife around the edges to loosen the cakes.

                  Invert the ramekins onto individual serving plates, giving a gentle tap to release the cakes.

                    Dust the warm cakes with powdered sugar and serve immediately with a scoop of vanilla ice cream if desired.

                      Prep Time: 10 minutes | Total Time: 25 minutes | Servings: 4

                        - Presentation Tips: Serve the lava cakes warm, with a vibrant scoop of vanilla ice cream alongside and a sprinkle of fresh berries or mint leaves for extra color.

                          WANT TO SAVE THIS RECIPE?

                          Similar Posts

                          Leave a Reply

                          Your email address will not be published. Required fields are marked *

                          Recipe Rating