Get ready for a crunchy, cheesy delight! Korean Cheese Balls are the perfect snack for any occasion. With gooey cheese and crispy outsides, these treats are a hit. You’ll love making them at home with just a few simple ingredients. In this post, I’ll guide you through each step, from mixing to frying, ensuring you get it right. Let’s dive into this tasty adventure and impress your friends and family!
Ingredients
Main Ingredients for Korean Cheese Balls
– 1 cup cooked rice
– 1/2 cup mozzarella cheese
– 1/4 cup cream cheese
– 1/4 cup green onions
– 1 egg
– Seasoning essentials: garlic powder, onion powder, black pepper
These ingredients form the heart of the Korean cheese balls. The cooked rice gives the balls structure. The mozzarella and cream cheese create a creamy, cheesy center that melts perfectly when cooked. Green onions add a fresh, mild flavor. The egg helps bind everything together. The seasoning adds depth to each bite.
Coating and Frying Essentials
– 1 cup panko breadcrumbs
– Oil for frying (vegetable or canola)
– Optional: soy sauce for dipping
The panko breadcrumbs coat the outside of the cheese balls. They make the outer layer crunchy and delicious. Choose a neutral oil like vegetable or canola for frying. This allows the cheese balls to cook evenly without affecting their flavor. If you like, serve them with soy sauce for a tasty dip.
Step-by-Step Instructions
Preparing the Mixture
– In a large bowl, combine 1 cup of cooked rice, 1/2 cup of shredded mozzarella cheese, and 1/4 cup of softened cream cheese.
– Next, add 1/4 cup of finely chopped green onions, 1 beaten egg, 1/2 teaspoon of garlic powder, 1/2 teaspoon of onion powder, and 1/4 teaspoon of black pepper.
– Mix everything together until it becomes sticky and manageable. This is key for shaping the balls later.
Forming and Coating the Balls
– With your hands, take a small amount of the mixture and shape it into a ball. Aim for about 1 to 1.5 inches in diameter. You should make about 12 to 15 balls.
– Once shaped, roll each ball in 1 cup of panko breadcrumbs. This gives them a crunchy texture when fried.
Frying the Cheese Balls
– In a deep saucepan, heat about 2 inches of oil over medium heat.
– Carefully add the cheese balls to the hot oil, making sure not to overcrowd the pan. Fry them until they turn golden brown, about 3 to 4 minutes.
– Flip the balls halfway through cooking to ensure even browning.
– Once cooked, remove the cheese balls with a slotted spoon and place them on a plate lined with paper towels. This helps drain any excess oil.Enjoy your crunchy snacks!
Tips & Tricks
Perfecting the Texture
To get the right stickiness, mix the cooked rice and cheese well. This helps the ingredients stick together. If your mixture is too dry, add a bit more cream cheese. It should feel slightly tacky but easy to handle.
Avoid overcrowding the frying pan. If you add too many cheese balls at once, they won’t fry evenly. Fry them in batches. This way, each cheese ball gets the heat it needs.
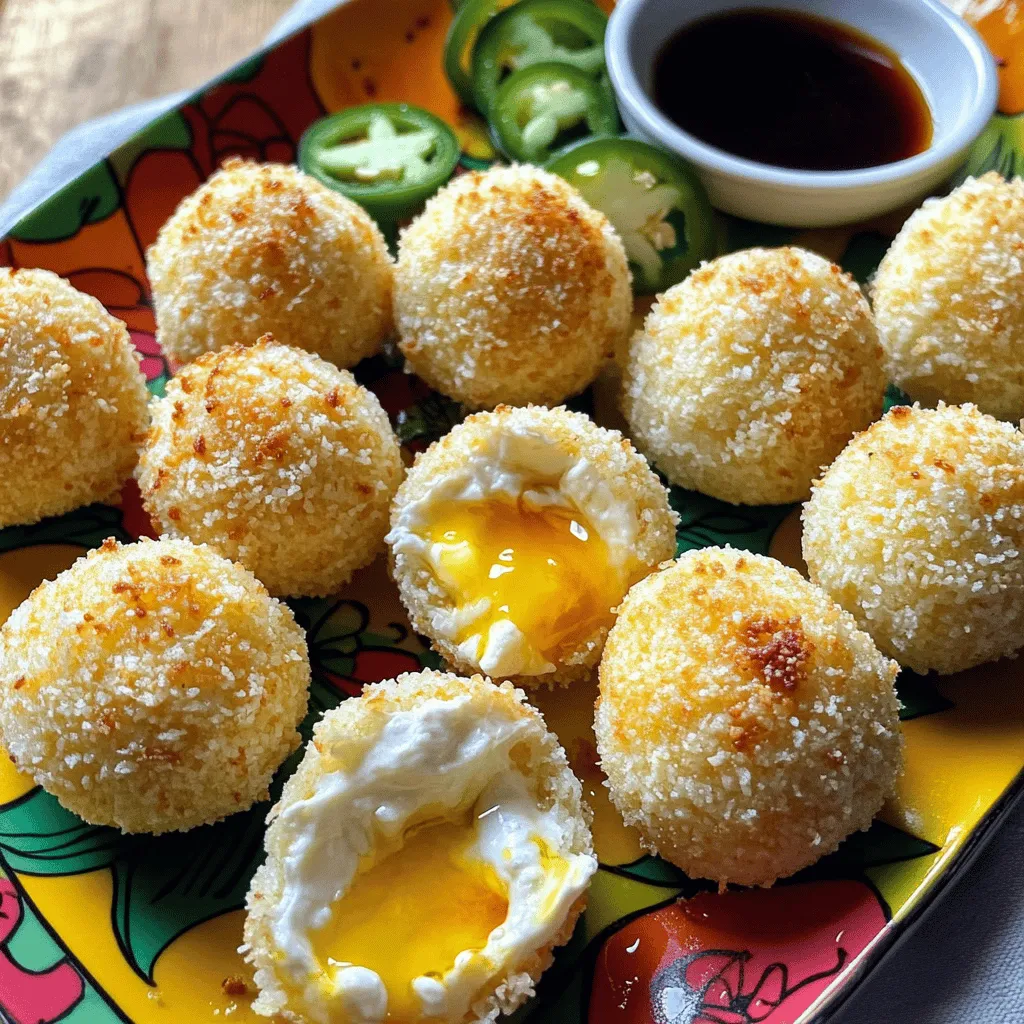
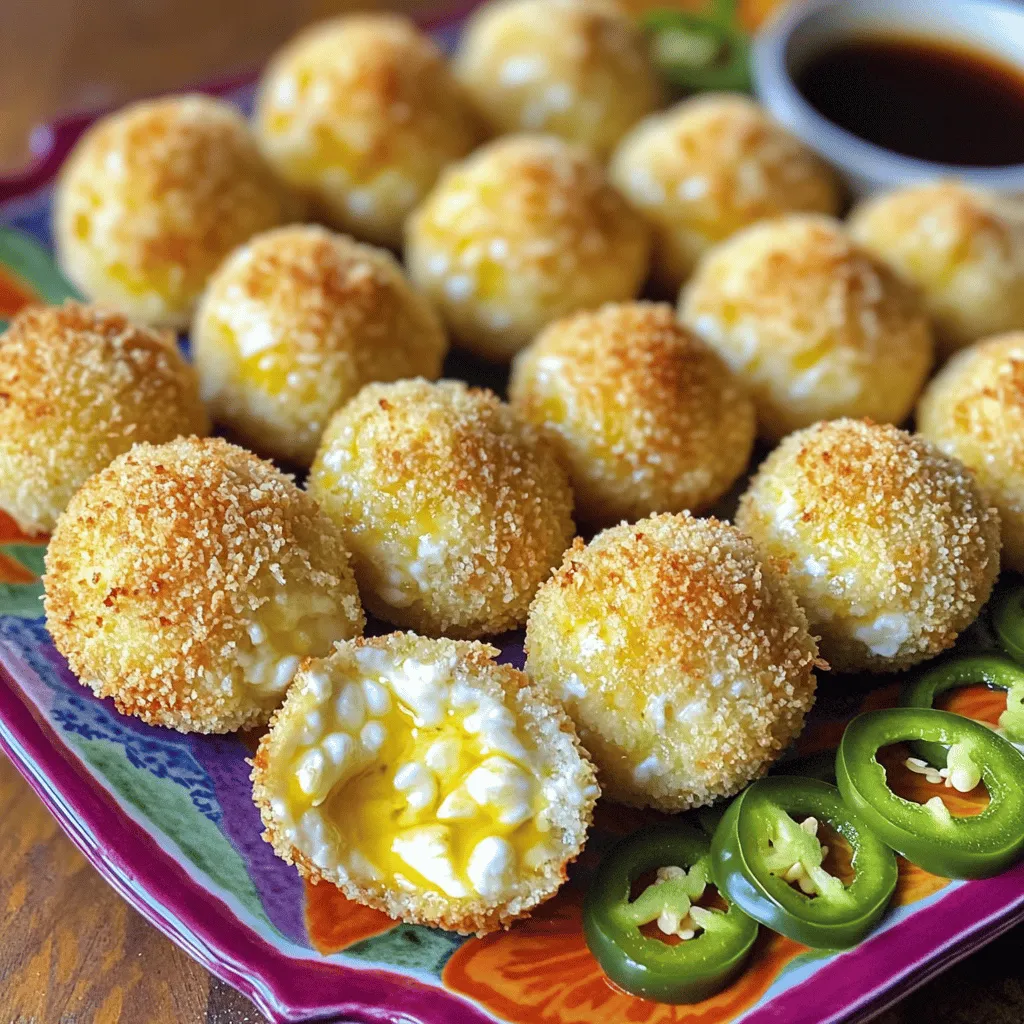
Serving Suggestions
For a fun presentation, arrange the cheese balls on a colorful platter. You can place sliced jalapeños around them for a nice touch. Add a small bowl of soy sauce in the center for dipping. It adds flavor and looks great!
Pair these cheese balls with soy sauce or spicy mayo. You can even try a sweet chili sauce for an extra kick. The dip enhances the taste and makes each bite exciting.
Storage Recommendations
To store leftovers, place them in an airtight container. You can keep them in the fridge for up to three days. If you want to enjoy them later, freeze them instead.
When reheating, use an oven or air fryer. This keeps them crispy. Microwave reheating can make them soggy. Enjoy your crunchy cheese balls again with these simple tips!
Variations
Cheese Options
You can get creative with the cheese you use. While mozzarella gives a nice stretch, cheddar adds a sharp taste. Pepper jack brings a spicy kick. Mixing different cheeses can create a unique flavor. Try blending mozzarella with cheddar for a rich and gooey texture. The choices are endless, and each cheese adds its own twist.
Flavor Enhancements
Spices can take your Korean cheese balls to the next level. Add paprika for a smoky flavor or cayenne for some heat. Fresh herbs, like cilantro or parsley, can brighten the taste. You might also want to fold in cooked proteins. Crumbled bacon adds a savory crunch. Diced kimchi gives it a fun, tangy kick. Get creative with your additions and find what you love.
Serving Style Variations
You can serve cheese balls in different ways. Frying gives them a crispy outer layer, while baking makes them lighter. If you want a fun twist, try making mini versions. They are perfect for appetizers or snacks at parties. Serve them warm with a side of soy sauce for dipping. This makes for a delightful treat that keeps everyone coming back for more.
Nutritional Information
Serving Size
This recipe serves about 4-6 people. Each serving offers a fun and tasty snack.
Nutrient Breakdown
Each serving contains around:
– Calories: 220
– Fats: 12 grams
– Proteins: 6 grams
– Carbohydrates: 20 grams
These cheese balls are a treat, but they can fit in a balanced diet. To keep them healthier, try using less oil for frying or bake them instead.
Dietary Adaptations
You can easily make these cheese balls gluten-free. Just swap panko breadcrumbs for gluten-free options. For vegetarians, this recipe works perfectly! Just skip any meat additions. Enjoy these crunchy delights while staying true to your diet.
FAQs
How to make Korean cheese balls crispy?
To make Korean cheese balls crispy, use panko breadcrumbs. These crumbs are lighter and crunchier than regular bread crumbs. Coat each cheese ball well, ensuring even coverage. When frying, keep the oil hot enough. This helps the balls cook fast and become golden-brown. Fry in small batches. Overcrowding the pan can lower oil temperature, resulting in soggy balls. Flip them halfway through frying for even crispness.
Can I use leftover rice for this recipe?
Yes, you can use leftover rice for this recipe. Day-old rice works best since it is drier and holds together better. Freshly cooked rice may be too sticky, making it hard to form balls. Spread leftover rice on a plate to cool before using. This will help it dry out a bit. You can also refrigerate it for an hour to achieve the right texture.
Where can I buy Korean cheese balls?
You can buy Korean cheese balls at many Asian grocery stores. Some stores have frozen varieties in the freezer section. If you prefer fresh options, look for Korean restaurants that serve them as appetizers. Some food trucks also offer these tasty snacks. Check local listings to find the best spots near you. Enjoy the fun of trying different places!
Korean cheese balls are a fun and tasty snack. We covered key ingredients like rice and cheese, and how to mix, shape, and fry them. I shared tips for texture and storage, plus fun variations for flavor. Don’t forget, you can change the cheese or even add spices to make this dish your own. Enjoy this easy recipe and impress friends or family. Your next snack time just got better!