Looking to sweeten your dessert menu? Pineapple desserts that delight your taste buds offer a tropical treat everyone loves. I’ll share a tasty Pineapple Tart recipe that’s simple yet satisfying. You’ll find easy-to-follow steps, helpful tips, and fun variations. Join me as we explore the world of pineapple flavors and make your next dessert a standout. Dive in for a delicious adventure!
Ingredients
List of Ingredients for Tropical Paradise Pineapple Tart
To make this tasty tart, gather these simple ingredients:
– 1 ripe pineapple, peeled and sliced
– 1 cup almond flour
– 1/2 cup coconut sugar
– 1/4 cup unsweetened shredded coconut
– 2 tablespoons melted coconut oil
– 1 teaspoon vanilla extract
– 1/2 teaspoon ground cinnamon
– 1 cup Greek yogurt
– Fresh mint leaves for garnish
Substitutions and Alternatives
If you want to switch things up, here are some great options:
– Use oat flour instead of almond flour for a different taste.
– Brown sugar works well if you don’t have coconut sugar.
– You can replace coconut oil with butter or any other oil.
– Feel free to use regular sugar if you prefer it over coconut sugar.
– Swap Greek yogurt with any yogurt you like, such as coconut or almond yogurt.
Health Benefits of Pineapple Ingredients
Pineapple is not just sweet; it offers many health benefits:
– It has bromelain, which helps with digestion.
– Pineapple is rich in vitamin C, boosting your immune system.
– Almond flour is low in carbs and high in protein, great for energy.
– Coconut sugar has a lower glycemic index than regular sugar, making it a better choice.
– Greek yogurt is full of probiotics, which are good for gut health.
– Mint adds flavor and can help with digestion too.
Using these ingredients not only makes a delicious dessert but also provides health benefits. You can enjoy your Tropical Paradise Pineapple Tart knowing it’s good for you!
Step-by-Step Instructions
Preparing the Crust
To start, preheat your oven to 350°F (175°C). Grab a tart pan and line it with parchment paper. In a mixing bowl, add almond flour, coconut sugar, and shredded coconut. Pour in melted coconut oil, vanilla extract, and ground cinnamon. Stir until the mix looks crumbly. Press this mixture firmly into the bottom and sides of your tart pan. Bake it for 10-12 minutes until it turns golden brown. This crust will be the perfect base for your tart.
Grilling the Pineapple
Now, let’s get to the star of the show: the pineapple! Take your peeled and sliced pineapple and place it on a preheated grill or grill pan. Grill each slice for about 2-3 minutes on both sides. You want to see those lovely grill marks and a bit of caramelization. This step adds a sweet, smoky flavor that elevates your tart.
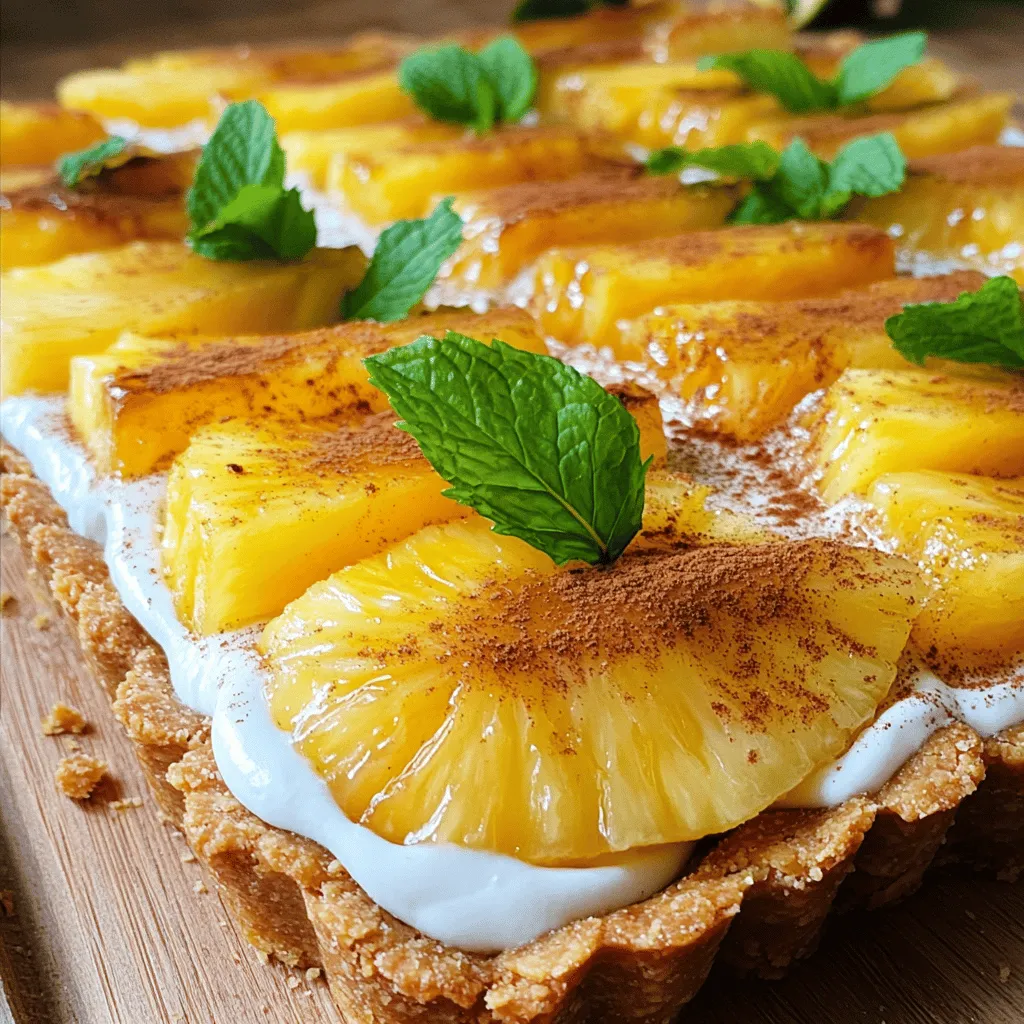
Assembling the Tart
Once your crust is cool, it’s time to assemble. Layer the grilled pineapple slices on top of the crust. Arrange them nicely to make it look pretty. Next, take Greek yogurt and spoon it over the pineapple. You can spread it evenly or create peaks for a textured look. Finally, garnish the tart with fresh mint leaves and a sprinkle of cinnamon. Refrigerate for at least 30 minutes. This helps the flavors mix together.
Enjoy your Tropical Paradise Pineapple Tart!
Tips & Tricks
Best Practices for Grilling Pineapple
Grilling pineapple brings out its sweet flavor. Start with fresh, ripe pineapple. Cut it into thick slices. This prevents the fruit from falling apart on the grill. Preheat your grill to medium heat. Lightly oil the grill grates to avoid sticking. Grill each slice for about 2-3 minutes on each side. Look for nice grill marks. This adds a smoky taste. Remove the slices and let them cool before using them in your dessert.
Ensuring a Perfect Tart Crust
A good tart crust is key to a tasty dessert. Use almond flour for a nutty taste. Mix it with coconut sugar and shredded coconut. This gives your crust a sweet and chewy texture. Make sure to press your mixture firmly into the tart pan. This helps it hold together while baking. Bake until golden brown, about 10-12 minutes. Let it cool completely. This step ensures your crust stays crisp when you add the filling.
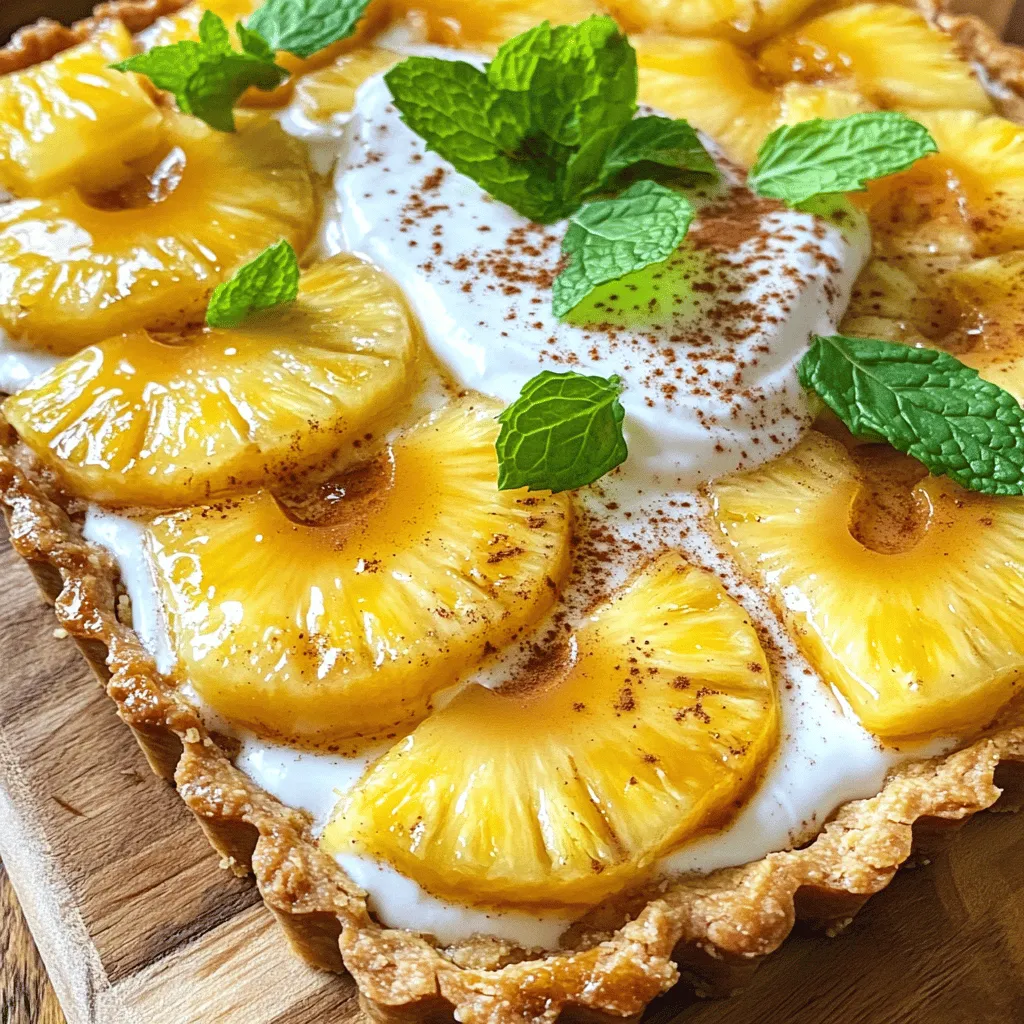
Presentation Suggestions for Serving
Presentation makes your dessert more inviting. To serve your Tropical Paradise Pineapple Tart, arrange the grilled pineapple slices in a fun pattern. Layer them neatly on the crust. Spoon Greek yogurt over the pineapple. You can create peaks for a nice look. Finish with fresh mint leaves on top. A sprinkle of cinnamon adds a pop of color. Chill the tart for at least 30 minutes. This lets the flavors mix well. Your guests will love the look and taste of this tart!
Variations
Alternative Fruit Tarts with Pineapple
You can mix fruits in your tart for fun flavors. Try mango or kiwi with pineapple. These fruits add sweetness and color. They also give a tropical feel. You can even use berries for a tart contrast. Each fruit brings a unique taste to your dish. This way, you create a colorful and tasty treat.
Vegan and Gluten-Free Substitutes
For a vegan option, swap Greek yogurt for coconut yogurt. This keeps the creaminess while making it dairy-free. You can use oat flour instead of almond flour for a gluten-free crust. Both options work well in the recipe. Remember to check labels for gluten-free status. This way, everyone can enjoy the tart!
Flavor Enhancements to Try
To boost flavors, add a splash of lime juice. This brightens every bite and pairs well with pineapple. You can also sprinkle a bit of chili powder for heat. The spice adds a fun twist that surprises many. Don’t forget to experiment with fresh herbs. Basil or cilantro can add a new layer of flavor. Enjoy creating your own version of the Tropical Paradise Pineapple Tart!
Storage Info
How to Store Leftover Tart
After you enjoy your Tropical Paradise Pineapple Tart, store any leftovers in the fridge. Use an airtight container to keep it fresh. Place a piece of wax paper between the tart and the lid to prevent sticking. This helps keep the crust nice and crisp for the next time you serve it.
Freezing Instructions
You can freeze the tart if you want to save it for later. Wrap the tart tightly in plastic wrap, then place it in a freezer-safe bag. Make sure to remove as much air as possible. The tart can stay frozen for up to three months. When you’re ready to eat, let it thaw in the fridge overnight.
Best Practices for Reheating
If you want to enjoy the tart warm, here’s how. Preheat your oven to 350°F (175°C). Place the tart on a baking sheet and cover it with foil. Heat it for about 10-15 minutes. This will help the crust stay crunchy while warming the filling. Avoid microwaving, as it can make the crust soggy.
FAQs
Can I use canned pineapple for this dessert?
Yes, you can use canned pineapple. Just drain it well before use. Canned pineapple is sweet and soft. This can save you time, but fresh pineapple is best for taste. It has a bright flavor and a nice crunch. If you use canned, check for added sugar to control sweetness.
What can I substitute for Greek yogurt?
You can use regular yogurt or dairy-free options. If you want a thicker texture, try sour cream. If you are vegan, use coconut yogurt or cashew yogurt. These options keep the tart creamy and rich. Each substitute brings its own flavor, so choose what you like best.
How long does the tart last in the fridge?
The tart lasts about three days in the fridge. Cover it tightly to keep it fresh. After three days, the crust may get soggy. If you plan to eat it later, store the yogurt separately. This keeps the crust crisp and delicious. Enjoy it chilled for the best taste!
This blog post covered how to make a Tropical Paradise Pineapple Tart. We explored the ingredients, from fresh pineapple to crust details. You learned about substitutions and the health perks of pineapple too. I shared tips for grilling pineapple and perfecting the crust. You can also try different fruit variations or store leftovers easily. My final thought: enjoy the process and have fun creating this tart in your kitchen! Your taste buds will thank you.