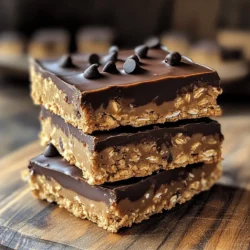
Chocolate Peanut Butter Oat Bars
Indulge in the deliciousness of chocolate peanut butter oat bars, a perfect treat for any time of day! Made with simple ingredients like rolled oats, creamy peanut butter, and chocolate chips, these bars are easy to whip up and super satisfying. Follow our simple recipe and enjoy chewy, nutty goodness in just 35 minutes. Click through to discover the full recipe and treat yourself today!