Herb Garlic Pull-Apart Rolls Simple and Flavorful Snack

WANT TO SAVE THIS RECIPE?

Craving a snack that’s simple yet bursting with flavor? Try my Herb Garlic Pull-Apart Rolls! These rolls are warm, soft, and perfect for sharing. I’ll guide you step-by-step as you create a tasty treat that impresses everyone. With just a few ingredients and easy tips, you’ll have wonderful rolls fresh from your oven. Ready to dive into this delightful baking adventure? Let’s get started!

Ingredients

Main Ingredients for Herb Garlic Pull-Apart Rolls

For these rolls, you will need:

– 3 cups all-purpose flour

– 1 packet (2 ¼ teaspoons) active dry yeast

– 1 teaspoon sugar

– 1 teaspoon salt

– 1 cup warm water (about 110°F/43°C)

– ¼ cup unsalted butter, melted

– 4 cloves garlic, minced

– 2 tablespoons fresh herbs (like rosemary, thyme, or parsley), finely chopped

– 1 tablespoon dried Italian seasoning

– 1 teaspoon garlic powder

– 1 egg, beaten (for egg wash)

These main ingredients work together to create a soft, flavorful roll. The garlic adds a rich taste, while the herbs bring freshness.

Optional Ingredients for Extra Flavor

To take your rolls up a notch, consider adding:

– ½ cup shredded cheese (like mozzarella or cheddar)

– A pinch of crushed red pepper for some heat

– More fresh herbs, like basil or oregano

These optional ingredients can make your rolls even tastier. Cheese adds creaminess, while red pepper brings a nice kick.

Suggested Tools and Equipment

For making these rolls, you will need:

– Mixing bowls

– Measuring cups and spoons

– A whisk

– A floured surface for kneading

– A greased round baking pan

– A damp cloth to cover the dough

Having the right tools makes the process smoother. It helps you focus on creating those delicious rolls.

Step-by-Step Instructions

Preparing the Yeast Mixture

Start by warming 1 cup of water. It should be about 110°F, perfect for yeast. In a small bowl, mix the warm water, 1 teaspoon of sugar, and 1 packet of yeast. Let it sit for 5 to 10 minutes. You want it to get frothy. This step wakes up the yeast, making your rolls rise.

Making the Dough

While the yeast works, grab a large mixing bowl. Whisk together 3 cups of flour, 1 teaspoon salt, 1 tablespoon of dried Italian seasoning, and 1 teaspoon garlic powder. Once the yeast looks frothy, pour it into the bowl with the dry mix. Add ¼ cup of melted unsalted butter. Stir until a dough forms.

Kneading and Rising the Dough

Now, sprinkle some flour on a clean surface. Knead the dough for about 5 to 7 minutes. You want it smooth and elastic. Once ready, place it in a greased bowl. Cover it with a damp cloth and let it rise in a warm spot for about 1 hour. It should double in size.

Shaping the Roll Balls

After the dough has risen, punch it down gently. Divide it into 12 equal pieces. Flatten each piece into a disc. Place a small amount of minced garlic and fresh herbs in the center. Fold the dough around the filling, then roll it into a ball. This step adds bursts of flavor.

Baking the Rolls

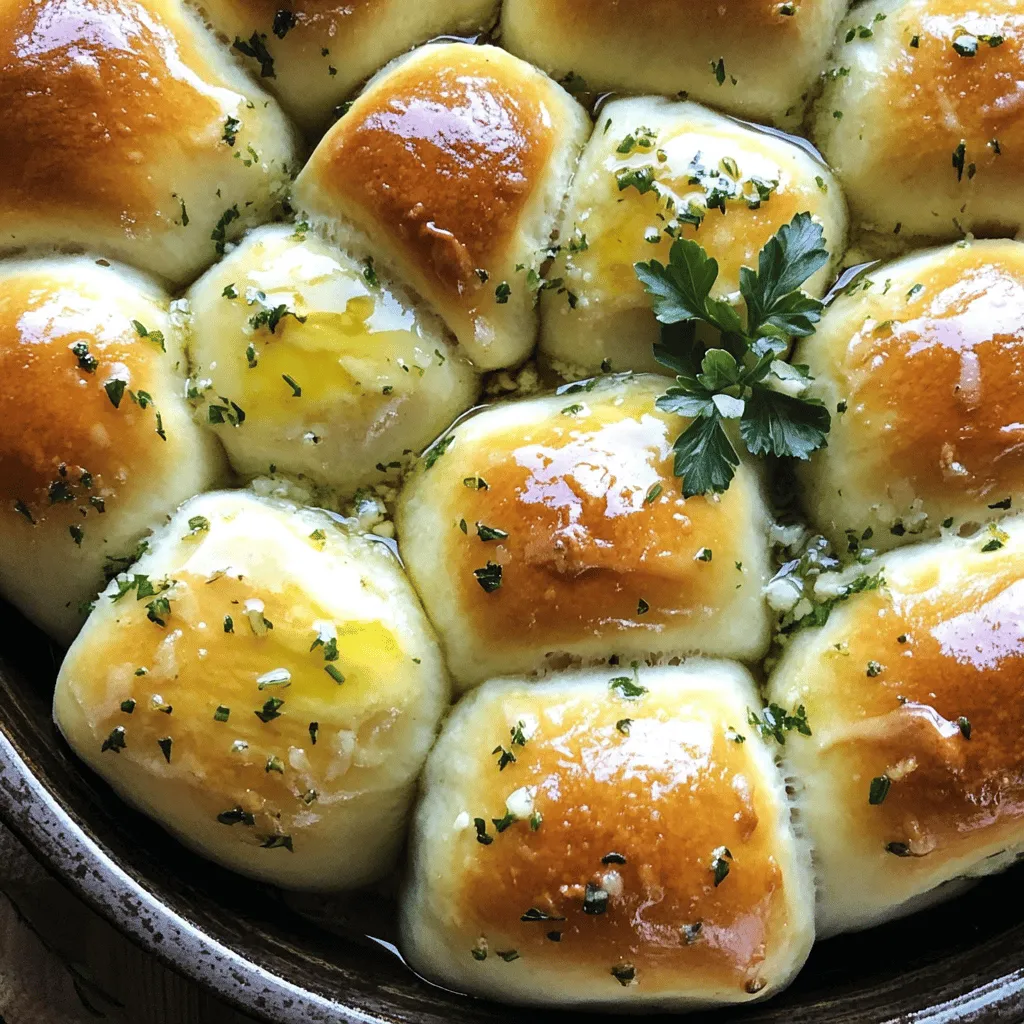
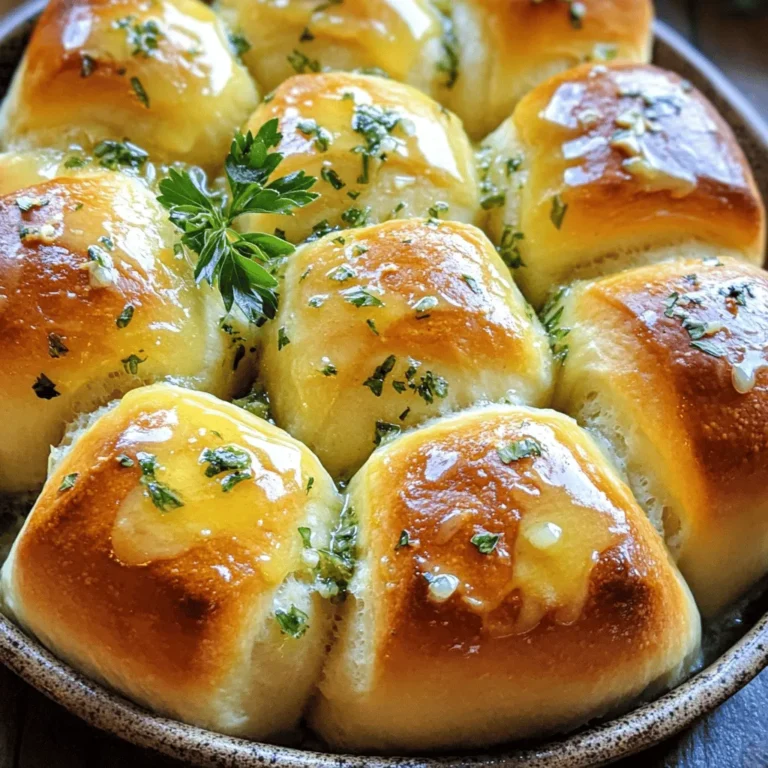
Preheat your oven to 350°F. Arrange the balls in a greased round baking pan. Leave a little space between them. Brush the tops with a beaten egg for a shiny finish. Optionally, sprinkle some salt and extra herbs on top. Bake for 20 to 25 minutes until golden brown. They should sound hollow when tapped. Once baked, brush with a bit more melted butter for extra shine.

Tips & Tricks

Perfecting the Dough Texture

To get the best dough, follow these steps. Use warm water around 110°F. This helps activate the yeast. Knead the dough well for 5-7 minutes. The dough should feel smooth and elastic. If it’s too sticky, add a bit more flour. If it’s too dry, sprinkle in a little water. The right texture makes all the difference.

Enhancing Flavor with Additional Herbs

You can boost the flavor with more fresh herbs. Try adding basil or oregano for a unique twist. Mix different herbs to find your favorite combo. You can also swap out the garlic for roasted garlic for a sweeter taste. The key is to experiment. Taste as you go to find the perfect blend.

Troubleshooting Common Issues

Sometimes, dough can be tricky. If your rolls don’t rise, your water might be too hot or too cold. Make sure it’s warm, not hot. If the dough is dense, it may not have risen long enough. Give it more time in a warm spot. For rolls that don’t brown, check your oven temperature. It should be preheated to 350°F. If they are too brown, cover them with foil. These tips help you achieve the perfect pull-apart rolls every time.
Variations

Cheese-Stuffed Pull-Apart Rolls

To add a cheesy twist, try cheese-stuffed pull-apart rolls. Use mozzarella or cheddar cheese. When shaping the roll balls, place a cube of cheese in the center before sealing. The cheese melts and creates a gooey, delicious surprise in every bite. This adds creaminess and richness that pairs well with garlic and herbs.

Different Herb Combinations

Herb garlic pull-apart rolls are flexible. You can swap herbs for new flavors. Try using basil, oregano, or dill. Mix and match to find your favorite blend. Fresh herbs elevate the taste and aroma, while dried herbs can add depth if fresh ones aren’t available. Experimenting with herbs makes each batch unique!

Using Whole Wheat Flour for a Healthier Version

For a healthier option, use whole wheat flour instead of all-purpose flour. Whole wheat flour adds fiber and nutrients. Just keep in mind that your rolls may be denser and have a nuttier flavor. You can mix whole wheat flour with all-purpose flour for a balanced texture. This small change makes your snack a bit healthier without losing taste.

Storage Info

How to Store Leftover Rolls

To keep your leftover rolls fresh, place them in a sealed bag or an airtight container. This method helps prevent them from drying out. You can store them at room temperature for up to two days. If you want to keep them longer, consider freezing.

Freezing Instructions

To freeze your herb garlic pull-apart rolls, let them cool completely first. Then, wrap each roll tightly in plastic wrap. Place the wrapped rolls in a freezer-safe bag. They will stay good for up to three months. When you’re ready to enjoy them, just thaw them in the fridge overnight.

Reheating Techniques for Freshness

To reheat your rolls, preheat the oven to 350°F (175°C). Remove the rolls from any wrapping and place them on a baking sheet. Heat them for about 10-15 minutes until warm. If you want a soft texture, cover them with foil. For a crispy top, leave them uncovered for the last few minutes. Enjoy your warm rolls just like fresh!

FAQs

Can I use instant yeast instead of active dry yeast?

Yes, you can use instant yeast. Instant yeast works faster. You do not need to proof it in water. Just mix it with the dry ingredients. It saves time and still gives great results.

What is the best way to reheat leftover rolls?

To reheat leftover rolls, wrap them in foil. Place them in a preheated oven at 350°F (175°C) for about 10-15 minutes. This keeps them soft and warm. You can also use a microwave. Just heat them for 10-15 seconds. They will not be as soft but still tasty.

How can I make these rolls dairy-free?

To make these rolls dairy-free, replace the butter with a dairy-free alternative. You can use olive oil or coconut oil. Both work well and add flavor. Make sure your alternative is melted before mixing it into the dough.

How long do these rolls last at room temperature?

These rolls last about 2-3 days at room temperature. Store them in an airtight container. If you want to keep them longer, freeze them. They can last up to 3 months in the freezer. Just thaw and reheat when ready to enjoy.

In this blog post, we explored the world of herb garlic pull-apart rolls. We covered key ingredients, tasty variations, and tools you need. I shared step-by-step instructions to make your baking easy. Helpful tips helped enhance your rolls’ taste and texture. Remember, these rolls can be stored and reheated easily for later enjoyment. Baking is fun, and these rolls are sure to impress your family and friends. With practice, you’ll master this recipe and create delicious rolls every time. Enjoy your baking journey!
For these rolls, you will need: - 3 cups all-purpose flour - 1 packet (2 ¼ teaspoons) active dry yeast - 1 teaspoon sugar - 1 teaspoon salt - 1 cup warm water (about 110°F/43°C) - ¼ cup unsalted butter, melted - 4 cloves garlic, minced - 2 tablespoons fresh herbs (like rosemary, thyme, or parsley), finely chopped - 1 tablespoon dried Italian seasoning - 1 teaspoon garlic powder - 1 egg, beaten (for egg wash) These main ingredients work together to create a soft, flavorful roll. The garlic adds a rich taste, while the herbs bring freshness. To take your rolls up a notch, consider adding: - ½ cup shredded cheese (like mozzarella or cheddar) - A pinch of crushed red pepper for some heat - More fresh herbs, like basil or oregano These optional ingredients can make your rolls even tastier. Cheese adds creaminess, while red pepper brings a nice kick. For making these rolls, you will need: - Mixing bowls - Measuring cups and spoons - A whisk - A floured surface for kneading - A greased round baking pan - A damp cloth to cover the dough Having the right tools makes the process smoother. It helps you focus on creating those delicious rolls. Start by warming 1 cup of water. It should be about 110°F, perfect for yeast. In a small bowl, mix the warm water, 1 teaspoon of sugar, and 1 packet of yeast. Let it sit for 5 to 10 minutes. You want it to get frothy. This step wakes up the yeast, making your rolls rise. While the yeast works, grab a large mixing bowl. Whisk together 3 cups of flour, 1 teaspoon salt, 1 tablespoon of dried Italian seasoning, and 1 teaspoon garlic powder. Once the yeast looks frothy, pour it into the bowl with the dry mix. Add ¼ cup of melted unsalted butter. Stir until a dough forms. Now, sprinkle some flour on a clean surface. Knead the dough for about 5 to 7 minutes. You want it smooth and elastic. Once ready, place it in a greased bowl. Cover it with a damp cloth and let it rise in a warm spot for about 1 hour. It should double in size. After the dough has risen, punch it down gently. Divide it into 12 equal pieces. Flatten each piece into a disc. Place a small amount of minced garlic and fresh herbs in the center. Fold the dough around the filling, then roll it into a ball. This step adds bursts of flavor. Preheat your oven to 350°F. Arrange the balls in a greased round baking pan. Leave a little space between them. Brush the tops with a beaten egg for a shiny finish. Optionally, sprinkle some salt and extra herbs on top. Bake for 20 to 25 minutes until golden brown. They should sound hollow when tapped. Once baked, brush with a bit more melted butter for extra shine. To get the best dough, follow these steps. Use warm water around 110°F. This helps activate the yeast. Knead the dough well for 5-7 minutes. The dough should feel smooth and elastic. If it's too sticky, add a bit more flour. If it’s too dry, sprinkle in a little water. The right texture makes all the difference. You can boost the flavor with more fresh herbs. Try adding basil or oregano for a unique twist. Mix different herbs to find your favorite combo. You can also swap out the garlic for roasted garlic for a sweeter taste. The key is to experiment. Taste as you go to find the perfect blend. Sometimes, dough can be tricky. If your rolls don’t rise, your water might be too hot or too cold. Make sure it’s warm, not hot. If the dough is dense, it may not have risen long enough. Give it more time in a warm spot. For rolls that don’t brown, check your oven temperature. It should be preheated to 350°F. If they are too brown, cover them with foil. These tips help you achieve the perfect pull-apart rolls every time. {{image_2}} To add a cheesy twist, try cheese-stuffed pull-apart rolls. Use mozzarella or cheddar cheese. When shaping the roll balls, place a cube of cheese in the center before sealing. The cheese melts and creates a gooey, delicious surprise in every bite. This adds creaminess and richness that pairs well with garlic and herbs. Herb garlic pull-apart rolls are flexible. You can swap herbs for new flavors. Try using basil, oregano, or dill. Mix and match to find your favorite blend. Fresh herbs elevate the taste and aroma, while dried herbs can add depth if fresh ones aren’t available. Experimenting with herbs makes each batch unique! For a healthier option, use whole wheat flour instead of all-purpose flour. Whole wheat flour adds fiber and nutrients. Just keep in mind that your rolls may be denser and have a nuttier flavor. You can mix whole wheat flour with all-purpose flour for a balanced texture. This small change makes your snack a bit healthier without losing taste. To keep your leftover rolls fresh, place them in a sealed bag or an airtight container. This method helps prevent them from drying out. You can store them at room temperature for up to two days. If you want to keep them longer, consider freezing. To freeze your herb garlic pull-apart rolls, let them cool completely first. Then, wrap each roll tightly in plastic wrap. Place the wrapped rolls in a freezer-safe bag. They will stay good for up to three months. When you're ready to enjoy them, just thaw them in the fridge overnight. To reheat your rolls, preheat the oven to 350°F (175°C). Remove the rolls from any wrapping and place them on a baking sheet. Heat them for about 10-15 minutes until warm. If you want a soft texture, cover them with foil. For a crispy top, leave them uncovered for the last few minutes. Enjoy your warm rolls just like fresh! Yes, you can use instant yeast. Instant yeast works faster. You do not need to proof it in water. Just mix it with the dry ingredients. It saves time and still gives great results. To reheat leftover rolls, wrap them in foil. Place them in a preheated oven at 350°F (175°C) for about 10-15 minutes. This keeps them soft and warm. You can also use a microwave. Just heat them for 10-15 seconds. They will not be as soft but still tasty. To make these rolls dairy-free, replace the butter with a dairy-free alternative. You can use olive oil or coconut oil. Both work well and add flavor. Make sure your alternative is melted before mixing it into the dough. These rolls last about 2-3 days at room temperature. Store them in an airtight container. If you want to keep them longer, freeze them. They can last up to 3 months in the freezer. Just thaw and reheat when ready to enjoy. In this blog post, we explored the world of herb garlic pull-apart rolls. We covered key ingredients, tasty variations, and tools you need. I shared step-by-step instructions to make your baking easy. Helpful tips helped enhance your rolls’ taste and texture. Remember, these rolls can be stored and reheated easily for later enjoyment. Baking is fun, and these rolls are sure to impress your family and friends. With practice, you’ll master this recipe and create delicious rolls every time. Enjoy your baking journey!

Herb Garlic Pull-Apart Rolls

Indulge in these delicious Herb Garlic Pull-Apart Rolls that are perfect for any gathering! With simple ingredients like fresh garlic and herbs, these warm, buttery rolls are easy to make and irresistibly tasty. Follow our step-by-step guide to create a crowd-pleaser that will elevate your dining experience. Don't miss out—click through to explore the full recipe and get baking today!

Ingredients
  

3 cups all-purpose flour

1 packet (2 ¼ teaspoons) active dry yeast

1 teaspoon sugar

1 teaspoon salt

1 cup warm water (about 110°F/43°C)

¼ cup unsalted butter, melted

4 cloves garlic, minced

2 tablespoons fresh herbs (such as rosemary, thyme, or parsley), finely chopped

1 tablespoon dried Italian seasoning

1 teaspoon garlic powder

1 egg, beaten (for egg wash)

Instructions
 

In a small bowl, combine warm water, sugar, and yeast. Allow it to sit for about 5-10 minutes until frothy.

    In a large mixing bowl, whisk together flour, salt, garlic powder, and Italian seasoning.

      Add the frothy yeast mixture and melted butter to the dry ingredients. Mix until a dough forms.

        Knead the dough on a floured surface for about 5-7 minutes until smooth and elastic.

          Place the dough in a greased bowl, cover it with a damp cloth, and let it rise in a warm place for about 1 hour, or until doubled in size.

            Preheat the oven to 350°F (175°C).

              Punch down the risen dough and divide it into 12 equal pieces.

                Flatten each piece into a disc, then place a small amount of minced garlic and herbs in the center. Fold the dough around the filling and roll into a ball.

                  Arrange the balls in a greased round baking pan, spacing them slightly apart.

                    Brush the tops with the beaten egg, and sprinkle a bit of salt and extra herbs on top if desired.

                      Bake for 20-25 minutes or until golden brown and the rolls sound hollow when tapped.

                        Once done, remove from the oven and brush with a little more melted butter for a shiny finish.

                          Prep Time: 15 minutes | Total Time: 1 hour 45 minutes | Servings: 12

                            - Presentation Tips: Serve the rolls warm in the baking pan, or stack them in a breadbasket lined with a kitchen towel. Garnish with a sprig of fresh herbs for an inviting look!

                              WANT TO SAVE THIS RECIPE?

                              Leave a Comment

                              Recipe Rating