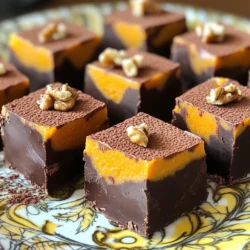
If you’re looking for a treat that combines rich chocolate with the cozy taste of pumpkin, you’re in for a delight! This No-Bake Chocolate Pumpkin Fudge is easy to make and perfect for any gathering. I’ll guide you through each step and share handy tips to ensure success. Whether you’re a baking newbie or a pro, this fun recipe will satisfy your sweet tooth. Let’s dive into the delicious world of fudge!
Ingredients
List of Ingredients
– 1 cup canned pumpkin puree
– 1 cup creamy almond butter (or peanut butter)
– 1/4 cup maple syrup
– 1 cup cocoa powder
– 1 teaspoon vanilla extract
– 1 teaspoon pumpkin spice (or a mix of cinnamon, nutmeg, and ginger)
– A pinch of sea salt
– 1/2 cup dark chocolate chips (dairy-free if preferred)
– Chopped walnuts or pecans for garnish (optional)
These ingredients blend to create a rich, creamy fudge. The pumpkin adds flavor and moisture. Almond or peanut butter adds a nutty base. Maple syrup sweetens without being too sweet. Cocoa powder gives the fudge its deep chocolate taste. Vanilla and pumpkin spice enhance the overall flavor. Sea salt balances the sweetness, while chocolate chips add delightful bites. You can top the fudge with nuts for extra crunch.
Recommended Ingredient Brands
For the best results, I suggest these brands:
– Pumpkin Puree: Libby’s or Farmer’s Market Organic
– Almond Butter: Justin’s or Whole Foods 365
– Maple Syrup: Grade A Pure Maple Syrup
– Cocoa Powder: Hershey’s or Ghirardelli
– Dark Chocolate Chips: Enjoy Life (for dairy-free) or Ghirardelli
These brands deliver high quality and great flavor, which is key for this fudge recipe.
Substitutions for Dietary Preferences
You can adjust this recipe for different diets:
– Nut-Free: Use sunflower seed butter instead of almond or peanut butter.
– Vegan: Ensure the dark chocolate chips are dairy-free and use maple syrup.
– Gluten-Free: All ingredients listed are naturally gluten-free.
– Lower Sugar: Use less maple syrup or try a sugar substitute.
These options help you enjoy this fudge while meeting your dietary needs.
Step-by-Step Instructions
Preparation Overview
To make No-Bake Chocolate Pumpkin Fudge, gather all your ingredients first. This recipe is simple and quick. It takes about 10 minutes to prep and 2 hours to chill. You’ll need a large mixing bowl, a spatula, and an 8×8 inch baking dish lined with parchment paper.
Detailed Mixing Instructions
Start by mixing these ingredients in a large bowl:
– 1 cup canned pumpkin puree
– 1 cup creamy almond butter (or peanut butter)
– 1/4 cup maple syrup
Stir until smooth. Next, add:
– 1 cup cocoa powder
– 1 teaspoon vanilla extract
– 1 teaspoon pumpkin spice
– A pinch of sea salt
Mix until there are no lumps left. This step is important for a creamy fudge. Now, gently fold in:
– 1/2 cup dark chocolate chips
Ensure the chips are well spread throughout the mix.
Setting and Cutting the Fudge
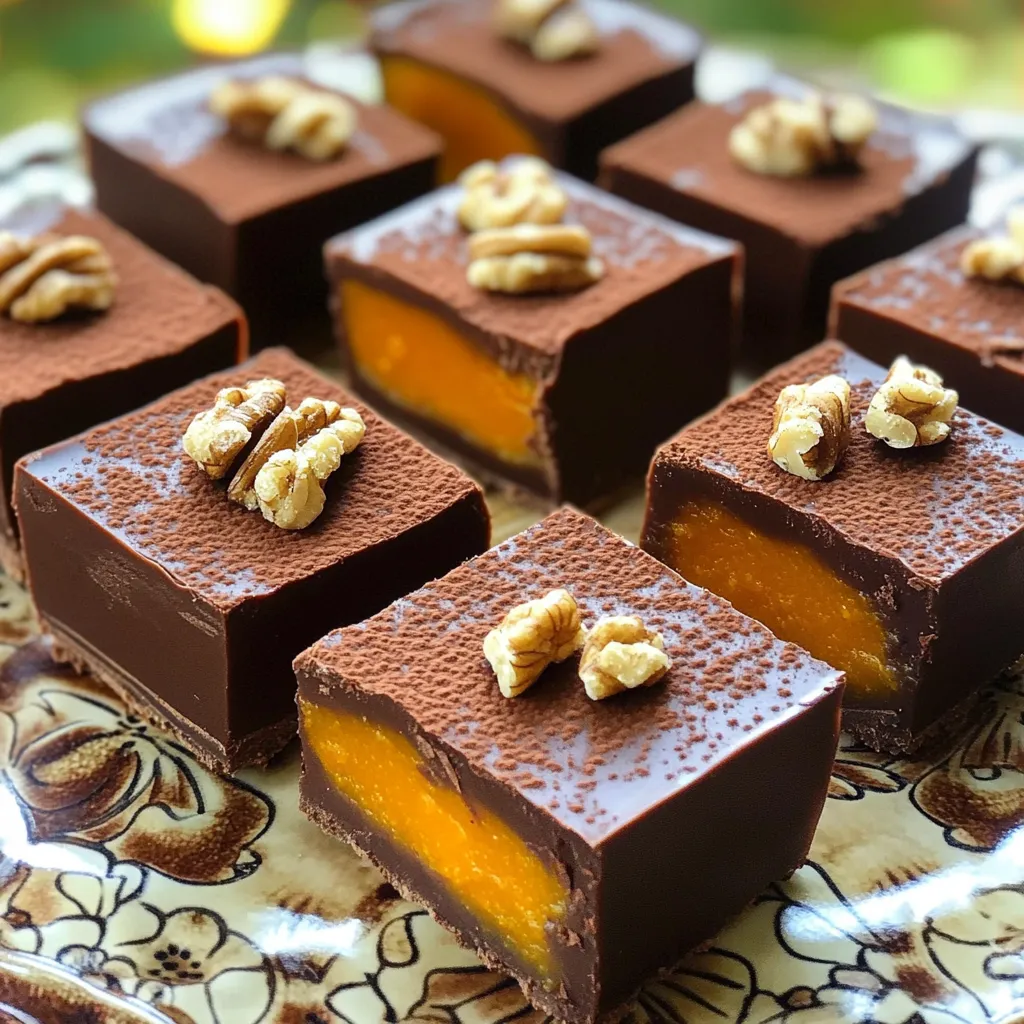
Line your baking dish with parchment paper. Leave some paper hanging over the edges. This will help you lift the fudge out later. Pour the mixture into the dish. Press it down with a spatula for an even layer. If you like, sprinkle chopped walnuts or pecans on top for extra crunch.
Cover the dish with plastic wrap. Refrigerate the fudge for at least 2 hours. This step helps it set properly. Once set, lift the fudge out using the parchment overhang. Cut it into bite-sized squares. Enjoy your easy, tasty treat!
Tips & Tricks
How to Achieve the Perfect Texture
To get the best texture, mix your pumpkin puree and almond butter well. Ensure they blend until smooth. This step prevents lumps in your fudge. When adding cocoa powder and spices, stir slowly. This gives a rich, even taste. Press the fudge firmly in the pan. A flat surface helps the fudge set better. Refrigerate for at least two hours. This helps the fudge firm up nicely.
Common Mistakes to Avoid
One common mistake is not measuring ingredients correctly. Use measuring cups for accuracy. Another mistake is not mixing well. Lumps can ruin your fudge’s texture. Avoid using too much cocoa powder; it can make the fudge bitter. Don’t skip the sea salt; it balances the sweetness. Lastly, be patient while refrigerating. Cutting too soon can lead to a messy fudge.
Serving Suggestions
For a fun twist, serve the fudge on a colorful plate. Dust it with cocoa powder or drizzle melted chocolate on top. You can also add chopped walnuts or pecans for crunch. Pair your fudge with a cold glass of almond milk or hot cocoa. It’s a delightful treat for any gathering or cozy night in!
Variations
Flavor Combinations to Try
You can play with flavors in this fudge. Try adding a splash of maple extract for extra sweetness. A pinch of chili powder can add a nice kick. Or, swap pumpkin spice for chai spice for a warm, cozy vibe. You can also mix in crushed peppermint for a cool twist. Each change makes the fudge a new treat.
Vegan and Gluten-Free Adjustments
This fudge can easily go vegan. Just use maple syrup and almond butter with no dairy. For gluten-free options, all the ingredients are safe. Always check labels when buying chocolate chips. This way, you keep it gluten-free without a worry.
Topping Ideas
Toppings add flair and crunch to your fudge. Try sprinkling sea salt for a sweet-salty mix. Chopped nuts, like walnuts or pecans, give a nice crunch. You can also drizzle melted chocolate on top for extra sweetness. Dried fruit, like cranberries or cherries, can add a fruity touch. Each topping makes your fudge unique and special.
Storage Info
Best Practices for Storing Fudge
To keep your no-bake chocolate pumpkin fudge fresh, store it in an airtight container. This keeps moisture out and helps maintain the fudge’s rich texture. Always layer parchment paper between fudge squares to prevent sticking. You can also wrap individual squares in plastic wrap for easy snacking.
How Long Does It Last in the Fridge?
When stored properly in the fridge, your fudge can last up to two weeks. If you notice any changes in smell or texture, it’s best to toss it out. Always check your fudge before enjoying it!
Freezing Instructions
If you want to keep your fudge longer, freezing is a great option. Cut the fudge into squares and place them in a single layer on a baking sheet. Once frozen, transfer them to a freezer bag or airtight container. Your fudge can last for up to three months in the freezer. To enjoy, simply thaw in the fridge overnight before serving.
FAQs
Can I use other nut butters for this recipe?
Yes, you can use other nut butters. Peanut butter works well. Sunflower seed butter is a good nut-free choice. Just remember that flavors may change slightly. Almond butter gives a nice creamy texture and taste.
Is there a way to make this fudge less sweet?
Absolutely! You can reduce the maple syrup. Try using only two tablespoons. You may also add more cocoa powder to balance the sweetness. Dark chocolate chips can be replaced with unsweetened chips to cut sugar.
How can I tell when the fudge is set?
The fudge will feel firm to the touch. It should not stick to your fingers. After two hours in the fridge, check its consistency. If it holds shape when you press it, it’s ready.
This blog post covered the key ingredients and detailed steps to make fudge. You learned the best brands, easy swaps, and tips for perfect texture. I shared fun variations and storage tips to keep your fudge fresh. Remember, small changes can make a big difference. Enjoy exploring flavors and sharing this treat with others. By following these steps, you can create fudge that pleases everyone. Your next batch will surely be a hit!