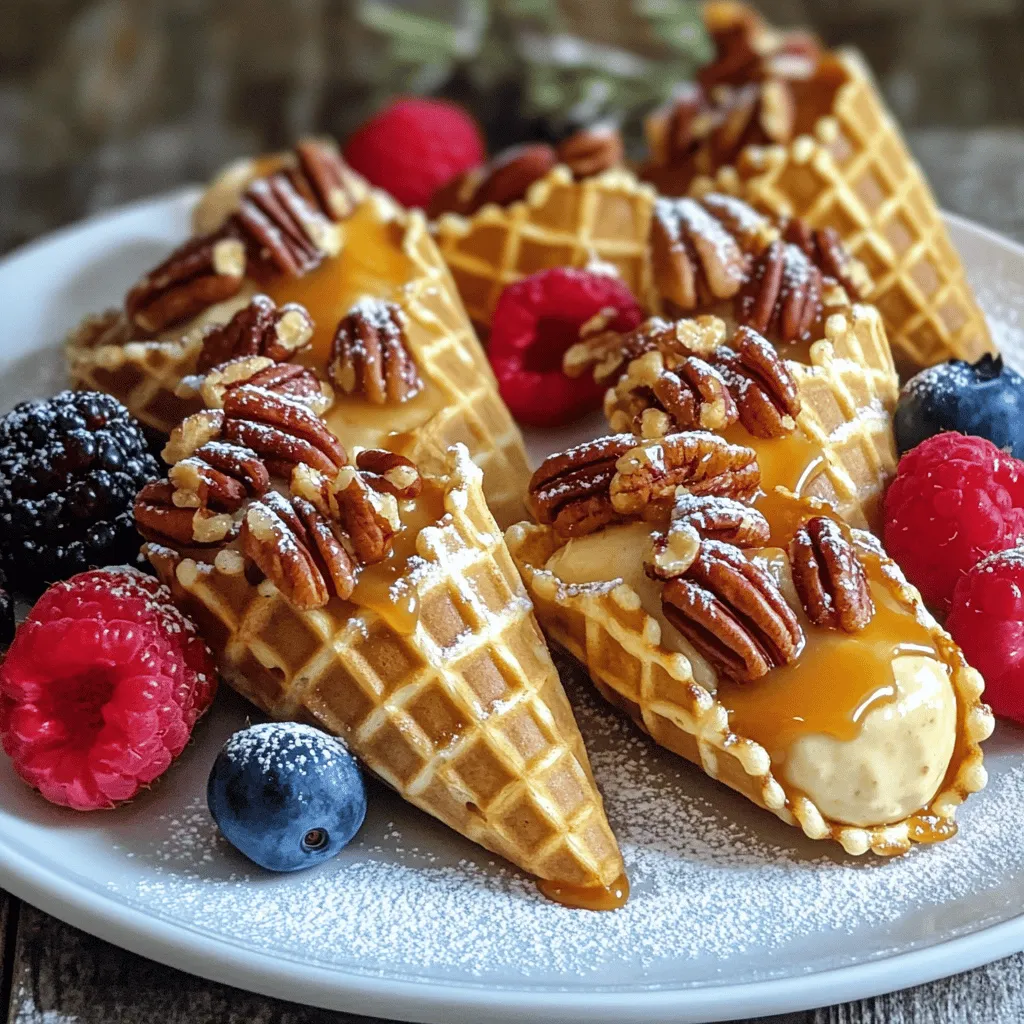
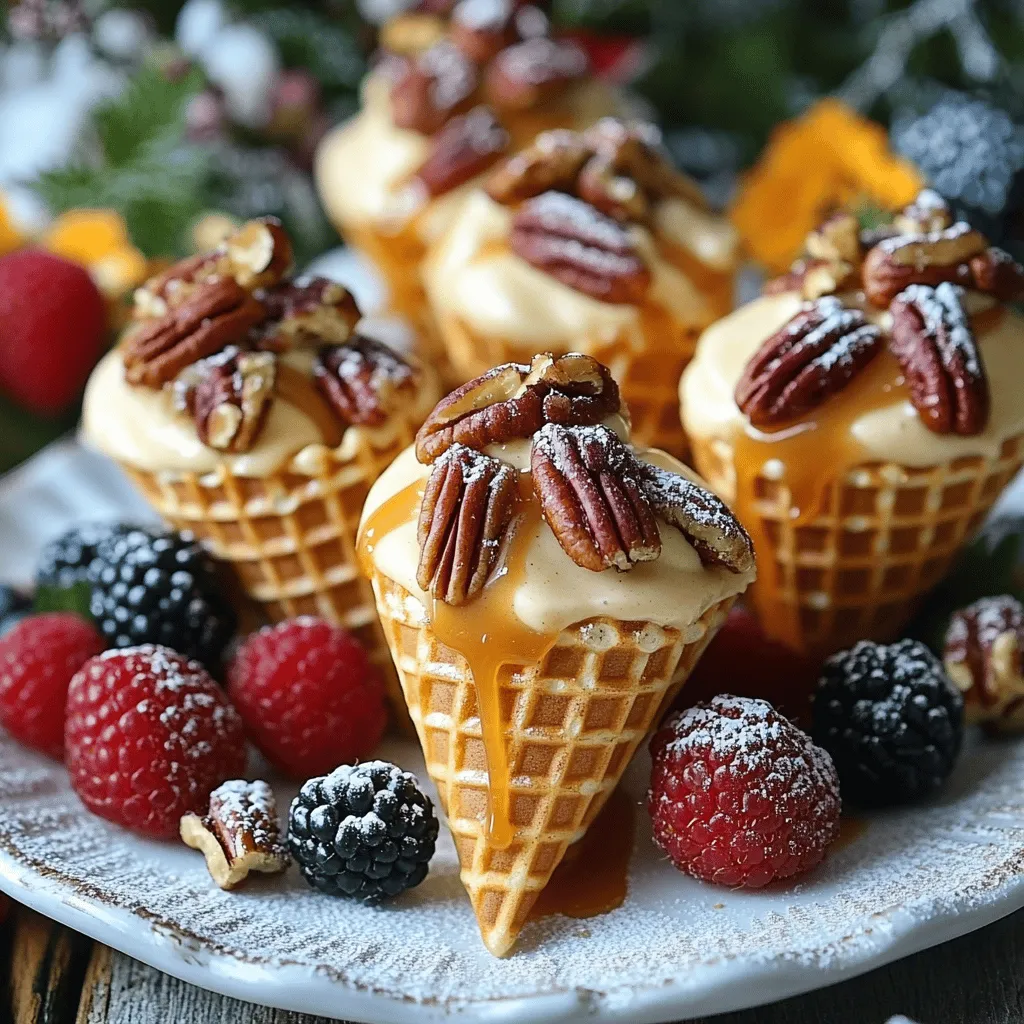
Looking for a fun and tasty dessert? Cheesecake Praline Cones are here to brighten your day! This easy recipe combines creamy cheesecake filling, crunchy pecans, and sweet caramel, all served in adorable mini waffle cones. Perfect for parties or a sweet treat at home, these cones will wow your friends and family. Join me as we dive into each simple step to create this delightful dessert that everyone will love!
Ingredients
Detailed List of Ingredients
– 1 cup cream cheese, softened
– 1/2 cup powdered sugar
– 1 teaspoon vanilla extract
– 1 cup heavy whipping cream
– 1/4 cup caramel sauce
– 1/2 cup pecans, chopped
– 1/4 cup butter, melted
– 1 tablespoon brown sugar
– 8 mini waffle cones
– Fresh berries (strawberries, blueberries, or raspberries) for garnish
Choosing the right ingredients makes all the difference. High-quality cream cheese provides a rich taste. Fresh berries add a pop of color and flavor. I always prefer to use a real caramel sauce for its depth.
Ingredient Substitutions
Do you want to switch things up? You can use alternative sweeteners for the powdered sugar. This can help with dietary needs. For a non-dairy option, try cashew cream instead of cream cheese. Coconut cream works well in place of heavy cream. You can also swap pecans for walnuts or almonds for a twist.
Importance of Quality Ingredients
Fresh berries are a must for garnish. They enhance the look and taste of your dessert. Using high-quality caramel sauce elevates the sweet factor. Cheap sauces can taste artificial. Always pick the best ingredients for a perfect cheesecake praline cone.
Step-by-Step Instructions
Preparation Steps
1. Mixing the cream cheese and powdered sugar
Start with a large mixing bowl. Beat 1 cup of softened cream cheese with an electric mixer. Add in 1/2 cup of powdered sugar and 1 teaspoon of vanilla extract. Mix until it is smooth and creamy.
2. Whipping the heavy cream
In another bowl, pour in 1 cup of heavy whipping cream. Use a mixer to whip it until stiff peaks form. This step is important to give your cones a light texture.
3. Toasting the pecans
In a skillet, melt 1/4 cup of butter over medium heat. Add 1/2 cup of chopped pecans and 1 tablespoon of brown sugar. Stir constantly for about 3-4 minutes. You want the pecans to toast and the sugar to caramelize. Then, remove them from heat and let them cool.
Assembly Process
1. Drizzling caramel sauce inside the cones
Take your mini waffle cones. Drizzle 1/4 cup of caramel sauce inside each cone. This adds sweetness and keeps the filling in place.
2. Fill cones with cheesecake mixture
Spoon the cheesecake mixture into the cones. Pack it tightly so it doesn’t fall out. Make sure each cone is filled to the top.
3. Topping with pecans and extra caramel
Sprinkle the toasted pecans over the cheesecake filling. Finish by drizzling extra caramel sauce on top. This creates a delicious crunch and adds more flavor.
Presentation Tips
1. How to display cheesecake praline cones
Arrange the cones upright in a cup or a cone holder. This makes them look fun and inviting. You can also dust the plates with powdered sugar for a fancy touch.
2. Creative garnishing ideas with berries
Add fresh berries like strawberries, blueberries, or raspberries on top of each cone. You can also place them around the cones on your serving platter. This adds color and freshness to your dessert.
Tips & Tricks
Common Mistakes to Avoid
– Overmixing the whipped cream: This can make it grainy and lose its lightness. Mix just until stiff peaks form.
– Under-toasting the pecans: Toasting brings out the flavor. Keep an eye on them so they do not burn.
Efficiency Tips
– Preparing ingredients in advance: Measure and prep all your ingredients before starting. This saves time and helps you stay organized.
– Using kitchen gadgets for ease: A hand mixer makes whipping cream easy. A nut chopper speeds up pecan preparation.
Serving Suggestions
– Ideal pairing with beverages: Cheesecake praline cones go great with coffee or sweet tea. These drinks balance the dessert’s sweetness.
– Perfect occasions for serving cheesecake praline cones: Serve at parties, picnics, or family gatherings. Their fun shape makes them a hit with kids and adults alike.
Variations
Flavor Variations
You can change up the flavor of your cheesecake praline cones. One great option is using chocolate cheesecake filling. To do this, simply add melted chocolate to the cream cheese mixture. This sweet twist will make your dessert even richer.
You can also add fruit purees or flavored extracts. Want a berry taste? Blend fresh strawberries or raspberries. Stir in the puree to the cheesecake filling for a fruity delight. Vanilla or almond extract can give it a nice twist, too.
Alternative Presentation Ideas
If you want to impress guests, try using larger waffle cones or cups. This gives you more space for filling and toppings. You can even create a sundae-style dessert. Just layer the cheesecake filling with ice cream, whipped cream, and toppings. It looks fun and tastes great!
Seasonal Variations
You can make your cheesecake praline cones fit any season. For holidays, add themed toppings. Use crushed candy canes for Christmas or sprinkles for birthdays.
Incorporating seasonal fruits is another fun idea. In summer, use fresh peaches or cherries. In fall, try pumpkin spice with your cheesecake filling. Each season offers new flavors to explore!
Storage Info
Best Practices for Storage
To keep your filled cheesecake praline cones fresh, store them in an airtight container. This protects them from drying out or absorbing other odors. Place parchment paper between the cones and the lid. This way, toppings stay crunchy.
For the ingredients, keep the cream cheese and heavy cream in the fridge. Make sure they are tightly sealed. This helps maintain their freshness. Store chopped pecans in a cool, dry place in a sealed bag.
Shelf Life
In the refrigerator, the filled cones last about 1 to 2 days. They taste best when fresh. If you want to enjoy them later, consider freezing the components separately. Freeze the cheesecake filling and pecans in airtight containers. You can assemble the cones when you’re ready to serve.
Reheating Tips
If you need to reheat caramel sauce, use a small pot on low heat. Stir it gently until warm. Avoid boiling the sauce, as it may change the texture. You can also microwave it in short bursts, stirring in between. This keeps the sauce smooth and creamy.
FAQs
What is the origin of Cheesecake Praline Cones?
Cheesecake Praline Cones blend two popular treats: cheesecake and pralines. Cheesecake has roots in ancient Greece. They made a cheese dish for athletes at the Olympics. Over the years, it became a favorite dessert worldwide. Pralines, made with nuts and sugar, began in France. They add a sweet crunch to many desserts. The idea of putting cheesecake into a cone is modern. It makes a fun, portable dessert that everyone loves.
Can I make Cheesecake Praline Cones ahead of time?
Yes, you can make these cones ahead of time! Prepare the cheesecake filling the day before. Store it in the fridge in an airtight container. You can also toast the pecans ahead. Just keep them in a separate container. Fill the cones only when you’re ready to serve. This keeps the cones crisp and fresh.
Where can I buy Cheesecake Praline Cones?
You can find Cheesecake Praline Cones at local bakeries. Check specialty dessert shops too. Some ice cream shops may offer them as well. If you do not see them, ask the staff. They might make them upon request.
How can I make this recipe gluten-free?
For gluten-free Cheesecake Praline Cones, use gluten-free waffle cones. Many stores sell these now. Check the ingredients to ensure they are gluten-free. You can also use gluten-free caramel sauce. This keeps the dessert safe for those avoiding gluten. Just make sure all your other ingredients are gluten-free too.
In this post, we covered how to make delicious Cheesecake Praline Cones. We explored ingredients, their substitutes, and the importance of quality items. I shared step-by-step instructions for preparation and assembly, along with helpful tips to avoid common mistakes. We looked at creative variations and smart storage practices to keep your cones fresh.
Remember, these cones are fun to make and perfect for gatherings. Enjoy the process and get creative with flavors!