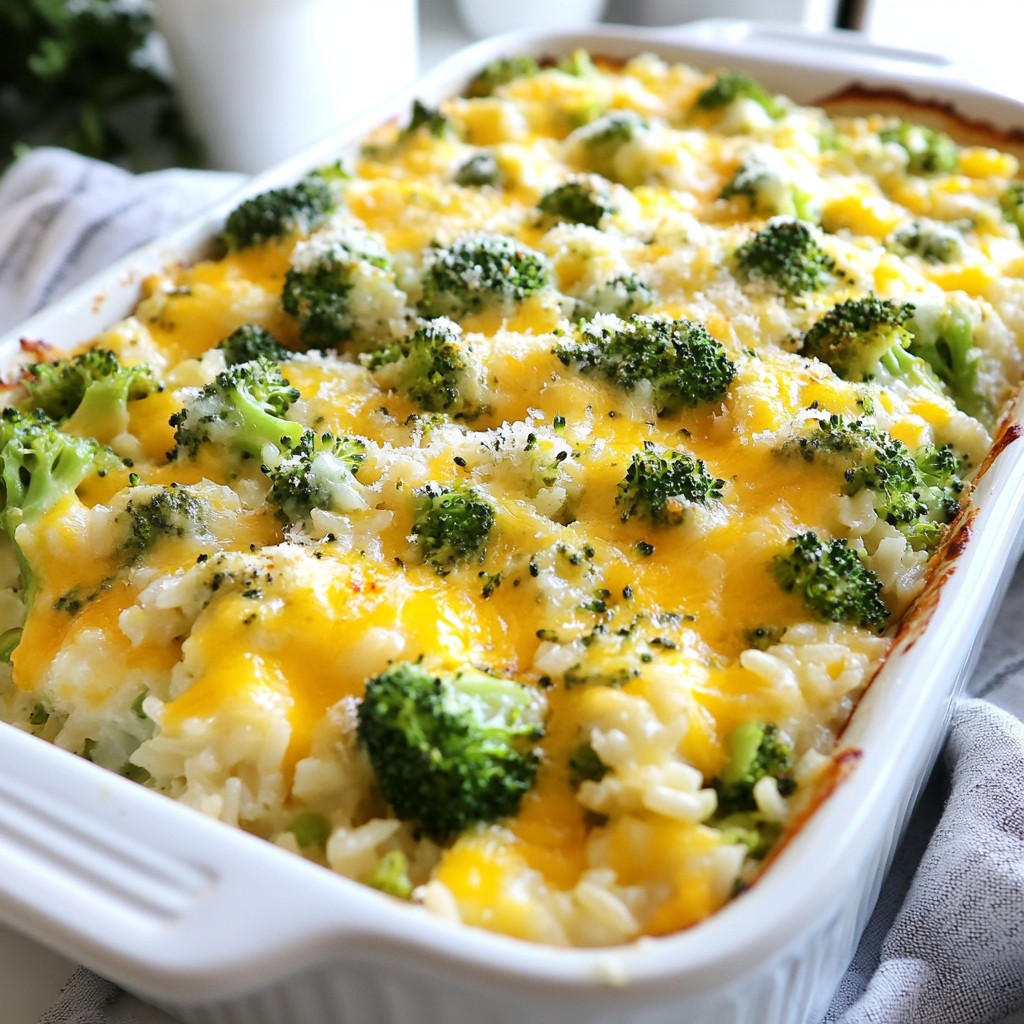
Looking for an easy meal that your whole family will love? This Cheesy Broccoli Rice Casserole hits the spot! It's creamy, cheesy, and packed with fresh veggies. Perfect for weeknight dinners, this dish is a crowd-pleaser and a breeze to make. I'll walk you through the simple steps, share tips for success, and show you tasty variations. Get ready to whip up a delicious family favorite!
Why I Love This Recipe
- Comfort Food: This cheesy broccoli rice casserole is the ultimate comfort food, perfect for cozy dinners or family gatherings.
- Nutritious Ingredients: Packed with fresh broccoli and brown rice, this dish provides essential nutrients while still being delicious.
- Easy to Make: With simple ingredients and straightforward steps, this recipe is beginner-friendly and quick to prepare.
- Customizable: You can easily customize this casserole by adding your favorite proteins or vegetables for a personal touch.
Ingredients
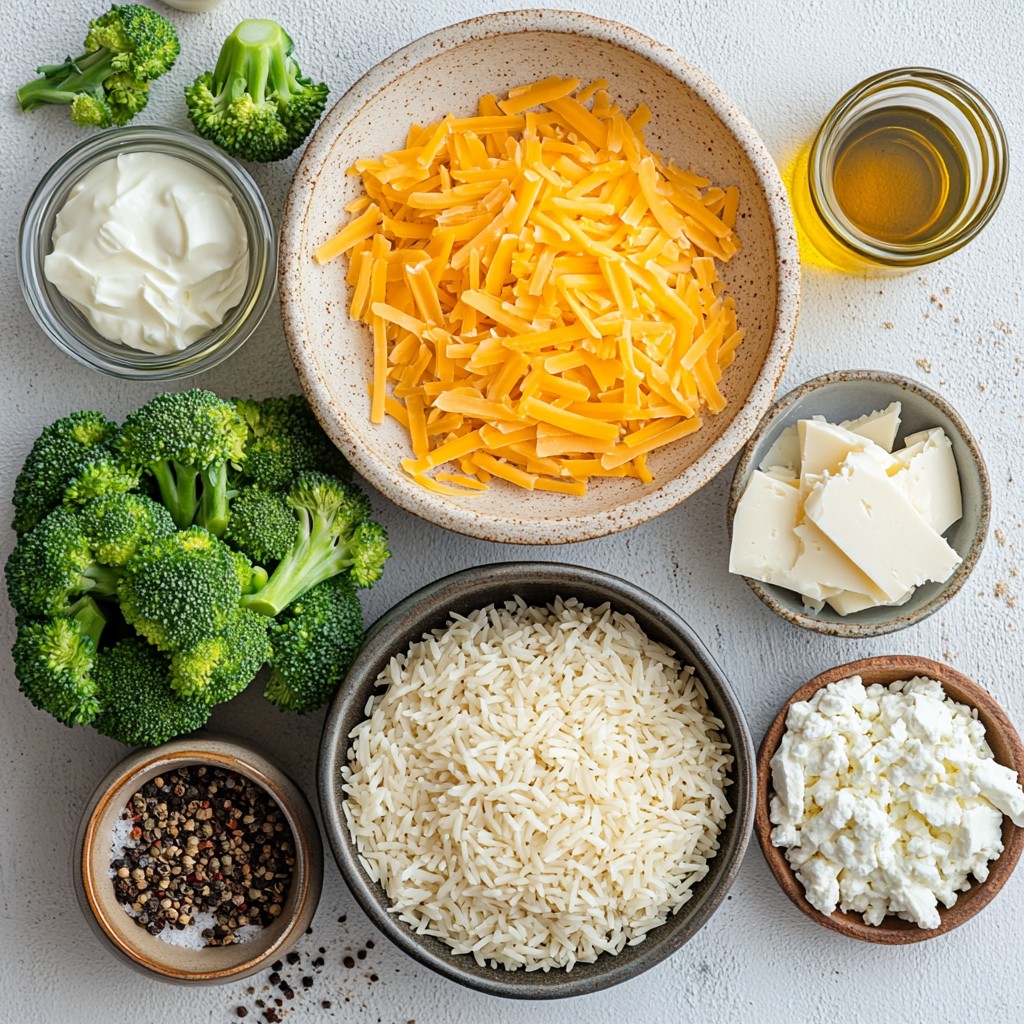
List of Ingredients
- 1 cup uncooked brown rice
- 2 cups vegetable broth
- 3 cups fresh broccoli florets
- 1 cup shredded cheddar cheese
- 1 cup cottage cheese
- 1/2 cup cream cheese, softened
- 1/2 cup grated Parmesan cheese
- 1 small onion, finely chopped
- 2 cloves garlic, minced
- 1 teaspoon black pepper
- 1/2 teaspoon paprika
- 1/2 teaspoon salt
- 1 tablespoon olive oil
Nutritional Information
This casserole serves 6 to 8 people. Each serving contains about:
- Calories: 320
- Protein: 15g
- Carbohydrates: 30g
- Fat: 15g
- Fiber: 4g
It is a balanced meal. You get protein from cheese and rice. Broccoli adds fiber and vitamins.
Substitutions and Alternatives
You can switch some ingredients to fit your diet:
- Use white rice instead of brown rice for a quicker cook time.
- Swap vegetable broth for chicken broth for more flavor.
- If you want it creamier, use ricotta cheese instead of cottage cheese.
- Use any cheese you like, such as mozzarella or gouda.
- For a vegan version, use vegan cheese and tofu instead of cream cheese.
These changes keep the dish tasty and fun!
Step-by-Step Instructions
Preparation of Rice
Start by rinsing 1 cup of uncooked brown rice. This removes excess starch. Next, combine the rice with 2 cups of vegetable broth in a medium saucepan. Bring it to a boil over high heat. Once boiling, lower the heat and cover the pot. Let it simmer for about 40-45 minutes. Check if the rice is tender and the broth is absorbed. Once done, remove the saucepan from heat and set the rice aside.
Sautéing the Vegetables
While the rice cooks, grab a large skillet and add 1 tablespoon of olive oil. Heat it over medium heat. Once hot, toss in 1 small onion, finely chopped. Sauté for about 3-4 minutes until the onion softens. Then, add 2 cloves of minced garlic. Cook for 1 more minute, stirring often. Now, it’s time to add 3 cups of fresh broccoli florets. Sauté these for 3-4 minutes. You want the broccoli to turn bright green and be slightly tender. After that, remove the skillet from heat.
Combining the Ingredients
In a large mixing bowl, combine your cooked rice and the sautéed broccoli mixture. Next, add in 1 cup of shredded cheddar cheese, 1 cup of cottage cheese, 1/2 cup of softened cream cheese, and 1/2 cup of grated Parmesan cheese. Mix everything well until all ingredients are combined. Season with 1 teaspoon of black pepper, 1/2 teaspoon of paprika, and 1/2 teaspoon of salt. Once seasoned, pour the mixture into a greased 9x13 inch baking dish. Spread it evenly. If you want, sprinkle extra cheddar cheese on top for a cheesy crust. Finally, bake it in a preheated oven at 350°F (175°C) for about 25-30 minutes. The cheese should be bubbly and slightly golden when done. Let it sit for 5 minutes before serving.
Tips & Tricks
Achieving the Perfect Cheese Melt
To get that gooey, melty cheese, use fresh cheese. Pre-shredded cheese often has added starch. This can stop it from melting well. Mix different cheeses for more flavor. I love using cheddar and cream cheese together. They melt beautifully and create a rich, creamy texture. Don't skip the topping! A sprinkle of extra cheddar before baking makes a nice crust.
Cooking Time Adjustments
Oven times can vary. Keep an eye on your casserole while it bakes. If your cheese isn’t bubbling yet, let it bake a bit longer. You want the edges to look golden brown. If you're using cooked rice, reduce baking time to about 15-20 minutes. This will keep your dish from drying out.
Best Practices for Prepping Ahead
You can prep this casserole ahead of time. Just make the mixture and store it in the fridge for up to 2 days. When you're ready, just pop it in the oven. If you freeze it, wrap it tightly. Thaw it in the fridge overnight before baking. This saves time on busy nights and keeps the meal fresh.
Pro Tips
- Cook Rice Ahead: For a quicker assembly, you can cook the brown rice a day in advance and store it in the refrigerator until ready to use.
- Broccoli Variations: Feel free to substitute fresh broccoli with other vegetables like cauliflower or spinach for different flavors and textures.
- Cheese Choices: Experiment with different types of cheese, such as gouda or mozzarella, to add unique flavors to the casserole.
- Make It Creamier: For an extra creamy texture, increase the amount of cream cheese or add a splash of heavy cream before baking.
Variations
Gluten-Free Options
To make this casserole gluten-free, swap brown rice for quinoa or cauliflower rice. Both options work well and keep the dish tasty. Quinoa adds protein, while cauliflower rice reduces carbs. Be sure to check your broth too. Choose a gluten-free vegetable broth to keep things safe for everyone.
Adding Protein
You can easily add protein to this dish. Cooked chicken, turkey, or even beans fit nicely. Just mix in about 1-2 cups of your choice before baking. This change makes it heartier and more filling. If you want a vegetarian option, try chickpeas or lentils for a protein boost.
Seasonal Vegetable Add-Ins
Feel free to get creative with seasonal veggies! In spring, add peas or asparagus. In summer, bell peppers or zucchini shine. In fall, try adding spinach or kale. Simply sauté your chosen veggies with the onions and garlic. These add-ins give new flavors and colors to your casserole, so don’t be shy to experiment!
Storage Info
How to Store Leftovers
To store leftover cheesy broccoli rice casserole, let it cool first. Place the casserole in an airtight container. This keeps it fresh. Store it in your fridge for up to three days. Make sure to label the container. This helps you remember when you made it.
Freezing Instructions
If you want to freeze the casserole, use a freezer-safe dish. Cover it tightly with plastic wrap and foil. This helps prevent freezer burn. You can freeze it for up to three months. When you’re ready to eat, thaw it in the fridge overnight.
Reheating Tips
To reheat your casserole, preheat your oven to 350°F (175°C). Place the casserole in an oven-safe dish. Cover it with foil to keep it moist. Heat for about 20 minutes or until hot. You can also use a microwave. Just heat it in short bursts, stirring in between. This keeps the cheese from getting too tough.
FAQs
Can I use frozen broccoli?
Yes, you can use frozen broccoli. Just thaw it first. Drain any excess water before adding it to the mix. It cooks faster than fresh broccoli. This makes it a great option when you are short on time.
How can I make it spicier?
To add some heat, you can use red pepper flakes. Start with a small amount, like half a teaspoon. You can also add diced jalapeños for a fresh kick. Mixing in a spicy cheese will also boost the flavor. Taste as you go, and adjust to your liking.
What goes well as a side dish with this casserole?
This casserole pairs well with a simple green salad. A fresh garden salad adds crunch and brightness. You can also serve it with roasted chicken for protein. Another great option is garlic bread. It adds a nice touch and makes the meal more filling.
In this blog post, we covered essential ingredients for a tasty dish. We shared nutritional facts and offered helpful substitutions. You learned step-by-step instructions for perfect rice, sautéed veggies, and combining flavors. Tips on cheese melting and cooking time helped you feel confident. We explored variations for gluten-free or protein-rich options. Plus, we detailed how to store leftovers and reheat them well.
Remember, cooking is fun! Feel free to experiment and make it your own.