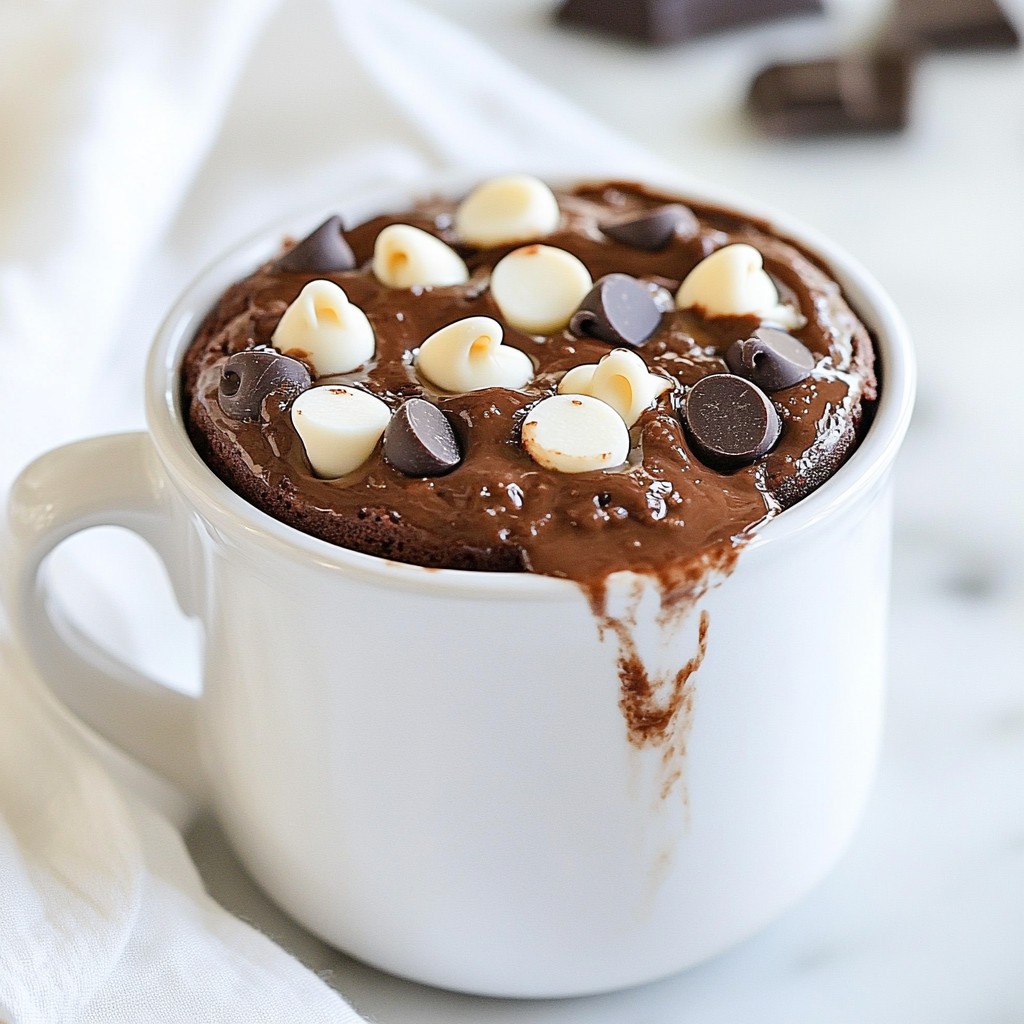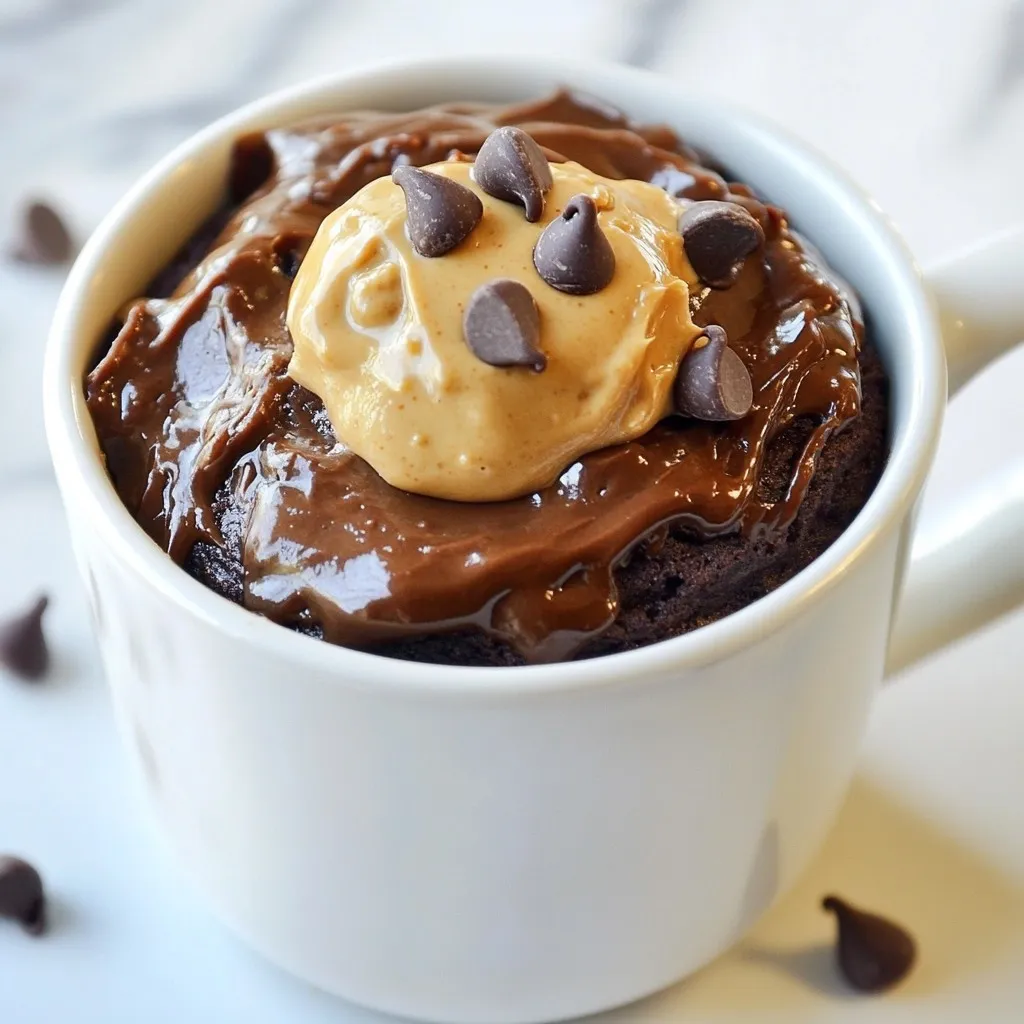
Craving something sweet but short on time? You’ll love this easy Chocolate Peanut Butter Mug Cake recipe! In just a few minutes, you can create a rich, warm treat that combines the best of chocolate and peanut butter flavors. I’ll guide you through every simple step to ensure your mug cake turns out perfect every time. Ready to satisfy your taste buds? Let’s get started!
Why I Love This Recipe
- Quick and Easy: This mug cake can be whipped up in just a few minutes, making it the perfect last-minute dessert.
- Chocolate and Peanut Butter Bliss: The combination of chocolate and peanut butter is a classic that never disappoints.
- Customizable: You can easily add in nuts, more chocolate chips, or even a scoop of ice cream on top for extra indulgence.
- Single Serving: No need to make a whole cake; this recipe is perfectly portioned for one, so you can enjoy it without any leftovers.
Ingredients
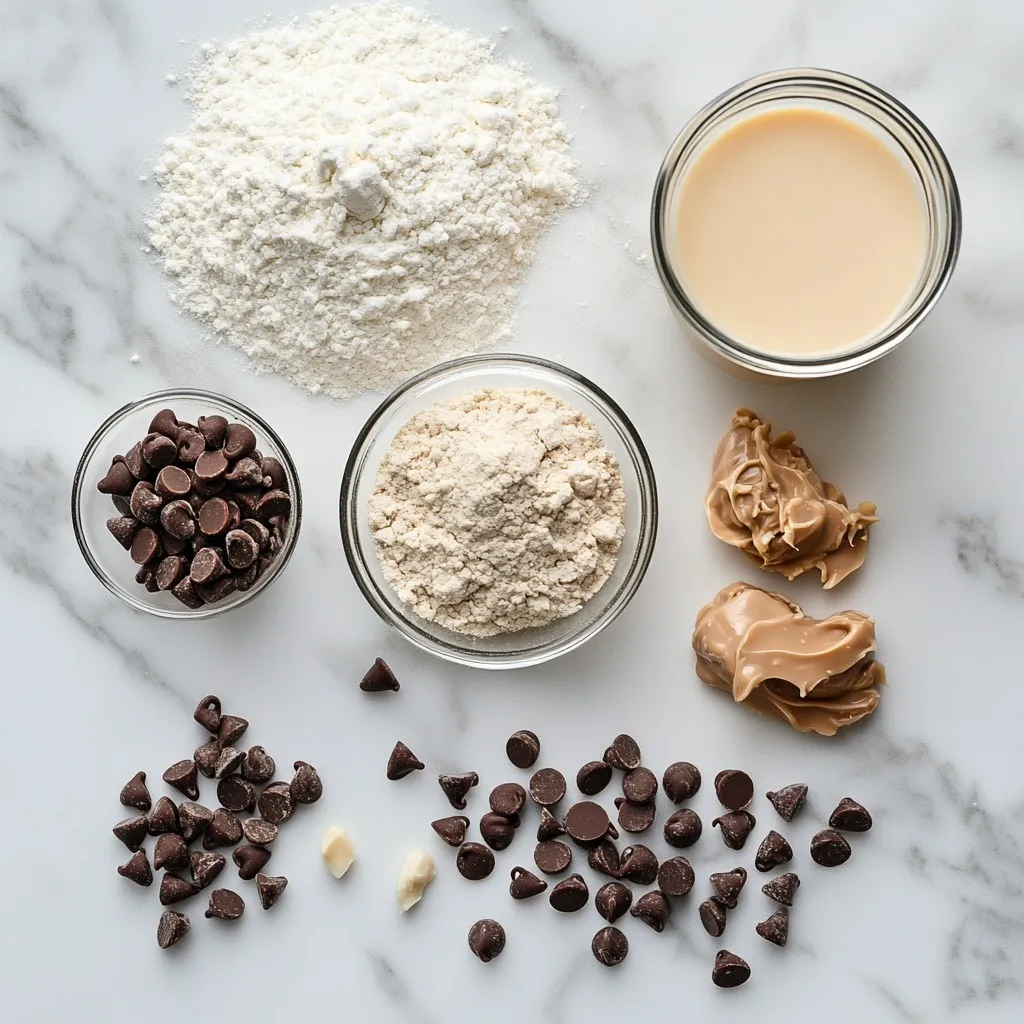
To make a delicious Chocolate Peanut Butter Mug Cake, you need simple ingredients that pack a lot of flavor. Here’s the list of what you will need:
– 4 tablespoons all-purpose flour
– 4 tablespoons granulated sugar
– 2 tablespoons cocoa powder
– 1/8 teaspoon baking powder
– 1/8 teaspoon salt
– 3 tablespoons milk (or a non-dairy alternative)
– 2 tablespoons peanut butter
– 2 tablespoons vegetable oil
– 1/4 teaspoon vanilla extract
– 1 tablespoon chocolate chips (optional)
These ingredients come together to create a soft, warm cake in just minutes. The flour and sugar provide the base. The cocoa powder adds rich chocolate taste. Baking powder makes it rise. Salt boosts the flavors. Milk or a non-dairy option keeps it moist. Peanut butter brings creaminess, while vegetable oil adds richness. Finally, vanilla extract gives a lovely aroma, and chocolate chips are a tasty bonus.
You can easily adjust the ingredients based on your taste. Want it sweeter? Add more sugar. Prefer it richer? Add more peanut butter. This recipe is flexible and fun. Enjoy playing with these ingredients!
Step-by-Step Instructions
Preparation Steps
– In a microwave-safe mug, combine:
– 4 tablespoons all-purpose flour
– 4 tablespoons granulated sugar
– 2 tablespoons cocoa powder
– 1/8 teaspoon baking powder
– 1/8 teaspoon salt
Mix these dry ingredients well. Break up any lumps to ensure a smooth cake.
– Next, add the wet ingredients:
– 3 tablespoons milk (or a non-dairy alternative)
– 2 tablespoons peanut butter
– 2 tablespoons vegetable oil
– 1/4 teaspoon vanilla extract
Stir vigorously with a fork until the mixture is smooth and creamy.
– If you want extra chocolate flavor, fold in:
– 1 tablespoon chocolate chips
This step is optional but highly recommended. It adds sweetness and richness.
Cooking Instructions
– Microwave the mug on high for about:
– 1 minute and 30 seconds
Check the cake for doneness. It should rise and be set in the middle. If it’s not done, add more time in 10-second intervals.
– Once the cake looks good, let it cool for a couple of minutes. This helps avoid burning your mouth.
For a special touch, top it with a dollop of peanut butter and a sprinkle of chocolate chips before enjoying.
Tips & Tricks
Perfecting Your Mug Cake
To make your mug cake great, start with a smooth batter. Mix dry ingredients well first. This helps avoid lumps. Use a fork to stir the wet mix in. Blend until it looks creamy and smooth. This step is key for texture.
Next, keep an eye on your microwave settings. Every microwave is different. Start with one minute and thirty seconds. Check if the cake has risen and is set in the middle. If it’s not done, add ten more seconds. This will help you avoid a soggy cake.
Serving Suggestions
For toppings, I love adding a dollop of peanut butter. It adds flavor and looks great. You can also sprinkle chocolate chips on top. This makes it extra special.
Pair your mug cake with a cold glass of milk or a warm cup of coffee. The flavors balance well together. Experiment with different drinks to find your favorite match. Enjoy every bite!
Pro Tips
- Use a Large Mug: Make sure to use a microwave-safe mug that holds at least 12 oz to prevent overflow while the cake rises during cooking.
- Customize Your Flavor: Experiment with different nut butters or add-ins like nuts or dried fruit for a unique twist on the classic mug cake.
- Check Microwave Wattage: Microwave power varies, so if your cake is undercooked, try adjusting the time based on your microwave’s wattage for perfect results.
- Let it Cool: Allow the mug cake to cool for a couple of minutes after microwaving to let the flavors meld and to avoid burning your mouth.
Variations
Flavor Variations
You can switch up the flavor of your mug cake easily. Try using different nut butters. Almond butter or cashew butter works great. Each nut butter adds a unique taste. Experiment to find your favorite.
You can also substitute chocolate types. Use dark chocolate for a richer taste. White chocolate offers a sweet and creamy twist. Both options can make the cake special. You just need to adjust the chocolate chips.
Dietary Alternatives
If you want a gluten-free mug cake, swap the all-purpose flour. Use gluten-free flour blends instead. They work well in this recipe. You won’t lose any taste or texture!
For a vegan option, replace milk with a non-dairy alternative. Almond milk or oat milk are good choices. Also, use a plant-based butter to keep it vegan. This way, everyone can enjoy a tasty treat!
Storage Info
Storing Leftovers
To store any leftover mug cake, let it cool first. Once cool, cover the mug with plastic wrap or a lid. You can also transfer it to a small container with a tight seal. This keeps the cake moist and fresh. Place it in the fridge for later enjoyment.
To reheat the mug cake, remove the cover. Microwave it for about 10 to 15 seconds. Check if it is warm enough. If not, heat it in 5-second bursts. This helps keep the cake soft without drying it out.
Shelf Life
In the fridge, your chocolate peanut butter mug cake lasts for about 2 to 3 days. After that, the texture may change. It may become dry or hard. Always check for any off smells or changes in color before eating. Enjoy your treat while it’s fresh for the best taste!
FAQs
Common Questions
Can I use a larger mug?
Yes, you can use a larger mug. A bigger mug gives the cake more room to rise. Just adjust the cooking time. Start with the same time and check for doneness.
How do I make multiple servings?
To make more servings, simply multiply the ingredients. Use a larger bowl instead of a mug. Mix everything well, then divide the batter into separate mugs. Cook each mug one at a time.
What should I do if the cake is too dry?
If the cake is dry, try adding a bit more milk. Start with one teaspoon and mix it in. You can also reduce the cooking time next time to keep it moist.
Can I make this mug cake without a microwave?
Yes, you can bake it in an oven. Preheat the oven to 350°F (175°C). Pour the batter into a small oven-safe dish. Bake for about 15 minutes or until set in the middle. Check it often to avoid overbaking.
This blog post covered how to make a quick and tasty mug cake. We looked at all the key ingredients, gave step-by-step instructions, and explored helpful tips. I shared fun variations and how to store your cake too.
Making a mug cake is fun and easy. You can customize it your way. Enjoy your mug cake, and don’t forget to share the tips with friend