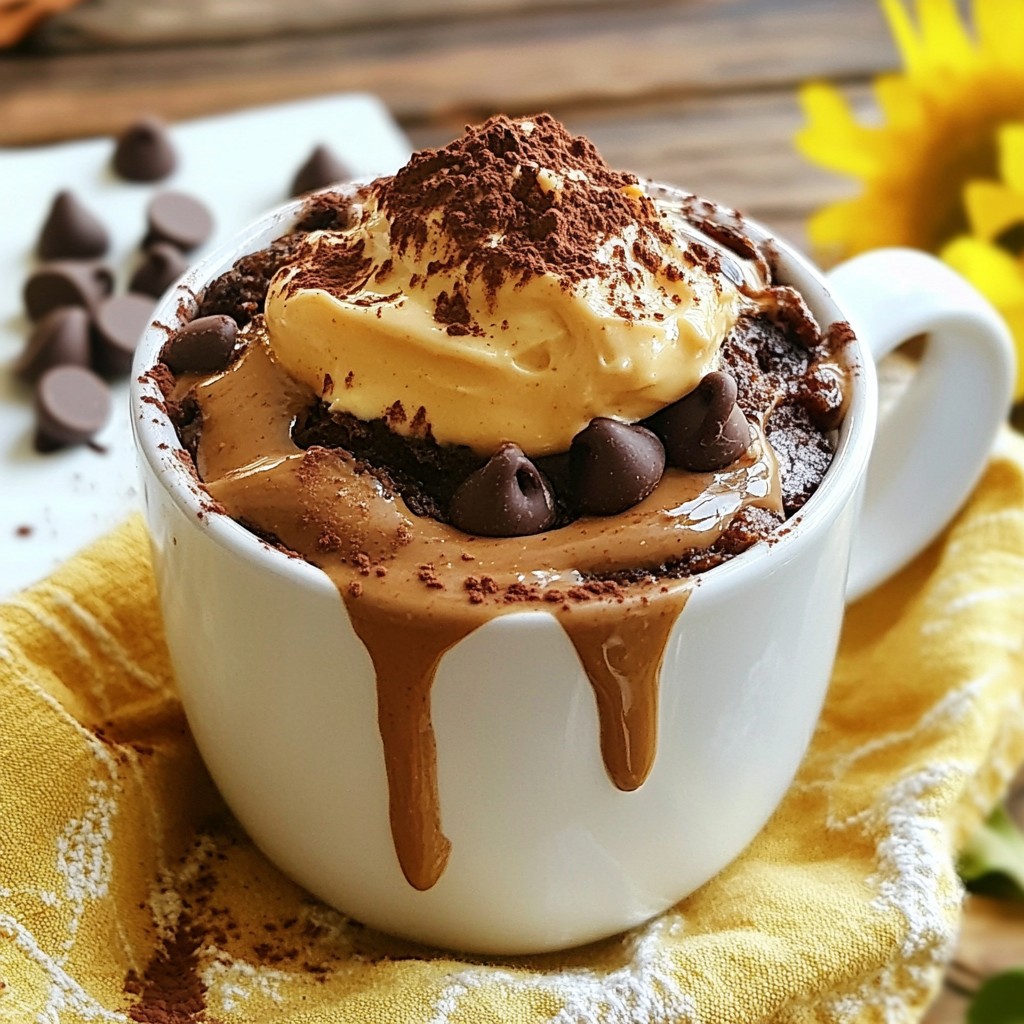
Craving something sweet and quick? Look no further than this Chocolate Peanut Butter Mug Cake! It’s simple to make and only takes a few minutes. With rich chocolate and creamy peanut butter, it’s a delicious treat for kids and adults alike. Let's dive into the easy ingredients and step-by-step instructions you'll need to whip up this delightful dessert. You’re just a few minutes away from a heavenly mug cake!
Why I Love This Recipe
- Quick and Easy: This mug cake can be made in under 10 minutes, making it perfect for a last-minute dessert craving.
- Rich Chocolate Flavor: The combination of cocoa powder and optional chocolate chips ensures a deep, indulgent chocolate taste.
- Peanut Butter Bliss: The addition of creamy peanut butter elevates the flavor profile, offering a delightful sweet and savory combination.
- Single Serving: This recipe makes one serving, which is great for portion control without the temptation of leftovers.
Ingredients
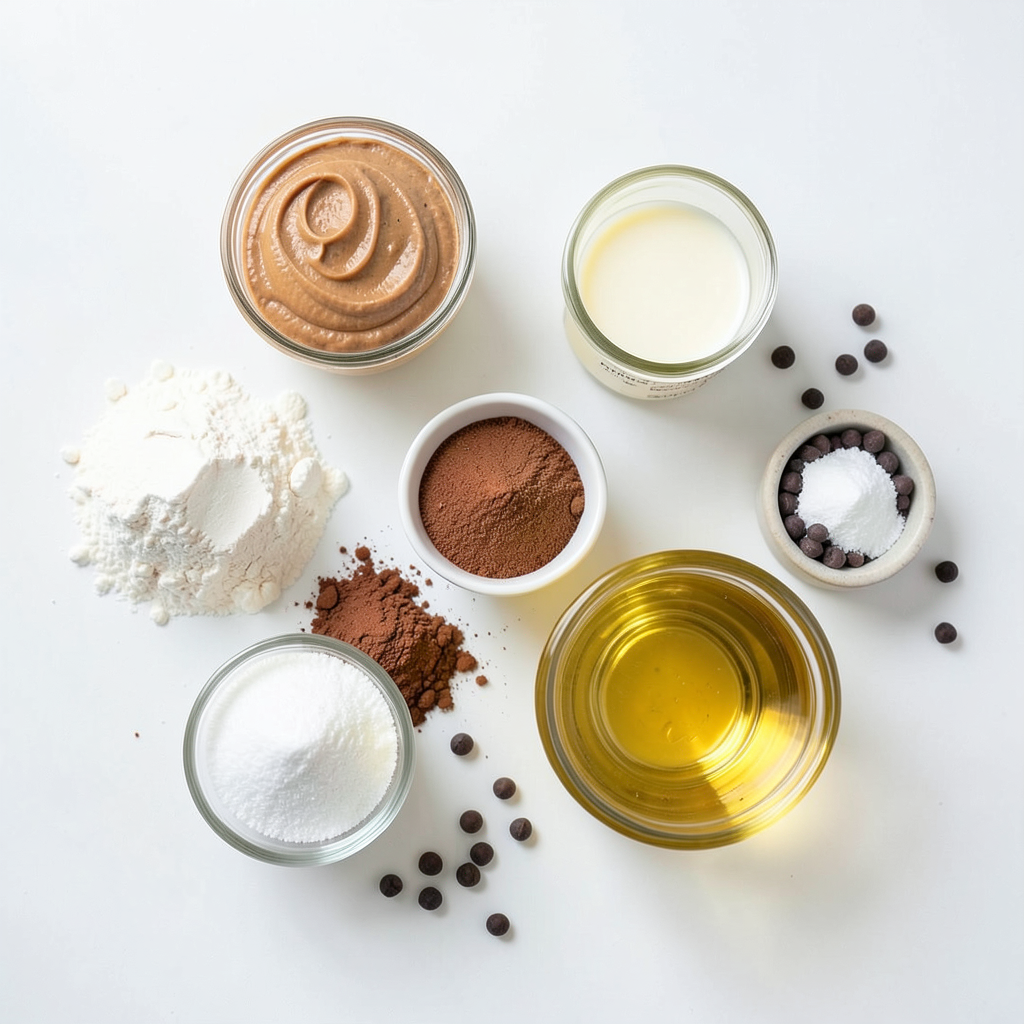
List of Ingredients
- Essential dry ingredients:
- 4 tablespoons all-purpose flour
- 2 tablespoons unsweetened cocoa powder
- 4 tablespoons granulated sugar
- 1/8 teaspoon baking powder
- 1/8 teaspoon salt
These dry ingredients form the base of your cake. Flour gives it structure, while cocoa powder adds rich chocolatey flavor. Sugar provides sweetness, and baking powder helps it rise.
- Essential wet ingredients:
- 3 tablespoons milk (dairy or non-dairy)
- 2 tablespoons vegetable oil
- 1 tablespoon creamy peanut butter
- 1/4 teaspoon vanilla extract
These wet ingredients bring moisture and flavor. Milk and oil keep the cake soft. Peanut butter gives a rich taste, and vanilla adds warmth.
- Optional add-ins for extra flavor:
- Chocolate chips for extra indulgence
Adding chocolate chips can make your mug cake even richer. They melt into the cake, giving you gooey bites of chocolate.
This list is all you need for a quick and tasty treat. Feel free to get creative by adding your favorite flavors!
Step-by-Step Instructions
Preparing the Dry Ingredients
Start by gathering your dry ingredients. You need flour, cocoa powder, sugar, baking powder, and salt.
- Mixing flour, cocoa powder, and sugar: In a microwave-safe mug, combine 4 tablespoons of all-purpose flour, 2 tablespoons of unsweetened cocoa powder, and 4 tablespoons of granulated sugar. Use a fork to mix them well. This blend gives your cake its rich chocolate flavor.
- Incorporating baking powder and salt: Add 1/8 teaspoon of baking powder and 1/8 teaspoon of salt. The baking powder helps the cake rise, while the salt brings out the flavors. Stir again until everything is evenly mixed.
Combining Wet Ingredients
Now, it’s time to add the wet ingredients. These will make your cake moist and delicious.
- Adding milk, oil, peanut butter, and vanilla: Pour in 3 tablespoons of milk, 2 tablespoons of vegetable oil, 1 tablespoon of creamy peanut butter, and 1/4 teaspoon of vanilla extract.
- Mixing to achieve a smooth batter: Use the fork to whisk all the ingredients together. Make sure to scrape the sides of the mug to mix in all the flour. You want a smooth batter with no lumps.
Microwaving the Mug Cake
This is where the magic happens!
- Recommended cooking time and power adjustments: Place your mug in the microwave and cook on high for about 1 minute and 30 seconds. Keep an eye on it while it cooks.
- Tips for preventing overflow: Microwaves can be tricky. If your mug is small, it might overflow. Watch closely and stop the microwave if it starts to rise too much. If your microwave is powerful, you might need to adjust the cooking time down a bit.
Enjoy your warm, gooey Chocolate Peanut Butter Mug Cake!
Tips & Tricks
Achieving the Perfect Texture
To get a soft and moist cake, follow these tips. First, do not overcook your mug cake. The cake will continue to cook in the mug after you take it out. Start with 1 minute and 30 seconds in the microwave. Check if it has risen and set in the middle. If it looks wet, add a few more seconds. Each microwave is different, so adjust the time if needed.
If your cake turns out dry or rubbery, you might have cooked it too long. Always watch it closely while it cooks. A minute can make a big difference in texture.
Serving Suggestions
For a fun look, serve your mug cake right in the mug. It gives a cozy vibe. If you want to impress, you can plate it. Add a dollop of whipped cream on top and sprinkle cocoa powder for flair. A spoonful of peanut butter on the side pairs well with the cake too.
Try adding fruits like bananas or strawberries on top for a fresh twist. They add color and flavor that go great with chocolate and peanut butter.
Customization Ideas
You can change up the flavor with different nut butters. Almond butter or cashew butter can add a new taste. Just replace the peanut butter with your choice.
Want more chocolate? Toss in extra chocolate chips before microwaving. You can also add chopped nuts for crunch. Walnuts or pecans work well and add a nice texture. Experiment with these ideas to make your mug cake unique!
Pro Tips
- Microwave Power Variability: Microwaves can vary significantly in power, so keep an eye on your mug cake as it cooks. Start with 1 minute and check for doneness, adding time in 10-second increments if necessary.
- Perfectly Mixed Batter: To ensure a smooth batter, use a fork to mix the ingredients thoroughly, scraping down the sides of the mug. This will help prevent any dry flour clumps.
- Personalize Your Cake: Feel free to customize your mug cake by adding nuts, dried fruits, or even a spoonful of your favorite jam for a unique flavor twist.
- Cooling Time: Allow the mug cake to cool for a minute after microwaving. This will not only make it safer to eat but also enhance the flavor as it settles.
Variations
Gluten-Free Options
To make this mug cake gluten-free, swap the all-purpose flour. Use almond flour or oat flour instead. Both work well and keep the cake soft. Just remember, gluten-free flours may absorb more liquid. You might need to adjust the milk a little to keep the batter smooth.
Vegan Adaptations
To veganize this recipe, use dairy-free milk like almond or soy. Instead of vegetable oil, you can use coconut oil or melted vegan butter. For peanut butter allergies, try sunbutter or almond butter. These swaps keep the flavor rich while making it safe for all diets.
Different Flavor Twists
Want to mix it up? Try adding caramel or coconut for a fun twist. You can also add some chopped nuts or dried fruit. These flavors pair well with chocolate and peanut butter. It’s a great way to make your mug cake unique every time you bake!
Storage Info
Best Practices for Mug Cake
To store leftover chocolate peanut butter mug cake, let it cool first. Cover it with plastic wrap or place it in an airtight container. Keep it in the fridge for up to three days. This will keep it fresh and moist.
When you want to enjoy it again, reheating is easy. Place the mug in the microwave for about 10 to 15 seconds. This warms it up without drying it out. If the cake seems dry, add a splash of milk before reheating.
Freezing Options
Yes, you can freeze mug cakes! To do this, let the cake cool completely. Wrap it tightly in plastic wrap. Then, place it in a freezer-safe bag or container. It can stay frozen for up to three months.
When you are ready to eat it, take the mug cake out of the freezer. Let it thaw in the fridge overnight. For reheating, microwave it for about 30 to 40 seconds. Make sure it is warm all the way through before enjoying. If needed, add a bit of milk to keep it soft.
FAQs
How long does it take to make a Chocolate Peanut Butter Mug Cake?
Making a Chocolate Peanut Butter Mug Cake is quick and easy. It takes just 5 minutes to prep and about 2 minutes to cook. You can enjoy this treat in under 7 minutes!
Can I make this mug cake in a conventional oven?
Yes, you can! Preheat your oven to 350°F (175°C). Pour the batter into a small, oven-safe ramekin. Bake for 10-12 minutes or until the cake rises and is set in the middle. Keep an eye on it to avoid overbaking.
What can I use if I don't have a microwave?
If you lack a microwave, try the stovetop. Use a non-stick skillet with a lid. Pour your batter into a small, heat-safe bowl. Place the bowl in the skillet, cover it, and cook on low heat for about 10-15 minutes. Check for doneness with a toothpick.
In this post, we explored how to make a delicious Chocolate Peanut Butter Mug Cake. We covered the key ingredients, from dry to wet. You learned step-by-step instructions for preparing and microwaving your cake. I shared tips for perfecting texture and creative serving ideas. We also discussed variations for gluten-free and vegan options.
Now, you have all the tools needed to enjoy a tasty treat in minutes. Get creative and make it your own!