Get ready to indulge in a sweet treat that combines the rich flavors of chocolate and peanut butter! In this guide, I’ll show you how to make Chocolate Peanut Butter Rice Krispie Treats with no baking required. Perfect for kids and adults alike, these delightful snacks are easy to whip up and are sure to impress. Let’s dive into the simple ingredients and quick steps to create your new favorite dessert!
Ingredients
Detailed Measurements
– 3 cups Rice Krispies cereal
– 1 cup creamy peanut butter
– 1 cup semi-sweet chocolate chips
– 1/2 cup honey or maple syrup
– 1 teaspoon vanilla extract
– A pinch of sea salt
These ingredients make a tasty treat with a nice blend of flavors. The Rice Krispies add a light crunch. The creamy peanut butter gives it that rich, nutty taste. The chocolate chips melt into a glossy layer on top. Honey or maple syrup acts as a sweetener, and the vanilla extract adds a nice aroma. Finally, a pinch of sea salt helps balance the sweetness.
Using these measurements ensures you get the right texture and taste. I always recommend measuring carefully. This way, your treats will turn out great every time.
Step-by-Step Instructions
Preparing the Base
– In a large bowl, combine 3 cups of Rice Krispies cereal with a pinch of sea salt. Mixing these two gives the treats a nice flavor.
– Next, melt 1 cup of creamy peanut butter with 1/2 cup of honey or maple syrup and 1 teaspoon of vanilla extract in a medium saucepan. Set the heat to low. Stir often until the mixture is smooth and fully melted. This step makes the peanut butter blend well with the cereal.
Mixing the Ingredients
– Once the peanut butter mixture is ready, pour it over the Rice Krispies. Use a spatula to coat the cereal evenly. It’s important to mix this well so every piece gets that tasty peanut butter flavor.
– Line a 9×9 inch baking dish with parchment paper or lightly grease it. Transfer the Rice Krispies mixture into the dish. Press it down firmly with your hands or spatula. This helps the treats hold together.
Adding the Chocolate
– In a microwave-safe bowl, melt 1 cup of semi-sweet chocolate chips. Do this in 30-second intervals, stirring in between. This keeps the chocolate smooth and prevents burning.
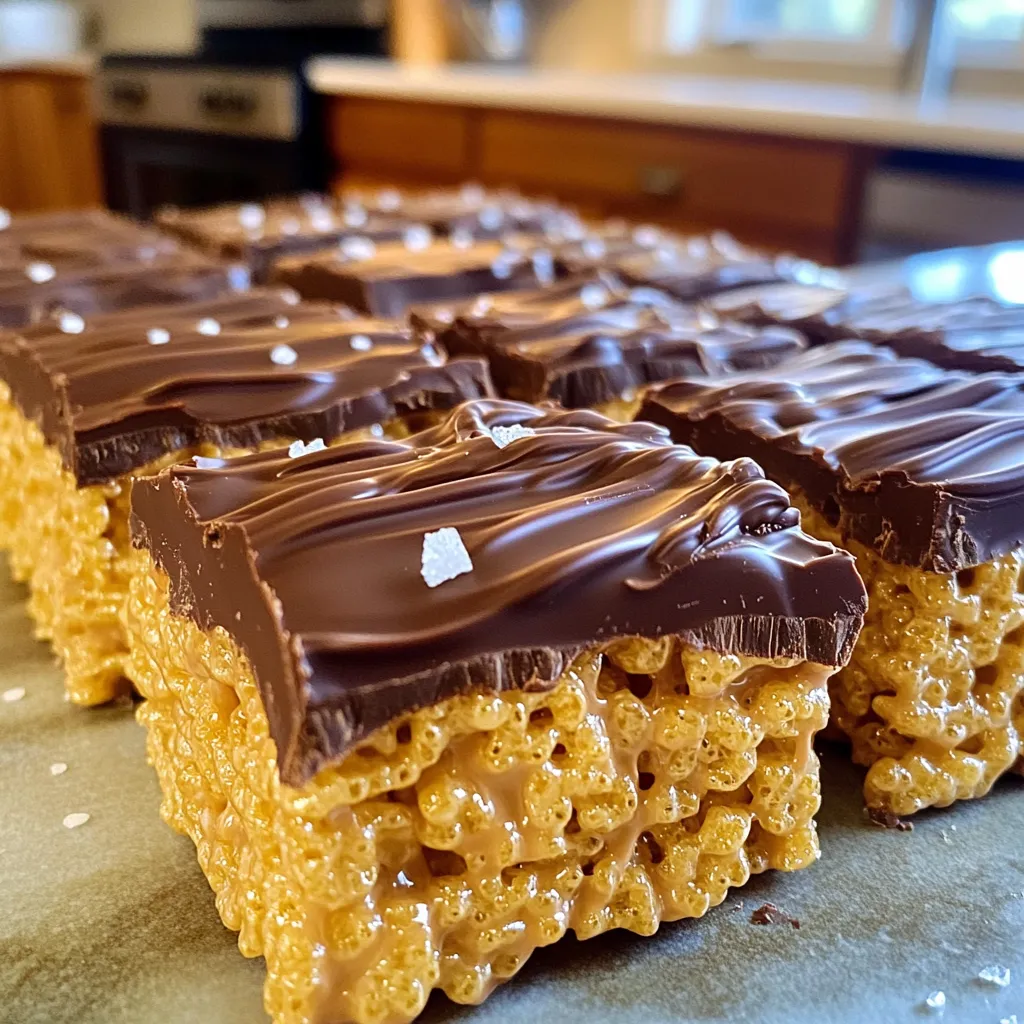
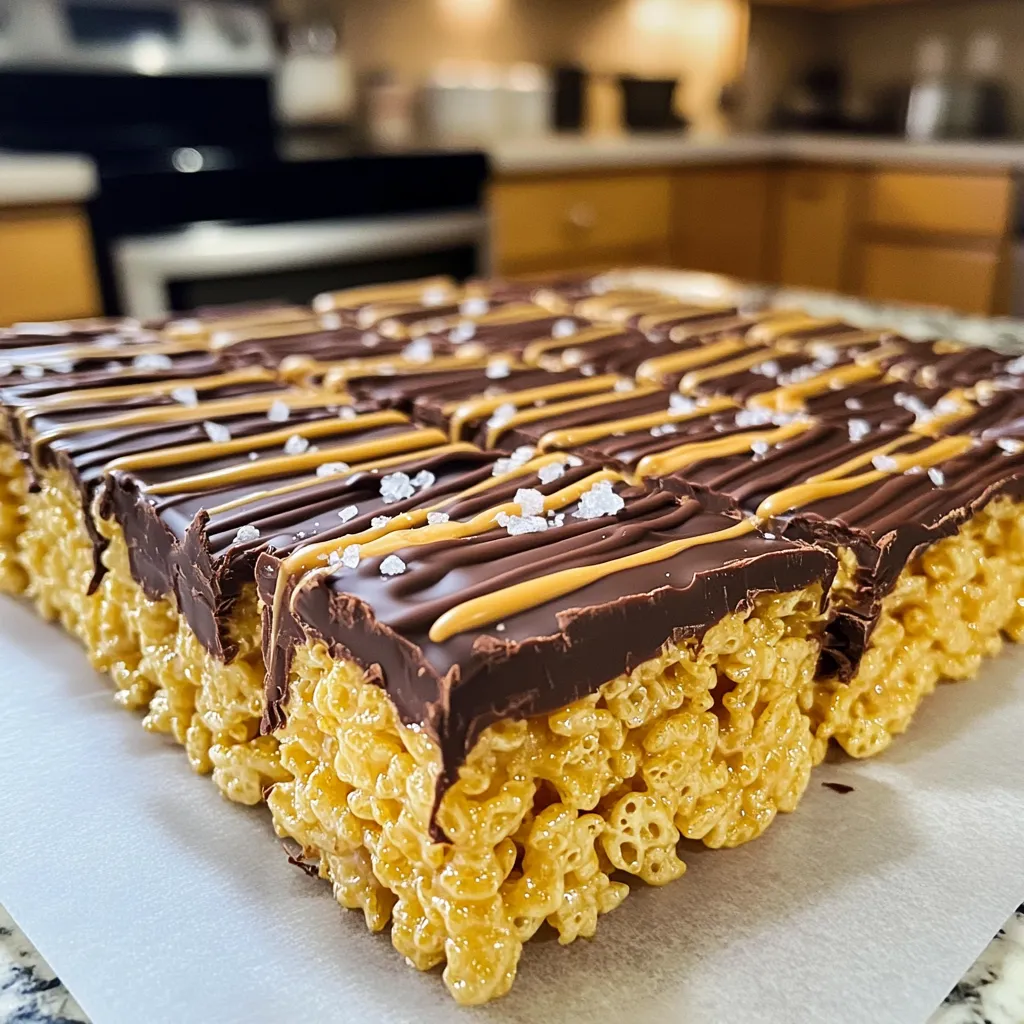
– After melting, pour the chocolate over the pressed Rice Krispies mixture. Use a spatula to spread it evenly. The chocolate adds a rich layer to the treat, making it even more delightful.
Tips & Tricks
Ensuring Perfect Texture
To avoid sticky treats, use creamy peanut butter. It helps mix well. You can also add a pinch more sea salt to balance the sweetness.
When pressing the mixture into the dish, wet your hands. This keeps the mixture from sticking. Press down firmly and evenly. Use a spatula to smooth the top. This step is key for even texture.
Melting Chocolate Successfully
For smooth chocolate melting, use low heat. Heat chocolate chips in short bursts of 30 seconds. Stir often to avoid hot spots that can burn.
If you notice the chocolate thickening, add a small amount of oil. This helps it stay smooth. Make sure to remove it from heat before it fully melts. This way, it won’t burn.
Variations
Ingredient Substitutions
You can switch up the creamy peanut butter for crunchy peanut butter. This adds a nice texture and extra flavor. If you want, you can also try using almond butter or sunflower seed butter. These options work well too.
For the Rice Krispies, consider using other cereals. Puffed rice or cornflakes make great substitutes. You can even use granola for a unique twist. Just make sure the texture is similar for the best results.
Flavor Enhancements
Adding nuts or seeds boosts both taste and nutrition. Chopped almonds or walnuts add a nice crunch. Sunflower seeds or pumpkin seeds add healthy fats and protein. Sprinkle them in when you mix the ingredients for a fun crunch.
Incorporating dried fruit or coconut can give your treats a fruity flair. Dried cranberries or raisins add sweetness. Shredded coconut adds a tropical touch. Mix these in with the Rice Krispies for a delightful surprise in every bite.
Storage Info
Best Practices for Storing Treats
To keep your Chocolate Peanut Butter Rice Krispie Treats fresh, store them in an airtight container. This helps keep them from drying out. You can stack layers of treats in the container, but place parchment paper between them. This prevents them from sticking together.
You can store these treats at room temperature. They stay fresh for about a week this way. If your home is warm, consider refrigeration. This can help them last longer but may change the texture. Cold treats can be a bit firmer and less chewy.
Shelf Life
How long do they last? When stored properly, these treats can last up to one week at room temperature. If you refrigerate them, they may last up to two weeks. Just remember that refrigeration can change the texture slightly.
Signs of spoilage include a change in smell or texture. If they feel hard or dry, they may not taste as good. You should also check for any discoloration. When in doubt, toss them out! Your taste buds will thank you for it.
FAQs
Common Questions about the Recipe
Can I use natural peanut butter?
Yes, you can use natural peanut butter. It might change the taste a bit. Natural peanut butter can be less sweet and may be a bit runnier. Just make sure to stir it well before use.
What if I don’t have honey?
If you don’t have honey, maple syrup works great too. Both sweeteners help stick the treats together. You can also use agave syrup for a similar effect.
Troubleshooting Issues
Why did my treats turn out too crumbly?
Treats can be crumbly if you didn’t use enough liquid. Make sure to measure the peanut butter and sweetener correctly. Pressing the mixture firmly into the dish also helps keep it together.
How to fix overly sticky Rice Krispie treats?
If your treats are too sticky, try adding more Rice Krispies. Mix in a little at a time until you reach your desired texture. You can also use a spatula dipped in water to help shape them without sticking.
You learned how to make delicious Rice Krispies treats with just a few steps. We covered the right measurements, detailed instructions, and tips to get the perfect texture. Also, you can mix things up with variations and know how to store your treats. Remember, making these treats is fun and easy. I hope you feel inspired to try this recipe. Enjoy creating and sharing your tasty treats!