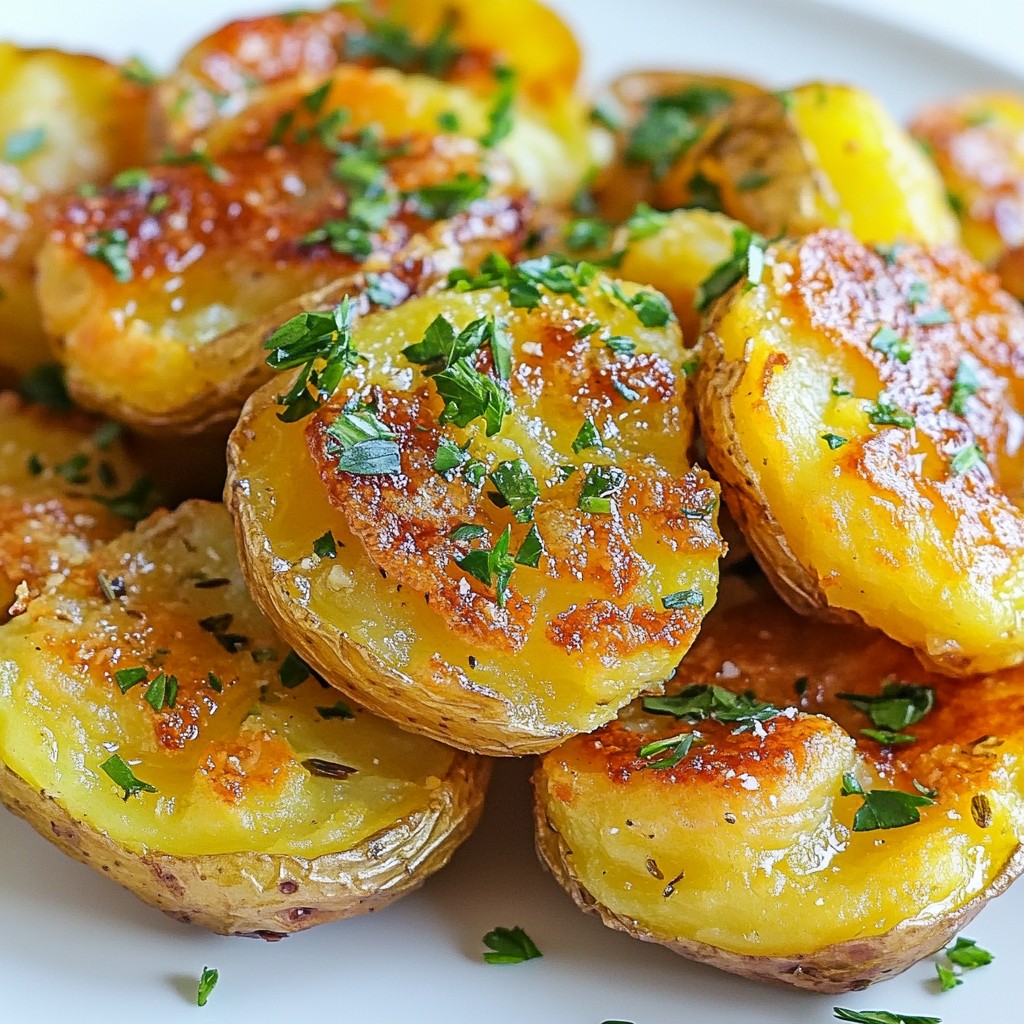
Welcome to your new favorite side dish: Crispy Garlic Smashed Potatoes! This recipe is simple and packed with flavor. You’ll learn how to make the perfect crispy texture using just a few ingredients. I will guide you through each step, from prepping the potatoes to adding delicious garlic oil. Get ready to impress your family and friends with this tasty treat that pairs well with almost anything!
Why I Love This Recipe
- Simple Preparation: This recipe uses minimal ingredients and straightforward steps, making it perfect for any home cook.
- Delicious Flavor: The combination of garlic, rosemary, and paprika creates a mouthwatering taste that elevates the humble potato.
- Crispy Texture: Baking the smashed potatoes gives them a delightful crunch, making them a satisfying side dish.
- Versatile Serving: These crispy smashed potatoes pair well with a variety of main courses, from grilled meats to vegetarian dishes.
Ingredients
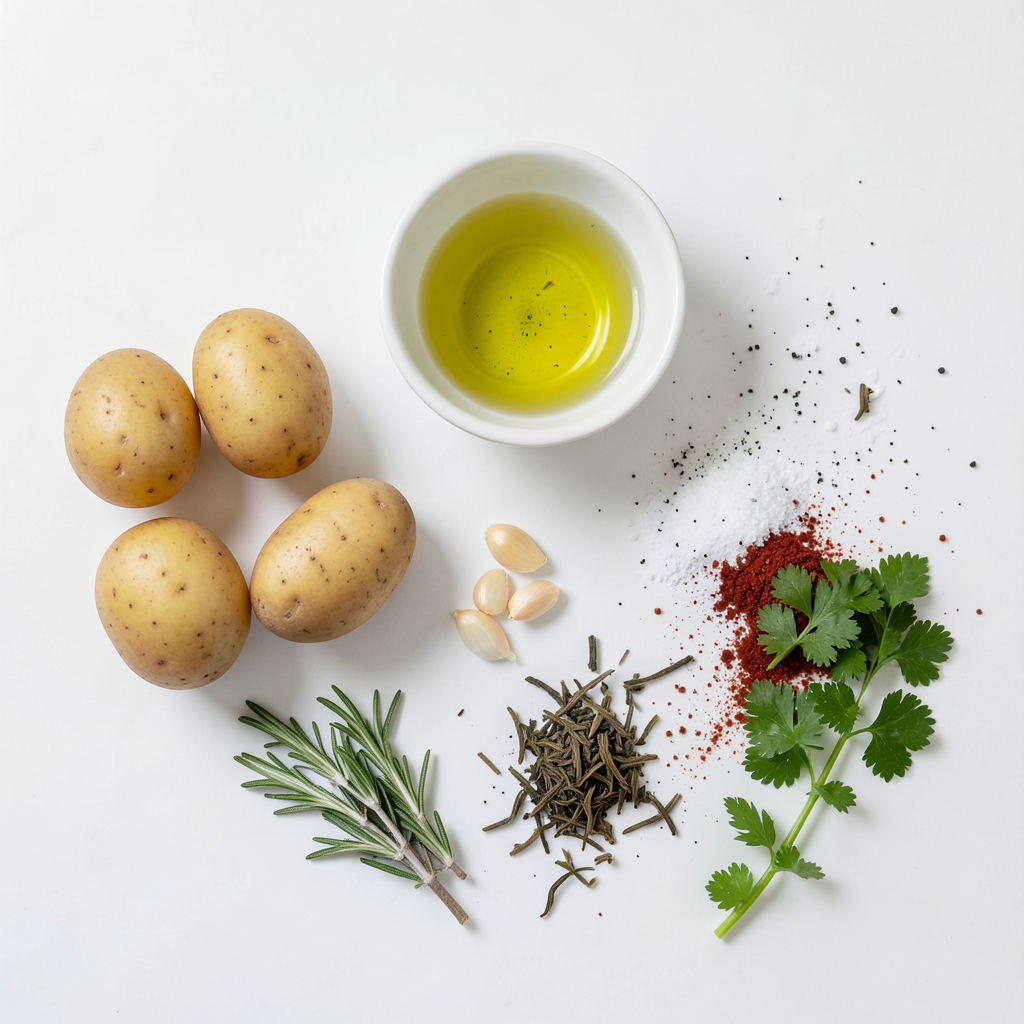
Here are the key ingredients you will need to make crispy garlic smashed potatoes. Each item brings a unique flavor that makes this dish special.
- Baby Potatoes or Small Yukon Golds
- Olive Oil
- Minced Garlic
- Seasonings: Salt, Pepper, Dried Rosemary, Paprika
- Fresh Parsley for Garnish
Using baby potatoes gives a tender bite and allows them to crisp up nicely. Olive oil adds richness and helps with crispiness. Garlic is the star here, bringing a strong, savory flavor.
The seasonings are simple yet effective. Salt and pepper enhance all the flavors, while dried rosemary adds a touch of earthiness. Paprika brings a slight warmth and color. Fresh parsley is not just for looks; it adds a fresh taste to balance the dish.
You can find these ingredients in most grocery stores. Always choose fresh garlic for the best flavor. With these ingredients, you're ready to create a dish that's both easy and irresistible.
Step-by-Step Instructions
Preheating the Oven
Preheating the oven is crucial. It helps the potatoes cook evenly and get crispy. Set your oven to 450°F (230°C). This high heat creates a great texture on the outside while keeping the inside soft.
Preparing the Potatoes
Start by boiling the potatoes. Place 1.5 pounds of baby potatoes in a large pot. Cover them with water and bring it to a boil. Cook for about 15 to 20 minutes. Check doneness by piercing a potato with a fork. If it slides in easily, they are ready.
Smashed Potato Technique
To smash the potatoes, you need a potato masher or the bottom of a glass. Line a baking sheet with parchment paper for easy cleanup. Place each boiled potato on the sheet. Gently press down until flattened but not completely broken.
Making the Garlic Oil
For the garlic oil, heat 4 tablespoons of olive oil in a small saucepan over medium heat. Add 4 minced garlic cloves, 1 teaspoon of dried rosemary, salt, and pepper. Cook for 2 to 3 minutes. Watch closely to avoid burning the garlic. It should smell fragrant but not brown.
Baking for Crispy Texture
Brush the garlic oil mixture onto each smashed potato. Bake them in the preheated oven for about 20 to 25 minutes. You’ll know they are perfect when the edges turn crispy and golden brown.
Final Touches and Serving
Once baked, remove the potatoes from the oven. Garnish with freshly chopped parsley for a pop of color. Serve them hot as a delightful side dish. Enjoy the crispy, garlicky goodness!
Tips & Tricks
Achieving Maximum Crispiness
- Best Oil Choices: Use high-quality olive oil for flavor. You can also try avocado oil. These oils can handle high heat and add great taste.
- Oven Rack Position: Place the baking sheet in the middle of the oven. This helps the heat circulate around the potatoes evenly.
Flavor Enhancements
- Additional Herbs and Spices: Try adding fresh thyme or chives for a new taste. A sprinkle of garlic powder can boost the garlic flavor, too.
- Cheese Variations: Top the potatoes with grated Parmesan or crumbled feta. These cheeses melt nicely and add depth to the dish.
Common Mistakes to Avoid
- Overboiling Potatoes: Boil the potatoes just until fork-tender. If you cook them too long, they may fall apart when smashed.
- Incorrect Oiling Method: Brush the garlic oil on the potatoes instead of pouring it. This ensures an even coating and better crispiness.
Pro Tips
- Choose the Right Potatoes: For the best texture, use waxy potatoes like baby potatoes or Yukon golds, as they hold their shape well when boiled and smashed.
- Don’t Overcook the Potatoes: Boil the potatoes just until fork-tender to prevent them from becoming too soft and mushy when smashed.
- Let the Garlic Oil Cool Slightly: Allow the garlic oil mixture to cool for a minute before brushing it on the potatoes to prevent burning the garlic.
- Experiment with Seasonings: Feel free to customize the seasonings by adding spices like chili powder or herbs like thyme for a unique flavor twist.
Variations
Herb-Infused Smashed Potatoes
For a fresh taste, use herbs in your smashed potatoes. Popular options include:
- Rosemary
- Thyme
- Chives
- Basil
To add fresh herbs, chop them finely. Mix them into the garlic oil before brushing. This way, the herbs infuse their flavor into the potatoes.
Cheesy Garlic Smashed Potatoes
Cheese adds a creamy touch. I suggest:
- Parmesan
- Cheddar
- Feta
To melt cheese perfectly, sprinkle it on the potatoes before baking. Bake until the cheese is bubbly and golden. This creates a delightful crust that enhances texture.
Spicy Garlic Smashed Potatoes
If you like heat, add chili flakes or hot sauce. Start with a pinch of chili flakes in the garlic oil. Taste and adjust as needed. Balance the heat with a bit of lemon juice or extra herbs. This will keep the flavors bright and lively.
Storage Info
Refrigerating Leftovers
Store your leftover crispy garlic smashed potatoes in a proper container. Use an airtight container to keep them fresh. You can also use a resealable bag but remove as much air as possible. These potatoes last in the fridge for about 3 to 4 days.
Reheating Instructions
To enjoy these potatoes again, reheat them carefully. The oven is the best method for keeping them crispy. Preheat your oven to 400°F (200°C) and place the potatoes on a baking sheet. Heat them for about 10 to 15 minutes until hot. The microwave will heat them faster but can make them soft. If you use the microwave, heat in short bursts and check often.
Freezing Smashed Potatoes
You can freeze smashed potatoes for later use. First, let them cool completely. Place them in a single layer on a baking sheet and freeze for about 1 hour. Once frozen, transfer them to an airtight container or freezer bag. They can last in the freezer for up to 2 months.
For reheating, thaw them in the fridge overnight. Then, follow the oven method to reheat and regain crispiness.
FAQs
Can I use other types of potatoes?
Yes, you can use other types of potatoes for crispy smashed potatoes. Baby potatoes and small Yukon golds work best. They are creamy and hold their shape well. You can also try red potatoes for a firmer texture. Just remember, the key is to choose waxy potatoes for the best outcome.
How long do Crispy Garlic Smashed Potatoes last?
Crispy garlic smashed potatoes can last up to three days in the fridge. Store them in an airtight container. They may lose some crispiness, but they still taste great. You can reheat them for a quick snack or side dish.
Can I make this recipe ahead of time?
You can prepare smashed potatoes ahead of time. Boil and smash them, then store them in the fridge. When you are ready to eat, brush them with garlic oil and bake. This method saves time and still gives you that crispy texture.
What can I serve with Crispy Garlic Smashed Potatoes?
Crispy garlic smashed potatoes pair well with many dishes. They complement roasted meats like chicken or beef. You can also serve them with grilled vegetables for a lighter meal. Add a fresh salad on the side for a balanced plate.
We explored how to make crispy garlic smashed potatoes from start to finish. You learned about key ingredients, cooking methods, and handy tips for perfect results. Remember, the right oil and techniques lead to maximum crispiness. Feel free to experiment with flavors and variations to suit your taste. Store leftovers well to enjoy later. With this guide, you can create delicious sides that impress. Happy cooking!