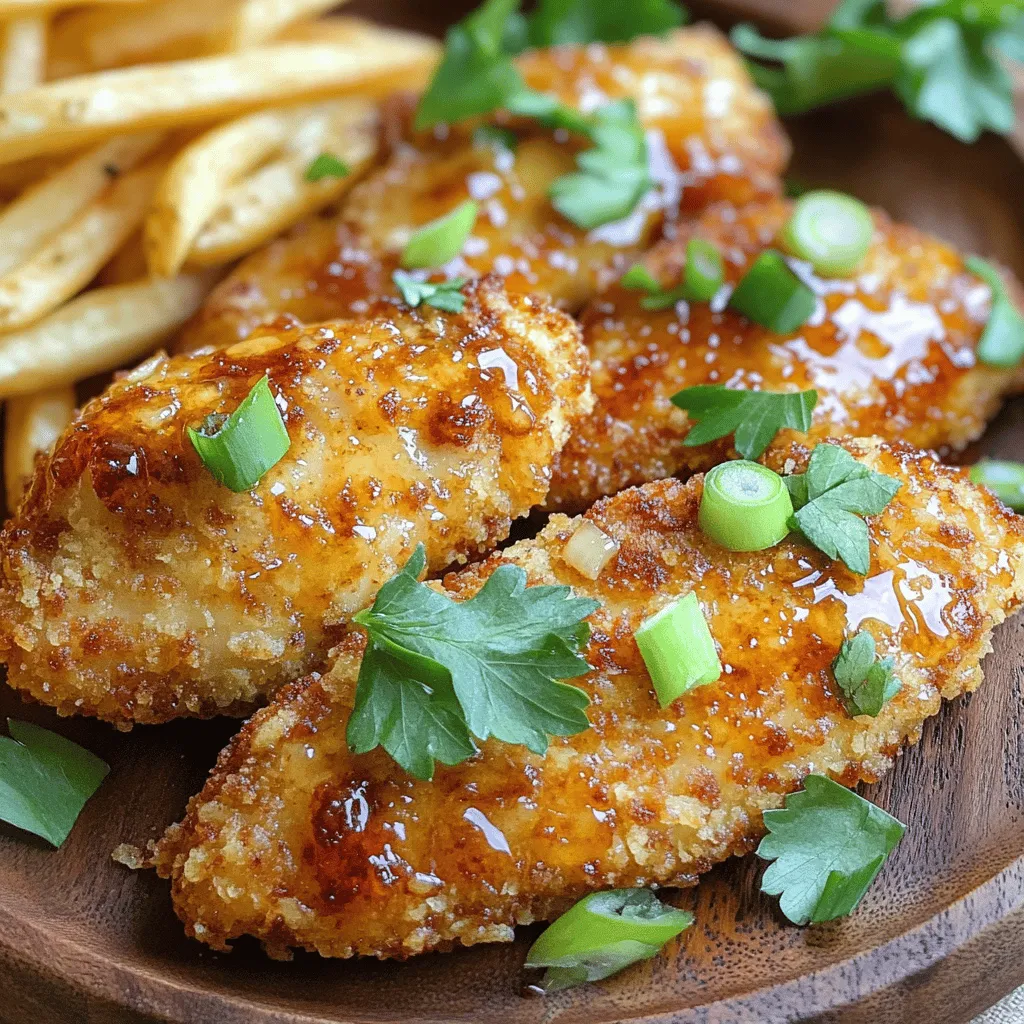
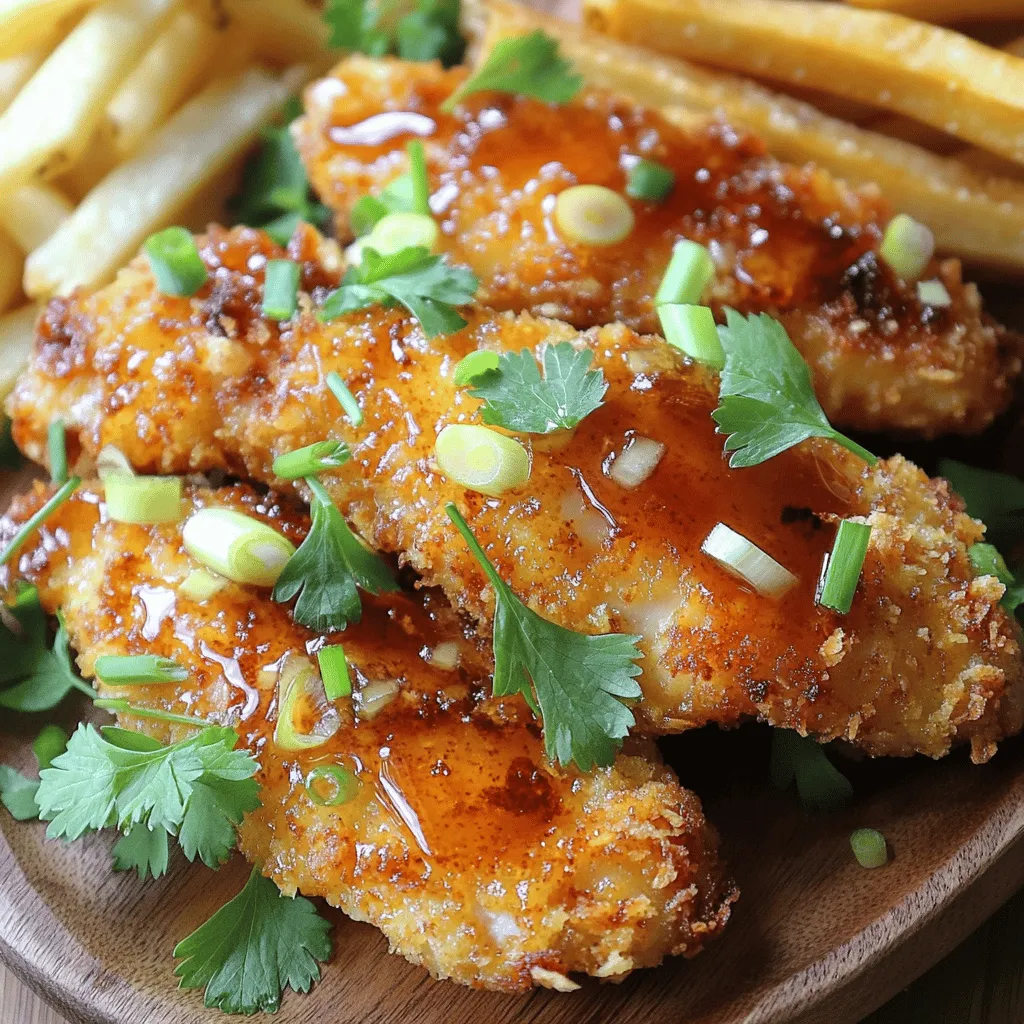
Get ready to enjoy a flavor explosion with my Crispy Honey Garlic Chicken Tenders! These tasty bites are perfect for every meal or snack. I’ll guide you through simple ingredients, quick steps, and pro tips to ensure they turn out perfectly every time. Whether you’re a cooking newbie or a pro, these tenders will impress everyone. Dive in to learn how to make this delicious dish that’s full of sweet and savory goodness!
Ingredients
Main Ingredients for Chicken Tenders
To create tasty crispy honey garlic chicken tenders, you need a few key items. Here’s what you will need:
– 1 pound chicken tenders
– 1 cup all-purpose flour
– 2 large eggs
– 1 cup breadcrumbs (use panko for extra crispiness)
– 1 teaspoon garlic powder
– 1 teaspoon onion powder
– 1 teaspoon smoked paprika
– Salt and pepper to taste
– Cooking oil for frying
These ingredients work together to give you juicy chicken with a crunchy outside.
Honey Garlic Sauce Ingredients
The sauce adds the sweet and savory flavor. For the honey garlic sauce, gather these ingredients:
– 1/2 cup honey
– 4 cloves garlic, minced
– 2 tablespoons soy sauce
– 1 tablespoon rice vinegar
– 1/2 teaspoon crushed red pepper flakes (optional, for heat)
This sauce makes the tenders shine with flavor. The honey pairs well with the garlic for a delightful taste.
Optional Seasoning Additions
Feel free to get creative with your seasonings! Here are some optional extras you can add:
– Extra spices like paprika or cayenne for more heat
– Fresh herbs like parsley or cilantro for freshness
– Lemon zest for a citrusy kick
These additions can help you make your chicken tenders uniquely yours. Experimenting with flavors is part of the fun!
Step-by-Step Instructions
Preparation of Chicken Tenders
First, take your pound of chicken tenders. Season them with salt, pepper, garlic powder, onion powder, and smoked paprika. Mix these spices well to coat the chicken evenly. Let the tenders sit for about 15 minutes. This step helps the flavors soak in.
Setting Up the Breading Station
Next, gather three shallow bowls. In the first bowl, add 1 cup of flour. In the second bowl, beat 2 large eggs until smooth. In the third bowl, place 1 cup of breadcrumbs, preferably panko. Panko gives the best crunch. This setup makes it easy to coat the chicken evenly.
Cooking the Chicken Tenders
Now, heat about 1/2 inch of cooking oil in a large skillet over medium-high heat. Wait until the oil shimmers. Carefully place the chicken tenders in the hot oil. Avoid overcrowding. Fry them for about 4-5 minutes on each side. They should turn golden brown and crispy. Once cooked, use a paper towel-lined plate to drain the excess oil.
This method ensures you get tasty, crispy honey garlic chicken tenders that are bursting with flavor.
Tips & Tricks
Achieving Maximum Crispiness
To get the best crunch, use panko breadcrumbs. They create a light and airy texture. Start by seasoning the chicken well. I use garlic powder, onion powder, and smoked paprika for flavor. Letting the chicken sit for 15 minutes helps the flavors soak in. This step is key for taste. When you bread the chicken, shake off any extra flour. This prevents clumps and ensures even coating.
Fry the tenders in hot oil. Use about half an inch of oil in your skillet. Make sure the oil is shimmering before you add the chicken. Fry in small batches so the heat stays high. This is how you get that golden brown look and crispiness.
Flavor Enhancements
The honey garlic sauce takes this dish over the top. Combine honey, minced garlic, soy sauce, and rice vinegar in a saucepan. Heat it gently until smooth and fragrant. Adding crushed red pepper flakes gives it a nice kick. If you want more flavor, try adding fresh ginger or a splash of lime juice. Both work well to brighten the dish. Toss the fried tenders in the warm sauce right before serving for the best taste.
Serving Suggestions
Presentation makes a meal more fun. Serve your chicken tenders on a large plate. I like to sprinkle fresh parsley and sliced green onions on top. This adds color and freshness. Pair them with coleslaw or crispy fries for a complete meal. You can also serve them with dipping sauces like ranch or sweet chili. This gives everyone options to enjoy.
Variations
Different Sauces to Try
You can mix up the flavor of your crispy honey garlic chicken tenders with different sauces. Here are a few ideas:
– BBQ Sauce: Swap the honey garlic sauce for your favorite BBQ sauce for a smoky taste.
– Teriyaki Sauce: Use teriyaki for a sweet and savory twist. This pairs well with the chicken.
– Buffalo Sauce: If you like heat, toss the tenders in buffalo sauce after frying. It adds a spicy kick.
Gluten-Free Options
Making these tenders gluten-free is easy! Here are some steps:
– Flour: Use almond flour or gluten-free all-purpose flour instead of regular flour.
– Breadcrumbs: Replace panko with gluten-free breadcrumbs or crushed cornflakes for crunch.
– Soy Sauce: Opt for tamari, which is gluten-free, when making the sauce.
Additional Spice Levels
Want to spice things up? Here are some ways to adjust the heat:
– Crushed Red Pepper Flakes: Add more than the 1/2 teaspoon for extra heat in the sauce.
– Hot Sauce: Mix in a splash of your favorite hot sauce to the honey garlic sauce for a kick.
– Chili Powder: Sprinkle chili powder on the chicken before frying it for a subtle warmth.
These variations keep the meal exciting and let you customize your crispy honey garlic chicken tenders to suit your taste!
Storage Info
How to Store Leftover Tenders
After enjoying your crispy honey garlic chicken tenders, store any leftovers in an airtight container. Let them cool to room temperature first. This keeps them fresh and tasty. Place the container in the fridge. They will stay good for up to three days.
Reheating Tips
When you’re ready to enjoy the leftovers, reheating is key. Preheat your oven to 375°F (190°C). Place the tenders on a baking sheet. Bake them for about 10-15 minutes. This method keeps them crispy. You can also use an air fryer at 350°F for about 5-7 minutes. This gives a nice crunch, just like fresh.
Freezing Recommendations
Want to save some for later? You can freeze the chicken tenders too! First, let them cool completely. Then, arrange them in a single layer on a baking sheet. Freeze until solid, about 1-2 hours. Once frozen, transfer them to a freezer bag. They can last for up to two months. When ready to eat, thaw in the fridge overnight. Reheat in the oven or air fryer for the best results.
FAQs
How do I make chicken tenders extra crispy?
To make chicken tenders extra crispy, you need a few key steps. First, use panko breadcrumbs. Panko is lighter and crunchier than regular breadcrumbs. Second, make sure to let the chicken sit after breading. This helps the coating stick better. Third, fry the tenders in hot oil. The oil should shimmer, about 350°F. Fry in batches to avoid crowding. This keeps the heat steady and helps them cook evenly.
Can I bake the chicken tenders instead of frying them?
Yes, you can bake the chicken tenders! Preheat your oven to 400°F. Arrange the breaded tenders on a baking sheet lined with parchment paper. Spray them lightly with cooking oil to help them crisp up. Bake for about 20-25 minutes, flipping halfway through. They may not be as crispy as fried, but they will still be tasty.
What sides pair well with crispy honey garlic chicken tenders?
Crispy honey garlic chicken tenders go well with many sides. Here are some great options:
– Coleslaw adds crunch and freshness.
– Crispy fries give a classic fast-food feel.
– Steamed broccoli adds color and nutrients.
– Rice is a great base to soak up the sauce.
– A simple salad can lighten the meal.
These sides will make your meal complete and delicious!
In this post, we covered how to make chicken tenders from start to finish. We explored essential ingredients, cooking methods, and tips for crispiness. I shared variations to keep things exciting and how to store leftovers properly.
Remember, cooking can be fun and simple. Make these tenders your own by trying different sauces or spices. Enjoy the delicious results and share them with family and friends!