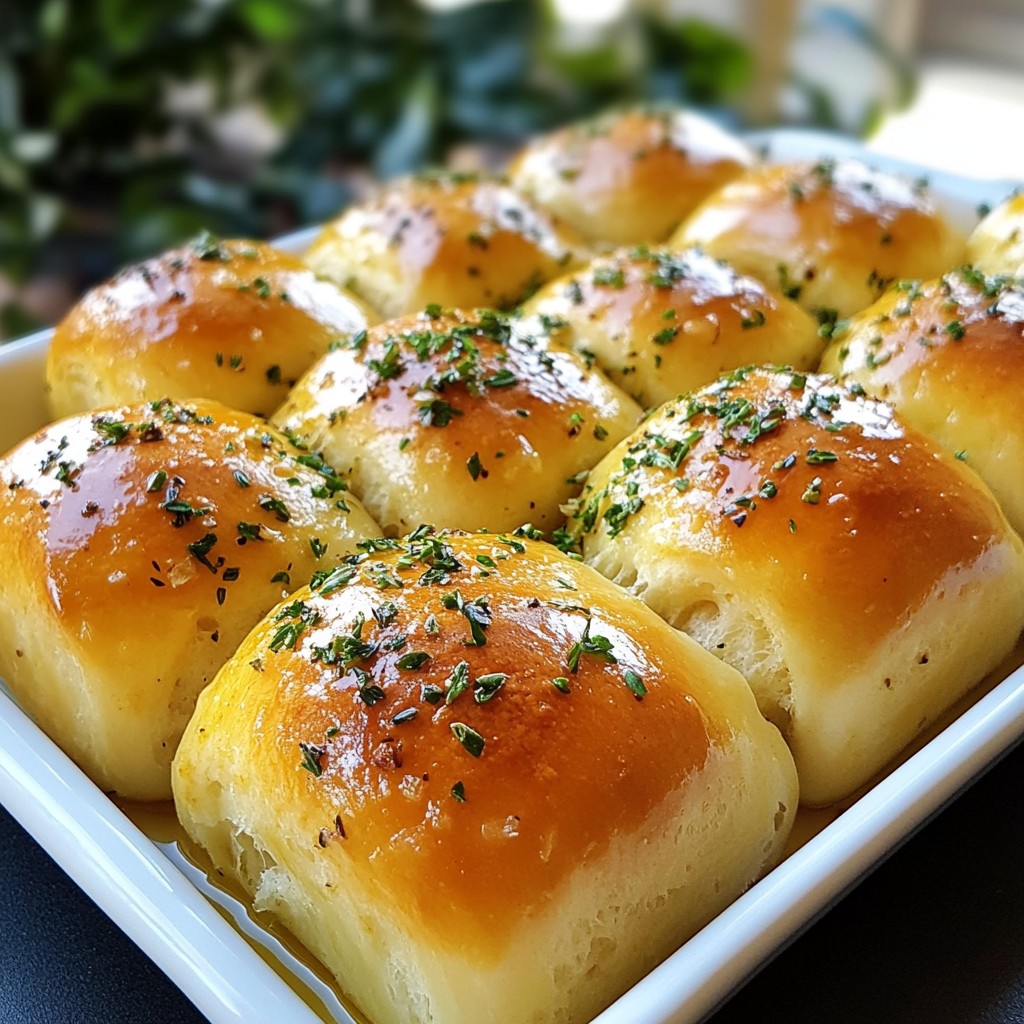
Want to impress your family or guests with warm, buttery rolls? Garlic Herb Dinner Rolls are the answer! They’re packed with flavor and easy to make. With just a few simple ingredients, you can create soft, fluffy rolls that will elevate any meal. Follow my step-by-step guide for perfect results every time. Let’s dive into this delicious recipe and enjoy these mouth-watering rolls together!
Why I Love This Recipe
- Delicious Flavor: The combination of garlic and fresh herbs creates a mouthwatering aroma and taste that elevates any meal.
- Easy to Make: This recipe is straightforward and requires minimal ingredients, making it perfect for bakers of all levels.
- Perfect for Any Occasion: These rolls are versatile and can complement any dinner, holiday gathering, or casual meal.
- Warm and Comforting: There's nothing quite like the taste of freshly baked rolls, warm from the oven, to bring a sense of comfort to the table.
Ingredients
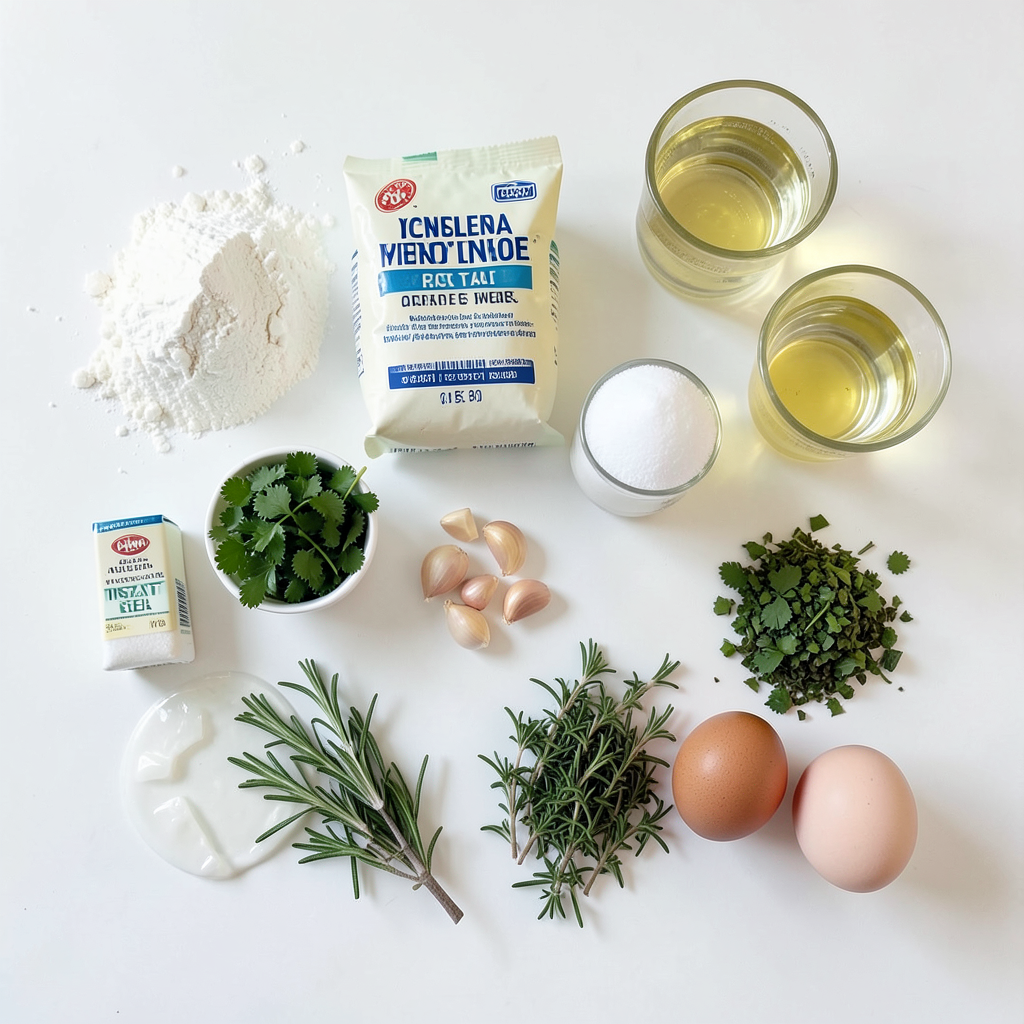
Required Ingredients for Garlic Herb Dinner Rolls
- 4 cups all-purpose flour
- 1 packet instant yeast (2 1/4 teaspoons)
- 1 teaspoon salt
- 2 tablespoons sugar
- 1/4 cup unsalted butter (melted)
- 1 1/2 cups warm water (about 110°F)
- 3 cloves garlic (minced)
- 2 tablespoons fresh parsley, finely chopped
- 1 tablespoon fresh rosemary, chopped
- 1 tablespoon fresh thyme, chopped
- 1 tablespoon olive oil
- 1 egg (optional for egg wash)
Gathering fresh ingredients makes a big difference in flavor. Fresh herbs add bright notes to our rolls. Each ingredient plays a key role in the final taste and texture.
Use all-purpose flour for a soft and fluffy roll. Instant yeast helps the dough rise quickly. Salt enhances flavor, while sugar balances the taste. Melting the butter adds richness to each bite. Warm water activates the yeast for a good rise.
Minced garlic brings a bold, savory flavor. Fresh herbs like parsley, rosemary, and thyme give a wonderful aroma. Olive oil adds a hint of fruitiness. An egg wash can give a nice golden color on top.
These ingredients come together to create a warm, comforting side dish. They pair well with soups, salads, and main courses. You can even enjoy them with a bit of butter.
Step-by-Step Instructions
Preparing the Dough
- In a large mixing bowl, combine 4 cups of all-purpose flour, 2 1/4 teaspoons instant yeast, 1 teaspoon salt, and 2 tablespoons sugar. Stir these dry ingredients well.
- In a separate bowl, mix 1/4 cup melted unsalted butter with 1 1/2 cups warm water. Add 3 minced garlic cloves and 2 tablespoons finely chopped parsley, 1 tablespoon chopped rosemary, and 1 tablespoon chopped thyme.
- Pour the wet mixture into the dry mixture. Stir until you form a sticky dough.
Kneading and Rising
- Lightly flour a clean surface. Knead the dough for 8 to 10 minutes. The dough should feel smooth and elastic.
- Place the kneaded dough in a greased bowl. Cover it with a damp cloth. Let it rise in a warm area for about 1 hour, or until it doubles in size.
Shaping and Second Rise
- After the dough has risen, punch it down gently. Divide the dough into 12 equal pieces.
- Shape each piece into a roll. Place the rolls in a greased 9x13 inch baking dish, making sure to leave space between them.
- Cover the rolls again with a cloth. Let them rise for another 30 to 45 minutes until they are puffy.
Baking the Rolls
- Preheat your oven to 375°F (190°C). If you want a golden finish, brush the tops of the rolls with a beaten egg.
- Bake the rolls for 20 to 25 minutes. They should turn a nice golden brown on top.
- After baking, brush the tops with 1 tablespoon of olive oil for added flavor. Let the rolls cool slightly before serving.
Tips & Tricks
Achieving the Perfect Texture
To get soft and fluffy rolls, use all-purpose flour. It helps create good elasticity. Kneading is key for the right texture. Aim for about 8 to 10 minutes of kneading. This will ensure your dough is smooth and elastic.
Flavor Enhancements
Want more flavor? Add extra minced garlic or mix in different herbs. You can also try toppings before baking. For example, sprinkle some grated cheese or seeds on top for a tasty twist.
Timing and Temperature
Warm water is very important for yeast. It helps the yeast wake up and start working. Make sure the water is around 110°F. Timing matters too. Let the dough rise until it doubles in size. This is usually about one hour. For the second rise, let it puff up for 30 to 45 minutes. This ensures your rolls are light and airy.
Pro Tips
- Use Fresh Herbs: Fresh herbs will enhance the flavor of your rolls significantly. If possible, opt for fresh parsley, rosemary, and thyme instead of dried.
- Knead Properly: Ensure you knead the dough until it is smooth and elastic, which typically takes about 8-10 minutes. This will help develop the gluten for a better texture.
- Check the Water Temperature: The warm water should be around 110°F. If it's too hot, it can kill the yeast; too cold, and the dough won't rise properly.
- Brush with Olive Oil: Brushing the rolls with olive oil after baking adds an extra layer of flavor and keeps the tops soft.
Variations
Herb Combinations
You can mix fresh herbs or use dried herbs. Basil, oregano, and chives work well. Try seasonal herbs too. In spring, use fresh dill or tarragon. In fall, rosemary and sage add warmth. Each mix brings unique flavors. Experiment to find your favorite blend.
Gluten-Free Options
If you need gluten-free rolls, use almond flour or a gluten-free blend. Be sure to check the blend’s instructions. You might need to add xantham gum for structure. The dough will be stickier, so adjust the water as needed.
Stuffed Dinner Rolls
Stuffing the rolls adds fun and flavor. Cheese, pesto, or roasted veggies are great choices. To prepare, flatten each dough piece before stuffing. Pinch the edges to seal well. This keeps the filling inside while baking. Enjoy the surprise of flavors in every bite!
Storage Info
Storing Leftover Rolls
To keep your leftover garlic herb dinner rolls fresh, use an airtight container. This will help them stay soft and tasty. You can store them at room temperature for one to two days. If you live in a humid area, refrigeration may help. But keep in mind, the rolls can dry out in the fridge. If you choose to refrigerate, wrap them in plastic wrap first.
Freezing Garlic Herb Dinner Rolls
Freezing is a great option if you have extra rolls. To freeze them, first let them cool completely. Then, place them in a freezer-safe bag or container. Be sure to squeeze out as much air as you can. This will help prevent freezer burn. They can stay in the freezer for up to three months. When you are ready to eat them, take out the rolls. Thaw them at room temperature or use the microwave. For reheating, wrap them in foil and heat in an oven at 350°F (175°C) for 10-15 minutes.
Shelf Life
At room temperature, your rolls will stay fresh for about two days. In the fridge, they can last up to a week. Always check for signs of spoilage. Look for any mold or strange smells. If they feel hard or dry, it's best to toss them. Keeping an eye on your dinner rolls will ensure you enjoy their great taste!
FAQs
Can I make these rolls ahead of time?
Yes, you can prepare these rolls ahead of time. You can make the dough and let it rise. After the first rise, you can shape the rolls. Place them in the baking dish and cover. Store them in the fridge overnight. The next day, let them come to room temperature before baking.
How do I keep dinner rolls soft?
To keep your rolls soft, store them in an airtight container. You can also wrap them in a clean cloth. Adding a slice of bread to the container can help maintain moisture. If you have leftovers, reheat them briefly in the oven.
Can I use dried herbs instead of fresh?
Yes, you can use dried herbs. Use about one-third of the amount of fresh herbs. For example, if the recipe calls for 1 tablespoon of fresh herbs, use 1 teaspoon of dried. Dried herbs are more potent, so adjust to taste.
What can I serve with garlic herb dinner rolls?
These rolls pair well with many dishes. Serve them with soups, salads, or stews. They also go nicely with grilled meats or as a side for pasta. For a fun twist, try them with a cheese platter.
Can I adjust the garlic flavor?
Absolutely! You can add more or less garlic to suit your taste. For a milder flavor, use just one clove of garlic. If you love garlic, add an extra clove or two. You can also use garlic powder if you want a different taste.
In this post, we covered how to make delicious garlic herb dinner rolls. You learned about the needed ingredients, step-by-step baking instructions, and important tips for perfect results. We also discussed fun variations and storage information.
These rolls bring great flavor to any meal. Try them with your favorite dishes. Enjoy baking and sharing these warm, tasty rolls soon!