No-Bake Peanut Butter Pumpkin Cups Easy Recipe

WANT TO SAVE THIS RECIPE?

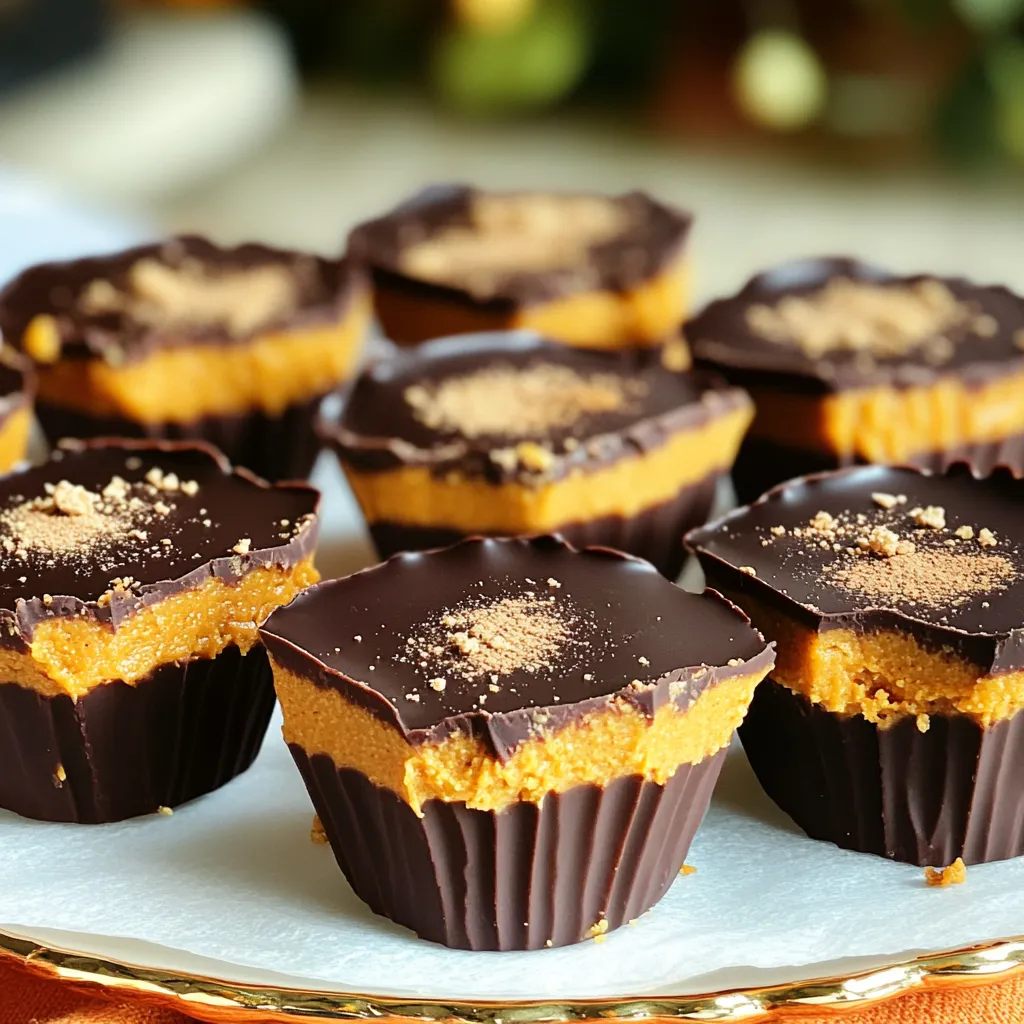
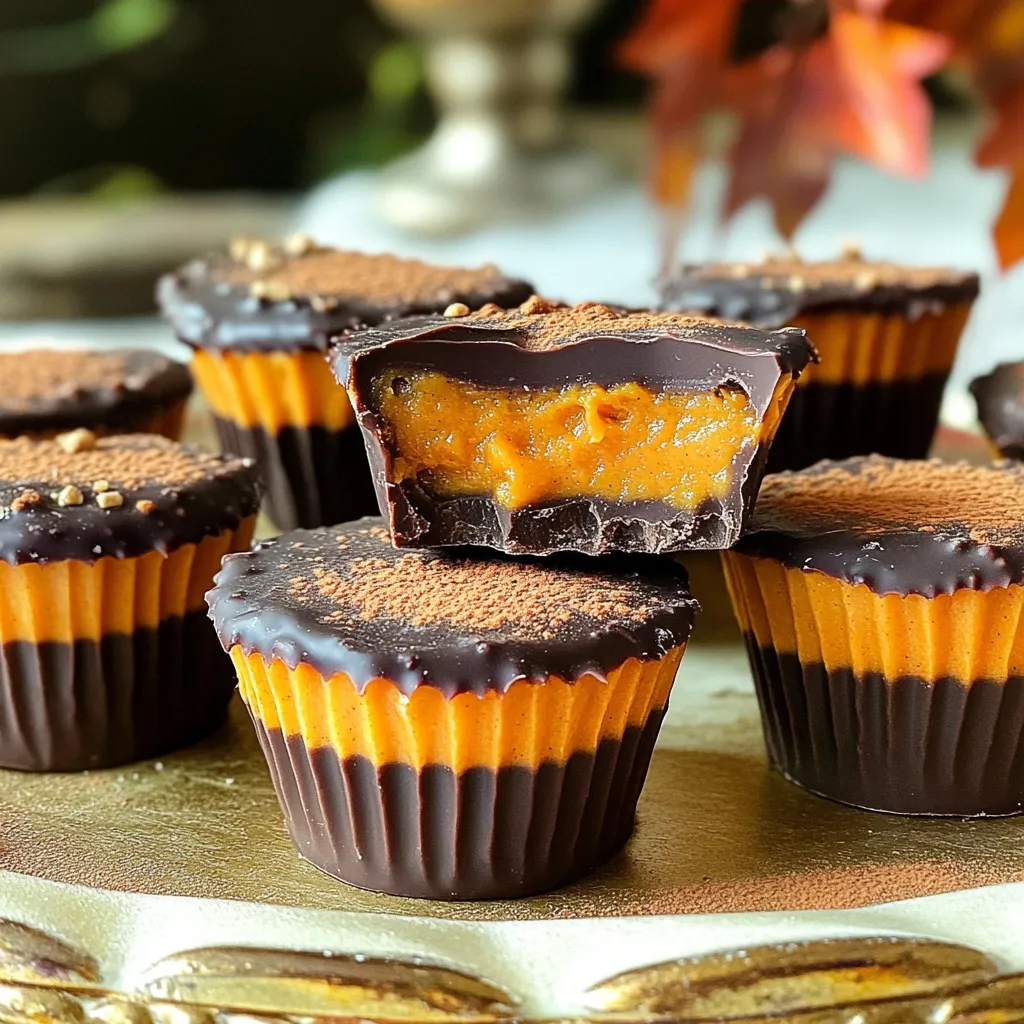
Craving a sweet fall treat? These No-Bake Peanut Butter Pumpkin Cups are your answer! With just a few simple ingredients, you can whip up a dessert that’s creamy, delicious, and perfect for sharing. Whether you’re an experienced chef or new to the kitchen, this easy recipe will wow your taste buds. Get ready to enjoy a hassle-free treat that will impress friends and family alike! Let’s dive into the details.

Ingredients

List of Required Ingredients

– 1 cup creamy peanut butter

– 1/2 cup canned pumpkin puree

– 1/4 cup maple syrup (or honey)

– 1 teaspoon vanilla extract

– 1 teaspoon pumpkin spice

– 1/4 teaspoon sea salt

– 1 cup graham cracker crumbs

– 1/2 cup dark chocolate chips

– 1 tablespoon coconut oil

Optional Ingredients

– Dairy-free chocolate chips

– Additional spices (cinnamon, nutmeg, ginger)

I love this recipe because it uses simple and tasty ingredients. The creamy peanut butter gives a rich base. Canned pumpkin puree adds a nice fall flavor and a creamy texture. Maple syrup sweetens it up, but you can swap it with honey if you like.

The vanilla extract enhances all the flavors. Pumpkin spice brings warmth and is a must-have for fall. A touch of sea salt balances the sweetness perfectly. Graham cracker crumbs give a nice crunch and help the mixture hold together.

For the chocolate layer, I use dark chocolate chips because they melt well. Coconut oil helps the chocolate stay smooth. If you want a dairy-free option, use dairy-free chocolate chips. You can also add more spices like cinnamon, nutmeg, or ginger for extra flavor.

This recipe is flexible. Feel free to mix and match these ingredients based on what you have. You can even use different nut butters. Just remember, the key is to enjoy the process and have fun!

Step-by-Step Instructions

Preparation of the Peanut Butter Pumpkin Mixture

Start by gathering your ingredients. In a medium bowl, mix together the creamy peanut butter, canned pumpkin puree, and maple syrup. Add in the vanilla extract, pumpkin spice, and sea salt. Stir until the mixture is smooth and creamy. Then, fold in the graham cracker crumbs. This step is key. The crumbs give the mixture a nice texture and help it hold together.

Assembling the Cups

Next, line a muffin tin with cupcake liners. This makes it easy to remove the cups later. Scoop the peanut butter pumpkin mixture into each liner. Fill them about three-quarters full. Press down a little to make a flat surface. This ensures a nice, even shape for your cups.

Melting the Chocolate

In a microwave-safe bowl, combine the dark chocolate chips and coconut oil. Heat this mixture in the microwave. Do it in 30-second bursts. Stir between each burst. Keep going until it’s smooth and melted. Be careful not to overheat it. You want it silky, not burnt.

Finalizing the Dessert

Now, pour the melted chocolate over each cup. Fill them to the top for a rich, chocolatey layer. Tap the muffin tin gently on the counter. This helps get rid of air bubbles. Then, place the tin in the refrigerator. Let it chill for at least one to two hours. This step is crucial. You want the chocolate to set completely. Once set, take the cups out and peel off the liners. Enjoy your no-bake peanut butter pumpkin cups!

Tips & Tricks

Perfecting the Texture

To make great peanut butter pumpkin cups, you need the right mix. Start by blending creamy peanut butter, canned pumpkin puree, maple syrup, vanilla, pumpkin spice, and sea salt. Mix until it is smooth. You want it thick enough to hold together. Stir in the graham cracker crumbs slowly. This adds crunch and helps the cups set. If it feels too runny, add more graham cracker crumbs. If it’s too thick, a splash of pumpkin puree can help.

Chocolate Melting Tips

Melting chocolate is key. Use a microwave-safe bowl to melt your dark chocolate chips with coconut oil. Start with 30 seconds in the microwave. After each time, stir the chocolate. This helps it melt evenly and prevents burning. If it still feels lumpy, heat for another 15 seconds at a time. Remember, you want a smooth, shiny finish for your chocolate layer.

Presentation and Serving Suggestions

Presentation makes food more fun! Once your cups are set, take them out of the muffin tin. Arrange them on a nice platter. You can sprinkle crushed graham crackers on top for texture. A light dusting of pumpkin spice adds a nice touch, too. This gives your cups a festive look, perfect for any fall gathering. Feel free to let your creativity shine!

Variations

Flavor Variations

You can switch up the nut butters in this recipe. If you want a new taste, try almond or cashew butter. Each nut butter brings its unique flavor. Almond butter offers a nutty and creamy taste. Cashew butter is rich and smooth. Both options mix well with pumpkin and chocolate.

Healthier Alternatives

To make this recipe a bit healthier, consider using different sweeteners. Instead of maple syrup, you could use agave nectar or honey. Both add sweetness without the strong flavor of maple. For the graham crackers, you can try crushed oats or nut flour. These options keep the texture while cutting down on refined carbs.

Seasonal Additions

This recipe is perfect for fall, but you can add other seasonal flavors. Try mixing in some apple puree for a fruity twist. You can also add a little caramel sauce on top for extra sweetness. These additions give the cups a new depth of flavor. Enjoy experimenting with these ideas to make your own special treats!

Storage Info

How to Store Leftovers

Store your leftover peanut butter pumpkin cups in airtight containers. They stay fresh in the fridge for the best taste. Use glass or plastic containers with lids. Make sure the cups are cool before sealing them. This prevents moisture from ruining their texture.

Freezing Instructions

Yes, you can freeze the cups! Wrap each cup in plastic wrap or foil. Place them in a freezer-safe bag or container. This helps keep them fresh for longer. When you want to enjoy them, let them thaw in the fridge overnight.

Shelf Life

These tasty treats last about one week in the fridge. After that, they may lose flavor and texture. Keep an eye on them and enjoy them while they are fresh!

FAQs

Can I use natural peanut butter?

Yes, you can use natural peanut butter. Natural peanut butter has fewer additives. It may be less sweet than regular peanut butter. This can change the taste of the cups slightly. Stir well before use, as natural peanut butter tends to separate.

What can I substitute for maple syrup?

If you don’t have maple syrup, try honey or agave syrup. Both options add sweetness. You can also use brown sugar mixed with a little water. This will give you a similar flavor. Adjust the amount based on your taste.

How do I know when the chocolate is properly melted?

Check the chocolate after every 30 seconds in the microwave. It should look smooth and shiny. Stir it well to mix all parts together. If there are small lumps, keep microwaving in short bursts. Avoid overheating to prevent burning.

Can I make this recipe vegan?

Yes, you can make this recipe vegan. Use maple syrup instead of honey. Choose dairy-free chocolate chips. Check the graham crackers for dairy. Many brands offer vegan options. These swaps keep the flavor while fitting a vegan diet.

Are these cups gluten-free?

These cups can be gluten-free. Use gluten-free graham crackers instead of regular ones. Many brands offer gluten-free options. Always check the labels to avoid hidden gluten. This way, everyone can enjoy these delicious cups!

This blog post shared a simple and tasty recipe for peanut butter pumpkin cups. We covered each ingredient, the steps to make them, and tips for the best results. You learned how to make these treats unique with flavors and alternatives. Storing and freezing options help keep them fresh. I hope this recipe excites you to start creating. Enjoy your dessert and have fun experimenting with flavors!

- 1 cup creamy peanut butter - 1/2 cup canned pumpkin puree - 1/4 cup maple syrup (or honey) - 1 teaspoon vanilla extract - 1 teaspoon pumpkin spice - 1/4 teaspoon sea salt - 1 cup graham cracker crumbs - 1/2 cup dark chocolate chips - 1 tablespoon coconut oil - Dairy-free chocolate chips - Additional spices (cinnamon, nutmeg, ginger) I love this recipe because it uses simple and tasty ingredients. The creamy peanut butter gives a rich base. Canned pumpkin puree adds a nice fall flavor and a creamy texture. Maple syrup sweetens it up, but you can swap it with honey if you like. The vanilla extract enhances all the flavors. Pumpkin spice brings warmth and is a must-have for fall. A touch of sea salt balances the sweetness perfectly. Graham cracker crumbs give a nice crunch and help the mixture hold together. For the chocolate layer, I use dark chocolate chips because they melt well. Coconut oil helps the chocolate stay smooth. If you want a dairy-free option, use dairy-free chocolate chips. You can also add more spices like cinnamon, nutmeg, or ginger for extra flavor. This recipe is flexible. Feel free to mix and match these ingredients based on what you have. You can even use different nut butters. Just remember, the key is to enjoy the process and have fun! Start by gathering your ingredients. In a medium bowl, mix together the creamy peanut butter, canned pumpkin puree, and maple syrup. Add in the vanilla extract, pumpkin spice, and sea salt. Stir until the mixture is smooth and creamy. Then, fold in the graham cracker crumbs. This step is key. The crumbs give the mixture a nice texture and help it hold together. Next, line a muffin tin with cupcake liners. This makes it easy to remove the cups later. Scoop the peanut butter pumpkin mixture into each liner. Fill them about three-quarters full. Press down a little to make a flat surface. This ensures a nice, even shape for your cups. In a microwave-safe bowl, combine the dark chocolate chips and coconut oil. Heat this mixture in the microwave. Do it in 30-second bursts. Stir between each burst. Keep going until it’s smooth and melted. Be careful not to overheat it. You want it silky, not burnt. Now, pour the melted chocolate over each cup. Fill them to the top for a rich, chocolatey layer. Tap the muffin tin gently on the counter. This helps get rid of air bubbles. Then, place the tin in the refrigerator. Let it chill for at least one to two hours. This step is crucial. You want the chocolate to set completely. Once set, take the cups out and peel off the liners. Enjoy your no-bake peanut butter pumpkin cups! To make great peanut butter pumpkin cups, you need the right mix. Start by blending creamy peanut butter, canned pumpkin puree, maple syrup, vanilla, pumpkin spice, and sea salt. Mix until it is smooth. You want it thick enough to hold together. Stir in the graham cracker crumbs slowly. This adds crunch and helps the cups set. If it feels too runny, add more graham cracker crumbs. If it’s too thick, a splash of pumpkin puree can help. Melting chocolate is key. Use a microwave-safe bowl to melt your dark chocolate chips with coconut oil. Start with 30 seconds in the microwave. After each time, stir the chocolate. This helps it melt evenly and prevents burning. If it still feels lumpy, heat for another 15 seconds at a time. Remember, you want a smooth, shiny finish for your chocolate layer. Presentation makes food more fun! Once your cups are set, take them out of the muffin tin. Arrange them on a nice platter. You can sprinkle crushed graham crackers on top for texture. A light dusting of pumpkin spice adds a nice touch, too. This gives your cups a festive look, perfect for any fall gathering. Feel free to let your creativity shine! {{image_2}} You can switch up the nut butters in this recipe. If you want a new taste, try almond or cashew butter. Each nut butter brings its unique flavor. Almond butter offers a nutty and creamy taste. Cashew butter is rich and smooth. Both options mix well with pumpkin and chocolate. To make this recipe a bit healthier, consider using different sweeteners. Instead of maple syrup, you could use agave nectar or honey. Both add sweetness without the strong flavor of maple. For the graham crackers, you can try crushed oats or nut flour. These options keep the texture while cutting down on refined carbs. This recipe is perfect for fall, but you can add other seasonal flavors. Try mixing in some apple puree for a fruity twist. You can also add a little caramel sauce on top for extra sweetness. These additions give the cups a new depth of flavor. Enjoy experimenting with these ideas to make your own special treats! Store your leftover peanut butter pumpkin cups in airtight containers. They stay fresh in the fridge for the best taste. Use glass or plastic containers with lids. Make sure the cups are cool before sealing them. This prevents moisture from ruining their texture. Yes, you can freeze the cups! Wrap each cup in plastic wrap or foil. Place them in a freezer-safe bag or container. This helps keep them fresh for longer. When you want to enjoy them, let them thaw in the fridge overnight. These tasty treats last about one week in the fridge. After that, they may lose flavor and texture. Keep an eye on them and enjoy them while they are fresh! Yes, you can use natural peanut butter. Natural peanut butter has fewer additives. It may be less sweet than regular peanut butter. This can change the taste of the cups slightly. Stir well before use, as natural peanut butter tends to separate. If you don’t have maple syrup, try honey or agave syrup. Both options add sweetness. You can also use brown sugar mixed with a little water. This will give you a similar flavor. Adjust the amount based on your taste. Check the chocolate after every 30 seconds in the microwave. It should look smooth and shiny. Stir it well to mix all parts together. If there are small lumps, keep microwaving in short bursts. Avoid overheating to prevent burning. Yes, you can make this recipe vegan. Use maple syrup instead of honey. Choose dairy-free chocolate chips. Check the graham crackers for dairy. Many brands offer vegan options. These swaps keep the flavor while fitting a vegan diet. These cups can be gluten-free. Use gluten-free graham crackers instead of regular ones. Many brands offer gluten-free options. Always check the labels to avoid hidden gluten. This way, everyone can enjoy these delicious cups! This blog post shared a simple and tasty recipe for peanut butter pumpkin cups. We covered each ingredient, the steps to make them, and tips for the best results. You learned how to make these treats unique with flavors and alternatives. Storing and freezing options help keep them fresh. I hope this recipe excites you to start creating. Enjoy your dessert and have fun experimenting with flavors!

No-Bake Peanut Butter Pumpkin Cups

Indulge in the ultimate fall treat with these No-Bake Peanut Butter Pumpkin Cups! Easy to make and packed with flavor, these delightful cups combine creamy peanut butter, rich pumpkin puree, and dark chocolate for a sweet bite that's perfect for any occasion. With just a few simple ingredients and minimal prep time, you can create a festive dessert that everyone will love. Click through to explore the full recipe and impress your guests!

Ingredients
  

1 cup creamy peanut butter

1/2 cup canned pumpkin puree

1/4 cup maple syrup (or honey)

1 teaspoon vanilla extract

1 teaspoon pumpkin spice (or a mix of cinnamon, nutmeg, and ginger)

1/4 teaspoon sea salt

1 cup graham cracker crumbs

1/2 cup dark chocolate chips (dairy-free if desired)

1 tablespoon coconut oil (for the chocolate)

Instructions
 

In a medium bowl, combine peanut butter, pumpkin puree, maple syrup, vanilla extract, pumpkin spice, and sea salt. Mix until smooth and well combined.

    Stir in the graham cracker crumbs until fully incorporated and the mixture is thick enough to hold together.

      Line a muffin tin with cupcake liners for easier removal.

        Evenly distribute the peanut butter pumpkin mixture into the lined muffin tin, filling each cup to about 3/4 full. Press down slightly to create a flat surface.

          In a microwave-safe bowl, combine dark chocolate chips and coconut oil. Microwave in 30-second intervals, stirring in between, until melted and smooth.

            Pour the melted chocolate over the peanut butter pumpkin mixture in each cup, filling them to the top.

              Tap the muffin tin gently on the counter to remove any air bubbles and smooth out the chocolate layer.

                Place the muffin tin in the refrigerator and let it chill for at least 1-2 hours, or until the chocolate is set completely.

                  Once set, remove the cups from the muffin tin and carefully peel off the liners.

                    Prep Time, Total Time, Servings: 15 mins | 2 hrs | 12 cups

                      - Presentation Tips: Arrange the pumpkin cups on a festive serving platter, and garnish with a sprinkle of crushed graham crackers or a dusting of pumpkin spice for a beautiful fall-themed dessert.

                        WANT TO SAVE THIS RECIPE?

                        Leave a Comment

                        Recipe Rating