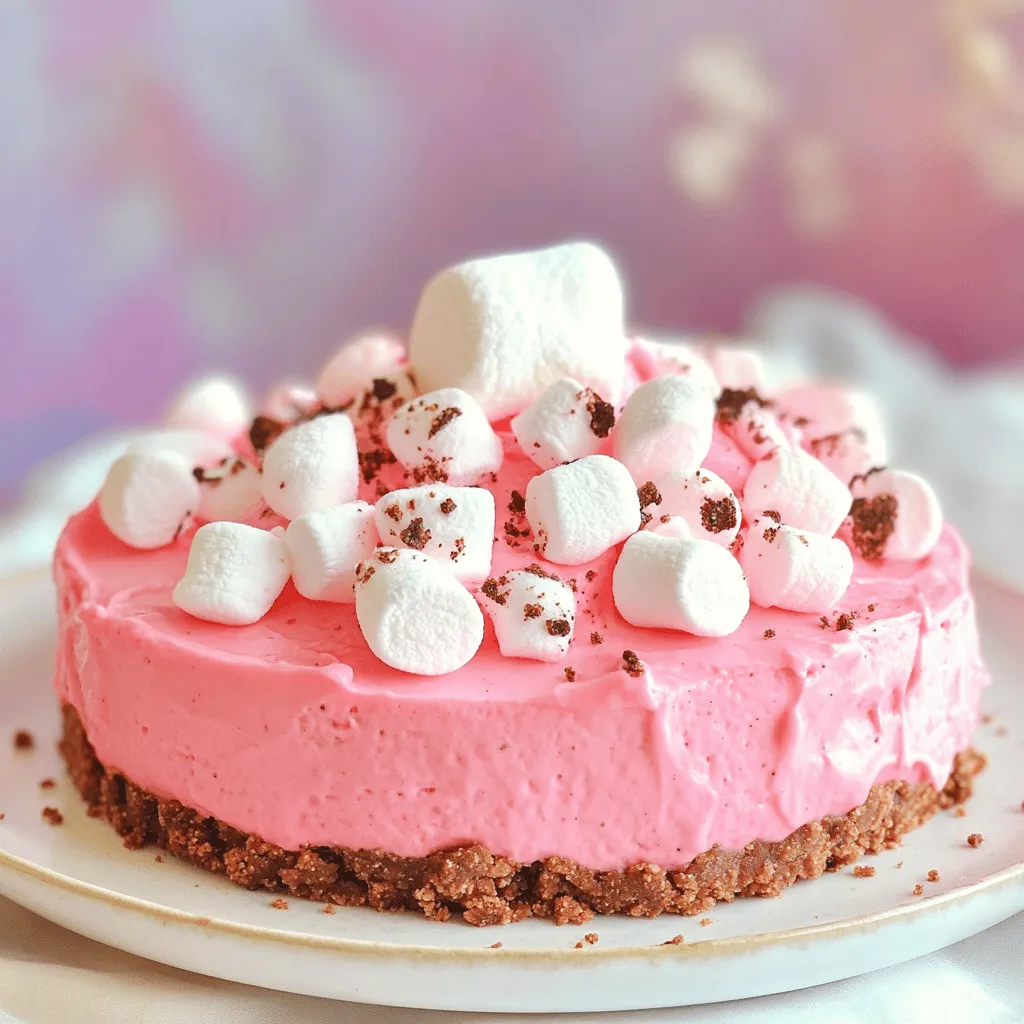
Are you ready to whip up a treat that’s both fun and easy? This Pink Oreo No-Bake Cheesecake is perfect for any occasion. You don’t need to be a master chef to create this dreamy dessert. I’ll guide you step-by-step, from selecting your key ingredients to adding unique twists. Let’s dive in and discover how to make a show-stopping cheesecake that will impress everyone!
Ingredients
Key Ingredients for Pink Oreo No-Bake Cheesecake
To make this cheesecake, you need some key ingredients. Here’s what you’ll need:
– 1 package (15.25 oz) pink Oreo cookies, crushed (reserve a few for garnish)
– ½ cup unsalted butter, melted
– 1 package (8 oz) cream cheese, softened
– 1 cup powdered sugar
– 1 teaspoon vanilla extract
– 2 cups heavy whipping cream
– 1 cup mini marshmallows (for sweetness and fluffiness)
– 2 tablespoons pink food coloring (optional)
These ingredients come together to make a rich and creamy cheesecake. The pink Oreo cookies give this dessert its fun color and flavor.
Optional Ingredients for Extra Flavor
You can add some optional ingredients to boost flavor. Consider these choices:
– Extra vanilla extract for a deeper flavor.
– A pinch of salt to enhance sweetness.
– Fresh berries for a fruity touch.
Adding these ingredients can help you create a cheesecake that fits your taste.
Ingredient Substitutions
If you don’t have some ingredients, don’t worry! Here are some great substitutions:
– Use regular Oreo cookies if you can’t find pink ones.
– Substitute cream cheese with Greek yogurt for a lighter cheesecake.
– Use coconut cream instead of heavy whipping cream for a dairy-free option.
These substitutions can help you enjoy this cheesecake, even if you lack some items.
Step-by-Step Instructions
Preparing the Crust
To start, gather your ingredients. You need pink Oreo cookies and melted butter. Crush the cookies in a bowl until they are fine crumbs. Mix the crumbs with the melted butter. This blend holds the crust together. Press the mixture into the bottom of a 9-inch springform pan. Make sure it is even and compact. Then, place the pan in the fridge. It needs to chill while you work on the filling.
Making the Cheesecake Filling
Next, it’s time for the filling. Take your softened cream cheese and put it in a large mixing bowl. Use an electric mixer on medium speed to beat it until smooth. Gradually add the powdered sugar and vanilla extract. Continue mixing until the mixture is creamy. In a separate bowl, whip the heavy cream until it forms stiff peaks. This step makes the cheesecake light and fluffy. Gently fold the whipped cream into the cream cheese mixture. Be careful not to deflate it. Then, fold in the mini marshmallows and optional pink food coloring. Mix until everything is well combined.
Chilling and Serving the Dessert
Now pour the cheesecake filling over the chilled crust. Use a spatula to smooth the top. Cover the pan with plastic wrap and place it in the refrigerator. Let it chill for at least 4 hours, or until it is firm. Once it is set, carefully remove the springform pan. For a nice touch, decorate the top with the reserved crushed Oreos. You can also add mini marshmallows or whipped cream. This makes it look festive and fun.
Tips & Tricks
Achieving the Perfect Texture
To get the best texture in your Pink Oreo No-Bake Cheesecake, focus on your cream. Whip the heavy cream until it forms stiff peaks. This helps give your cheesecake a light and airy feel. When you mix it with the cream cheese, fold gently. Overmixing can make it dense. Also, let your cream cheese soften at room temperature. This makes it easier to blend and reduces lumps.
Decorating Your Cheesecake
The right decoration can make your cheesecake shine. Use some of the crushed pink Oreos to sprinkle on top. This adds a nice crunch. You can also add mini marshmallows for a fun touch. For extra color, drizzle some melted chocolate over the top. If you want a pop of color, use fresh berries or edible flowers. Serve on pink plates for a fun theme.
Common Mistakes to Avoid
Many home cooks face simple mistakes. One common error is not chilling the cheesecake long enough. It needs at least four hours to set properly. Another mistake is using cold cream cheese. Always let it sit out to warm up first. This helps it mix smoothly. Lastly, don’t skip the food coloring if you want a vibrant pink color.

Variations
Different Flavor Profiles
You can switch up the flavors of your Pink Oreo No-Bake Cheesecake. Try using different cookie types for a fun twist. For example, use golden Oreos for a vanilla taste. You can also mix in some peanut butter, chocolate, or mint extract. Each change brings a new taste. You can even try adding fruit purees like strawberry or raspberry for a fruity version.
Alternative Toppings
Toppings can make your cheesecake extra special. You can use fresh strawberries or raspberries for a juicy touch. Shredded coconut or crushed nuts can add a nice crunch. You could also drizzle chocolate or caramel sauce on top. This gives every bite a mix of flavors. For a fun look, add colorful sprinkles or edible glitter. They make the dessert pop!
Mini Cheesecake Cups Version
Mini cheesecake cups are great for parties. To make them, use small cups or jars. Start with your crust at the bottom. Then, layer the cheesecake filling on top. You can even include layers of fruit or sauces. Chill the mini cups just like the full cheesecake. These are perfect for serving at events or for a fun family treat.
Storage Info
How to Store Leftovers
Store any leftover Pink Oreo No-Bake Cheesecake in the fridge. Place slices in an airtight container. It will stay fresh for about 3 to 5 days. If you have the whole cheesecake, cover it well with plastic wrap. This keeps it from drying out and helps maintain its lovely texture.
Freezing Guidelines
You can freeze this cheesecake too! Cut it into slices first and wrap each slice in plastic wrap. Then place them in a freezer-safe bag or container. This way, you can enjoy a slice later. It can last up to 2 months in the freezer. Just remember to label the bag with the date.
Best Practices for Thawing
When you’re ready to enjoy your frozen cheesecake, thaw it in the fridge overnight. This keeps the texture smooth and creamy. Avoid thawing it at room temperature. That can make it too soft and lose its shape. Enjoy your delightful cheesecake just like new!
FAQs
Can I make this cheesecake ahead of time?
Yes, you can make this cheesecake a day before. It tastes even better after chilling overnight! This allows all the flavors to blend well. Just cover it tightly with plastic wrap to keep it fresh.
How long does the cheesecake last in the fridge?
The cheesecake lasts about 3 to 5 days in the fridge. Make sure to keep it covered. If you notice any changes in smell or texture, it’s best to discard it.
Can I use regular Oreos instead of pink Oreos?
Absolutely! Regular Oreos work great too. They will give you a different look, but the taste will still be yummy. The pink color comes from the pink Oreos, so your cheesecake will be less vibrant.
What can I substitute for cream cheese in this recipe?
You can use mascarpone cheese or Greek yogurt as a substitute. Both will give you a creamy texture. Just keep in mind the flavor may change slightly.
Is it necessary to use food coloring?
No, it’s not necessary. The food coloring adds a fun pink hue, but it’s optional. You can skip it if you prefer a more natural look. The cheesecake will still taste delicious without it.
This blog post covered how to make a Pink Oreo No-Bake Cheesecake. We looked at key ingredients, optional flavors, and substitutions. I shared easy steps for the crust, filling, and chilling. You learned helpful tips for perfecting texture, decorating, and avoiding mistakes. We explored fun variations and how to store leftovers properly.
In summary, this dessert is fun and easy to make. Enjoy trying your own flavors and designs!