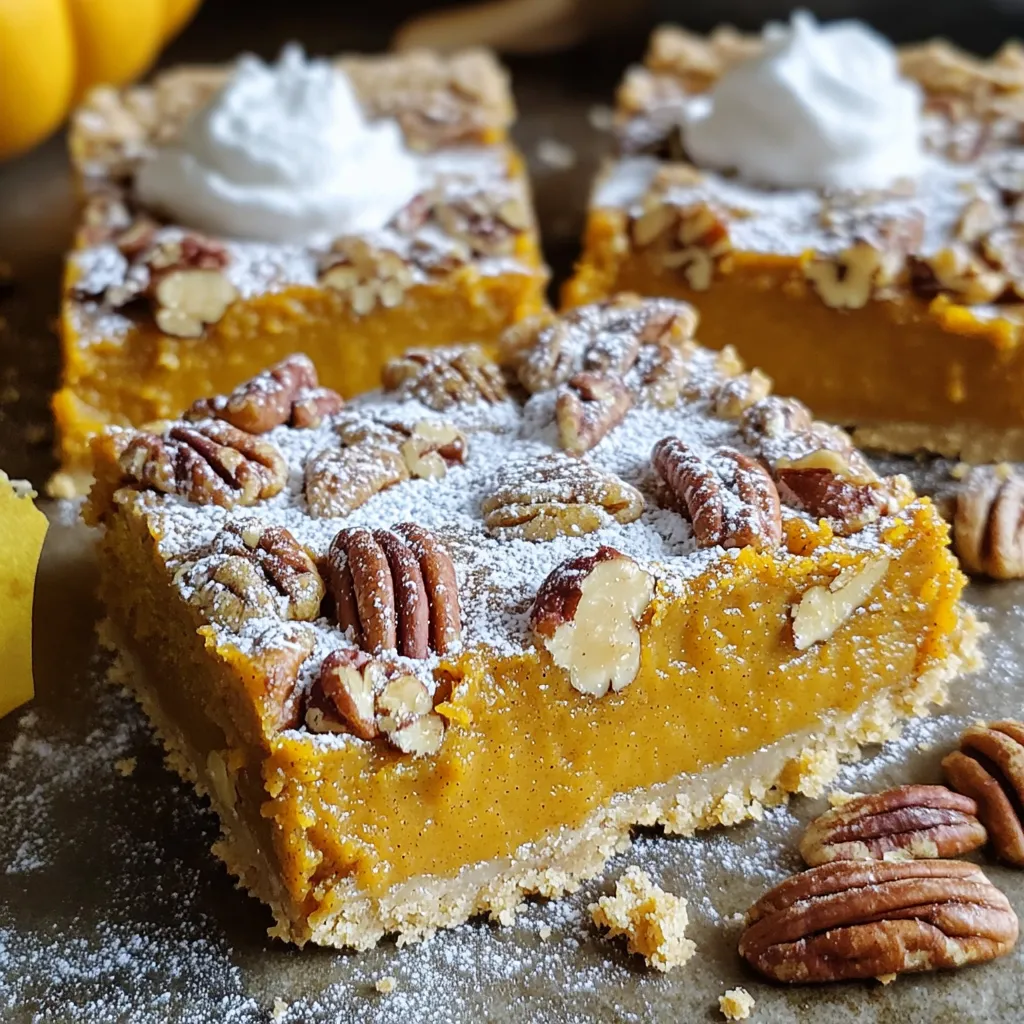
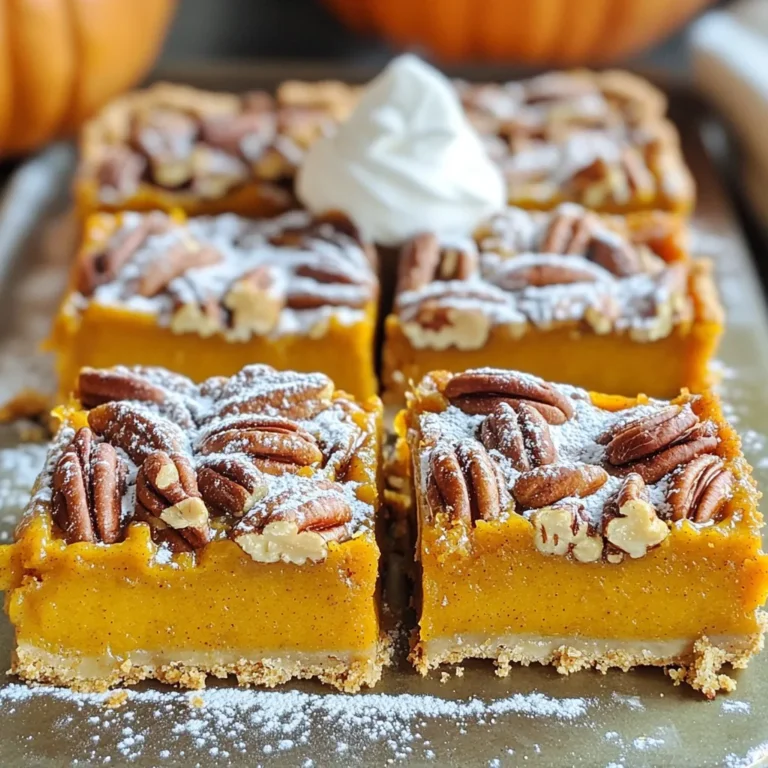
If you love fall flavors, pumpkin pecan pie bars are the perfect treat for you! This delightful dessert combines creamy pumpkin and crunchy pecans in a simple, easy-to-make recipe. Whether you’re hosting a gathering or just craving something sweet, these bars will impress everyone. Join me as I walk you through the steps, tips, and variations to make your baking experience a joy. Let’s dive in!
Ingredients
Required Ingredients for Pumpkin Pecan Pie Bars
To make these tasty bars, you need a few key ingredients. Here’s what you will need:
– 1 cup all-purpose flour
– 1/2 cup unsalted butter, melted
– 1/4 cup granulated sugar
– 1/2 teaspoon salt
– 1 cup pumpkin puree
– 1/2 cup brown sugar, packed
– 2 large eggs
– 1 teaspoon vanilla extract
– 1 teaspoon ground cinnamon
– 1/2 teaspoon ground nutmeg
– 1/4 teaspoon ground ginger
– 1/4 cup heavy cream
– 1 cup pecans, roughly chopped
Measurement Details
Accurate measurements matter for great results. Use a dry measuring cup for the flour and sugar. When measuring the butter, melt it first for easy pouring. For the pumpkin puree, make sure it’s pure and not pie filling. Pack the brown sugar into the cup tightly. This ensures you get the right sweetness.
Optional Ingredients for Enhanced Flavor
You can boost the flavor of your bars with some optional ingredients. Here are a few ideas:
– A pinch of ground cloves for warmth
– A splash of maple syrup for extra sweetness
– Chocolate chips for a sweet twist
– Sea salt on top for contrast
Feel free to mix and match these options. They can make your bars even more special!
Step-by-Step Instructions
Preheating and Preparing the Baking Pan
First, set your oven to 350°F (175°C). This temperature works great for baking. Next, take an 8×8-inch baking pan and line it with parchment paper. Leave some paper hanging over the edges. This helps you lift the bars out later.
Making the Crust
In a medium bowl, mix the following ingredients:
– 1 cup all-purpose flour
– 1/2 cup unsalted butter, melted
– 1/4 cup granulated sugar
– 1/2 teaspoon salt
Stir these until they look crumbly. Press this mixture evenly into the bottom of your prepared baking pan. Bake it for 15 minutes or until it turns lightly golden. This crust will be the base of your bars.
Preparing the Pumpkin Filling
In a large bowl, whisk together:
– 1 cup pumpkin puree
– 1/2 cup brown sugar, packed
– 2 large eggs
– 1 teaspoon vanilla extract
– 1 teaspoon ground cinnamon
– 1/2 teaspoon ground nutmeg
– 1/4 teaspoon ground ginger
– 1/4 cup heavy cream
Mix until everything is smooth. This filling has a great fall flavor and will make your bars delicious.
Incorporating the Pecans
Now, take 1 cup of roughly chopped pecans. Gently fold them into the pumpkin mixture. This adds a nice texture and crunch. Make sure the pecans are evenly mixed in.
Baking Instructions
Pour the pumpkin-pecan filling over the crust. Use a spatula to spread it evenly. Bake the bars for 25 to 30 minutes. They are done when the filling is set. You can check this by inserting a toothpick in the center. If it comes out clean, they are ready.
Cooling and Slicing the Bars
Let the bars cool completely in the pan on a wire rack. Once cool, lift them out using the parchment overhang. Cut them into squares with a sharp knife. These bars are now ready to enjoy!
Tips & Tricks
How to Avoid a Soggy Crust
To keep your crust crisp, always pre-bake it. This step cooks the base before adding the filling. After mixing the crust ingredients, press it firmly into the pan. Bake it for 15 minutes. Watch it closely. Look for a light golden color. If it browns too much, it can taste bitter. Make sure the crust cools slightly before adding the pumpkin filling.
Perfecting the Pumpkin Filling Texture
For a smooth filling, blend your ingredients well. Start with the pumpkin puree and brown sugar. Use a whisk to mix in eggs, vanilla, and spices. This helps break up any lumps. The heavy cream adds richness and a silky texture. When mixing, don’t overdo it. Just until smooth is enough. Over-mixing can add air, which changes the texture.
Serving Suggestions for Presentation
Presentation matters. Cut the bars into neat squares for serving. Dust them with powdered sugar for a sweet touch. You can add a dollop of whipped cream on the side. A sprinkle of chopped pecans on top adds crunch. This makes the dish look inviting and festive. Use a nice plate to elevate your dessert experience.

Variations
Gluten-Free Pumpkin Pecan Pie Bars
You can easily make these bars gluten-free. Just swap the all-purpose flour for a gluten-free blend. Look for one that has a good mix of starches and flours. This will keep the bars soft and tasty. Make sure to check if your other ingredients, like the baking powder, are also gluten-free.
Vegan Adaptations for the Recipe
If you’re looking for a vegan option, you can replace the eggs. Use flax eggs instead. To make one flax egg, mix one tablespoon of ground flaxseed with three tablespoons of water. Let it sit for a few minutes to thicken. You can also use coconut cream in place of heavy cream for a rich texture. These changes will keep the flavor while making it plant-based.
Flavor Variations: Adding Spices or Extracts
You can spice up your pumpkin pecan pie bars with more flavors. Try adding a pinch of allspice or cardamom for a warm twist. You can also add a splash of maple syrup or almond extract for a unique taste. These small changes can really bring out the fall vibes in your dish. Experiment and find your favorite blend.
Storage Info
How to Store Leftover Pumpkin Pecan Pie Bars
After you enjoy your pumpkin pecan pie bars, store leftovers in an airtight container. Make sure they are completely cool before covering them. This helps keep the bars fresh. They can last in the fridge for up to five days. If you want to enjoy them later, freezing is a great option.
Freezing Instructions for Long-Term Storage
To freeze your pumpkin pecan pie bars, first cut them into squares. Wrap each square tightly with plastic wrap. Then, place them in a freezer-safe bag or container. Label the bag with the date. These bars can stay good in the freezer for up to three months. This way, you can enjoy a taste of fall even in summer!
Best Practices for Thawing and Reheating
When it’s time to eat your frozen bars, take them out of the freezer. Let them thaw in the fridge overnight. If you want them warm, preheat your oven to 350°F (175°C). Place the bars on a baking sheet and heat for about 10 minutes. You can also use a microwave for quick reheating. Just heat each square for 15 to 20 seconds. Enjoy them warm with a dollop of whipped cream!
FAQs
Can I substitute any ingredients in the recipe?
Yes, you can. If you want a gluten-free option, use almond flour instead of all-purpose flour. For a dairy-free version, replace unsalted butter with coconut oil and heavy cream with a plant-based cream. If you don’t have brown sugar, you can use white sugar with a bit of molasses to mimic the flavor.
How do I know when the bars are done baking?
Check the bars after 25 minutes. Insert a toothpick into the center. If it comes out clean, the bars are done. The filling should be set, and the edges will be slightly golden. If it’s still wet, bake for a few more minutes and check again.
What can I serve with Pumpkin Pecan Pie Bars?
These bars are great on their own, but you can enhance them. Serve with whipped cream for a creamy touch. A scoop of vanilla ice cream pairs well too. You can also add a sprinkle of cinnamon or chopped pecans on top for extra flavor and crunch.
Can I make these bars ahead of time?
Yes, making these bars ahead is easy. You can bake them up to two days in advance. Store them in the fridge. Just remember to let them cool completely before slicing. This will help keep the bars fresh and tasty.
In this article, we covered how to make delicious Pumpkin Pecan Pie Bars. We discussed the key ingredients needed, the step-by-step instructions for baking, and tips to improve your results. I also shared variations for gluten-free and vegan options, plus storage tips to keep your bars fresh.
Enjoy these tasty treats with friends and family. Feel free to experiment with flavors! You now have all you need to create a perfect dessert. Happy baking!


