Looking for a flavorful dip that’s easy to make? You’ve found it! This Roasted Garlic Goat Cheese Dip combines rich, creamy cheese with the sweet taste of roasted garlic. Perfect for any gathering, it’s a hit with friends and family alike. In this post, I’ll share fresh ingredient tips, easy steps, and fun variations. Get ready to impress with a dip that's sure to be a crowd-pleaser!
Why I Love This Recipe
- Rich Flavor: The combination of roasted garlic and creamy goat cheese creates a depth of flavor that’s irresistible.
- Easy to Make: This dip requires minimal prep and can be whipped up in just 10 minutes, making it perfect for last-minute gatherings.
- Versatile: Serve it with fresh veggies, crackers, or even spread it on bread for a tasty appetizer.
- Healthy Option: Using fresh ingredients and wholesome goat cheese makes this dip a healthier alternative to many store-bought options.
Ingredients
Complete List of Ingredients
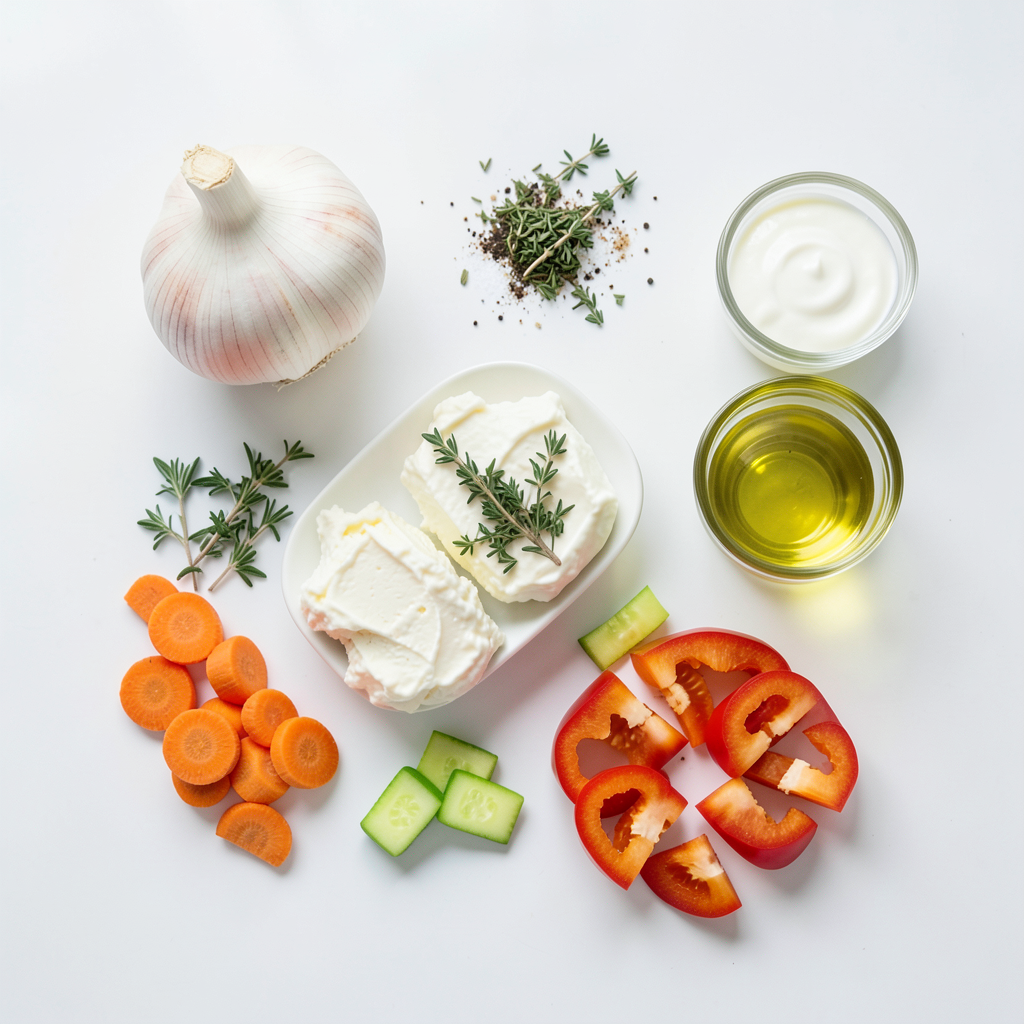
To make this tasty dip, you need these ingredients:
- 1 head of garlic
- 8 oz goat cheese, softened
- 4 oz cream cheese, softened
- 1/4 cup sour cream
- 2 tablespoons olive oil
- 1 tablespoon fresh thyme leaves, chopped
- Salt and pepper to taste
- Fresh veggies (carrots, celery, bell peppers) or crackers for serving
Tips for Selecting Fresh Ingredients
Choosing fresh ingredients is key to great flavor. For garlic, look for firm heads with tight skin. Avoid any that are soft or sprouting. When picking goat cheese, choose a log that feels soft and creamy. Check for a fresh smell. For cream cheese and sour cream, ensure they are well within the use-by date. Fresh thyme should smell fragrant and look vibrant.
Optional Add-ins for Enhanced Flavor
You can boost the flavor of your dip with a few fun add-ins. Consider mixing in:
- Chopped sun-dried tomatoes for a tangy bite.
- Crumbled bacon for a savory crunch.
- A pinch of red pepper flakes for some heat.
- A splash of lemon juice for brightness.
These add-ins can help you customize your dip to fit your taste. Enjoy experimenting!
Step-by-Step Instructions
Preparing the Roasted Garlic
To start, you need to roast the garlic. First, preheat your oven to 400°F (200°C). This makes the garlic soft and sweet. Next, cut the top off the head of garlic. This exposes the cloves. Drizzle one tablespoon of olive oil over it. Wrap the garlic in aluminum foil. Place it in the oven and roast for 30-35 minutes. The cloves should feel soft and look golden. Once done, remove it from the oven and let it cool.
Mixing the Cheese Base
Now, let's mix the cheese. In a mixing bowl, add 8 oz of softened goat cheese, 4 oz of softened cream cheese, and 1/4 cup of sour cream. Use a fork or a hand mixer to blend them well. It should be creamy and smooth. Next, squeeze the roasted garlic cloves out of their skins into the cheese mixture. This adds a rich flavor. Mix everything together until it's well combined. Finally, stir in the fresh thyme leaves. Add salt and pepper to taste.
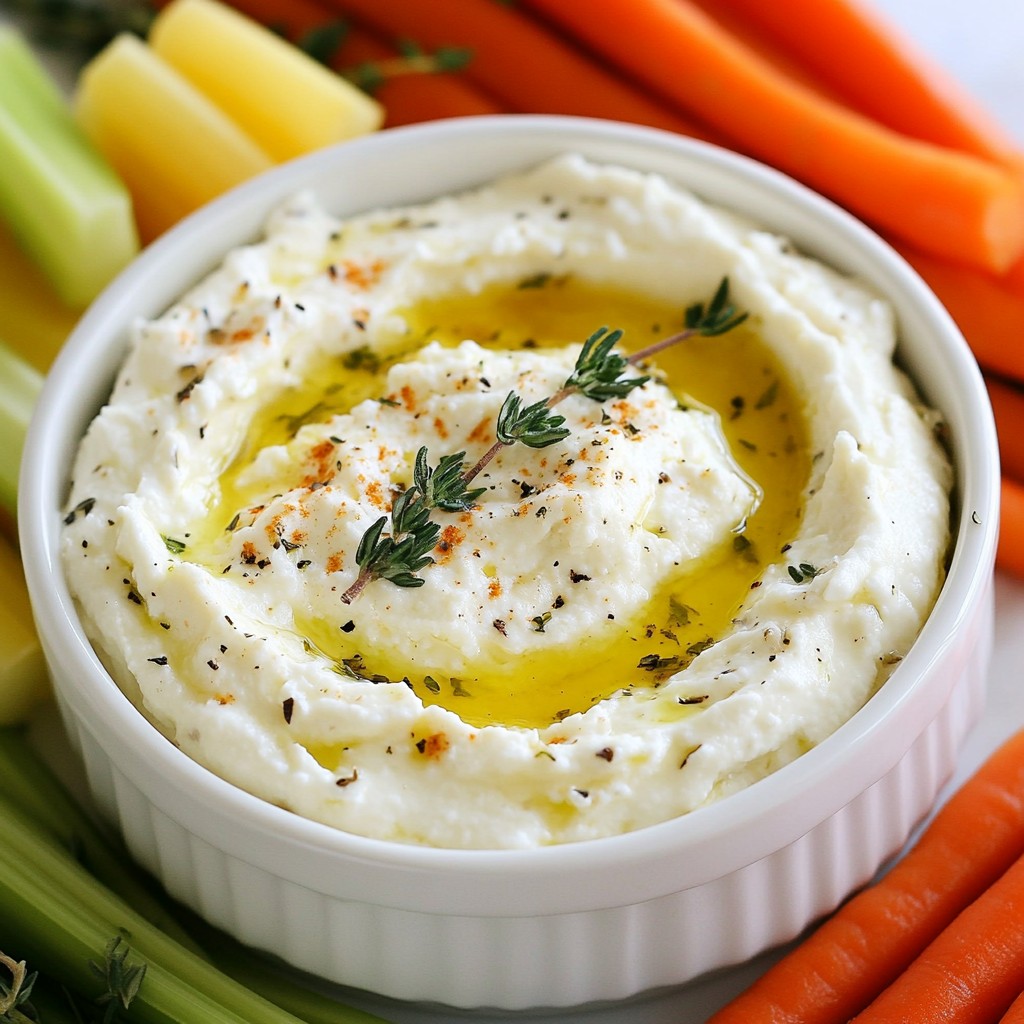
Final Assembly and Presentation Tips
For the final touch, transfer your dip to a serving bowl. Drizzle the remaining tablespoon of olive oil on top. This adds a nice shine and flavor. To serve, pair the dip with fresh veggies like carrots, celery, and bell peppers. You can also use your favorite crackers. This dip looks great and tastes even better! Enjoy your delicious roasted garlic goat cheese dip.
Tips & Tricks
How to Make the Dip Extra Creamy
To make your dip super creamy, start with warm cheese. Softened goat cheese and cream cheese blend better when they are at room temperature. You can also add a splash of milk or cream for a smoother texture. Blend the cheeses well until they are light and fluffy. This will ensure every bite is rich and delicious.
Time-Saving Tips for Preparation
For a quicker prep, roast the garlic ahead of time. You can store it in the fridge for up to a week. Pre-chop your veggies or crackers before your guests arrive. This way, you can focus on mixing the dip and enjoying the moment. Using a hand mixer saves time, too. It blends the ingredients faster than mixing by hand.
Best Practices for Roasting Garlic
Roasting garlic is simple. Cut off the top of the head to expose the cloves. Make sure to drizzle with olive oil for flavor and moisture. Wrap the garlic in foil to trap the heat. Roast it until soft, about 30-35 minutes at 400°F. Let it cool before squeezing out the cloves. This method brings out the natural sweetness in the garlic, adding depth to your dip.
Pro Tips
- Roasting Garlic: For an even deeper flavor, consider roasting extra heads of garlic. You can store them in the fridge for future dips or spread.
- Choosing Cheese: Experiment with different types of goat cheese. A tangy herbed goat cheese can add a delightful twist to your dip.
- Serving Suggestions: Pair the dip with sliced baguette or pita chips for a more gourmet touch at your gatherings.
- Make Ahead: This dip can be made a day in advance. Just cover and refrigerate, then bring to room temperature before serving.
Variations
Spicy Roasted Garlic Goat Cheese Dip
To add some heat to your dip, mix in chopped jalapeños or crushed red pepper flakes. Start with one tablespoon and adjust to your taste. The spice will balance nicely with the creamy goat cheese. You can also blend in a dash of hot sauce for extra flavor. This spicy twist makes the dip perfect for those who love a kick.
Herb and Nut Variations
You can enhance the flavor by adding fresh herbs like basil or parsley. Try mixing in some toasted nuts, such as walnuts or pecans. They will add a nice crunch and a rich taste. Simply chop the herbs and nuts and fold them into the cheese mixture. This adds a fresh and earthy vibe to your dip, making it even more delicious.
Dairy-Free Alternatives
If you want a dairy-free version, replace the cheese with vegan options. Look for dairy-free cream cheese and goat cheese substitutes. You can also use cashew cream for a creamy texture. Add roasted garlic and herbs as usual. This way, everyone can enjoy a tasty dip, no matter their diet.
Storage Info
How to Store Leftover Dip
To store leftover dip, place it in an airtight container. Seal it tightly to keep air out. This helps maintain flavor and freshness. Store it in the fridge for up to five days. If you notice any off smells, it's best to discard it.
Freezing Instructions
You can freeze this dip for later use. To freeze, spoon the dip into a freezer-safe container. Leave some space at the top, as it can expand. Cover it well with a lid or plastic wrap. It can last in the freezer for about three months. When you’re ready to use it, thaw it overnight in the fridge.
Best Practices for Reheating
When reheating, do so gently to keep the dip creamy. You can use the microwave or oven. If using the microwave, heat in short bursts, stirring in between. For the oven, preheat to 350°F (175°C) and warm for about 15 minutes. Add a splash of olive oil if it seems too thick. Enjoy your dip warm with fresh veggies or crackers!
FAQs
Can I use different types of cheese?
Yes, you can switch up the cheese! Cream cheese and goat cheese work well together. If you want a bolder flavor, try feta cheese. You can also blend in some sharp cheddar for a twist. Each cheese adds a unique taste. Just make sure the cheese is soft for easy mixing.
How long does the dip last in the fridge?
The dip lasts about 3 to 5 days in the fridge. Make sure to store it in an airtight container. This keeps it fresh and tasty. If you see any change in color or smell, it’s best to toss it out. Always check before enjoying your dip again.
Can this recipe be made ahead of time?
Absolutely! You can make this dip a day in advance. Just prepare it and store it in the fridge. Let it sit at room temperature for about 30 minutes before serving. This allows the flavors to come out more. It’s a great way to save time for gatherings!
We explored how to create a delicious roasted garlic goat cheese dip. You learned about choosing fresh ingredients and optional add-ins to enhance flavor. Step-by-step instructions helped you prepare, mix, and present the dip perfectly. I shared tips to make it creamy and save time. We also looked at tasty variations and how to store leftover dip for later use. This recipe is simple and fun, making it a hit for any gathering. Enjoy making this dip and impress your friends with your skills!