Vanilla Bean Crème Brûlée Divine Dessert Recipe

WANT TO SAVE THIS RECIPE?

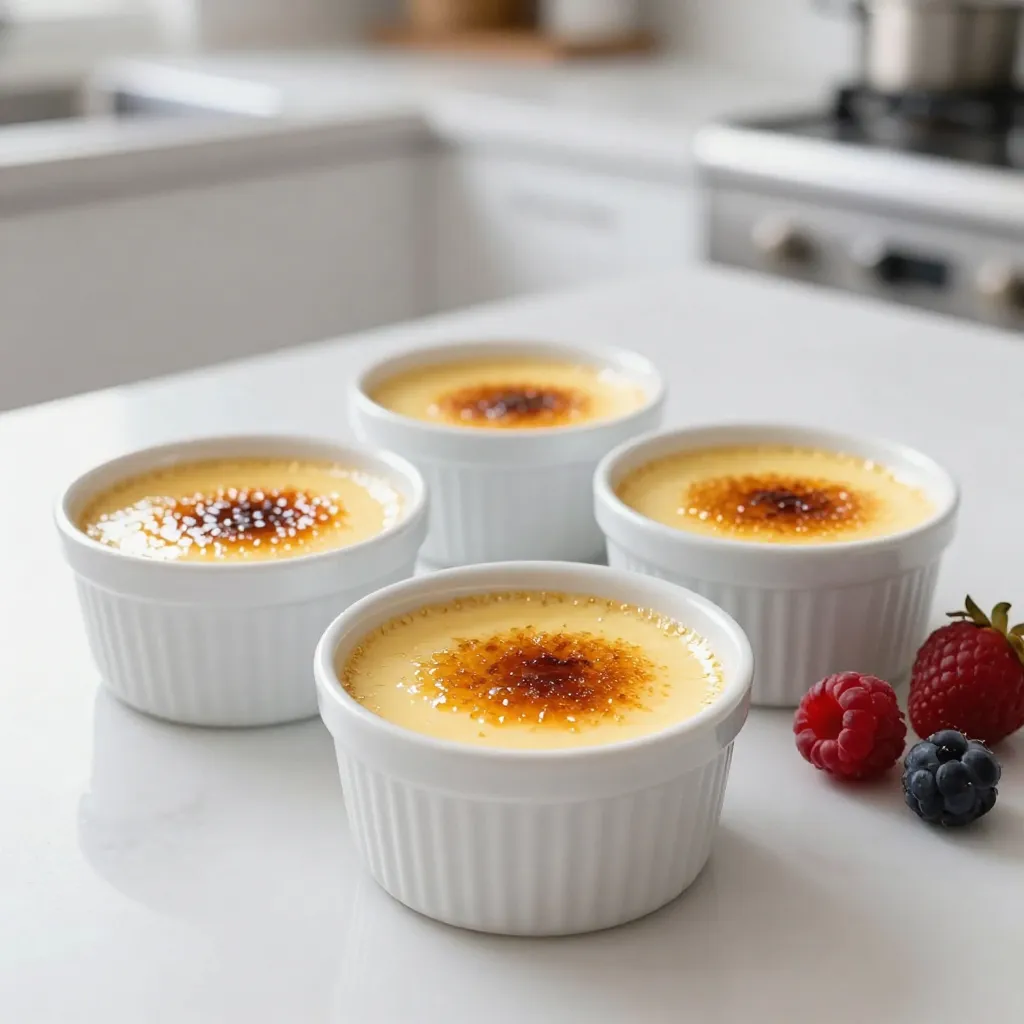
If you love creamy desserts, you must try my Vanilla Bean Crème Brûlée. This divine treat is smooth, rich, and topped with a satisfying crack of caramelized sugar. I’ll guide you through every step, from choosing the perfect ingredients to caramelizing that sugar beautifully. You’ll impress friends and family with this classic dessert that’s easier to make than you think. Let’s dive in and create something truly delicious!

Why I Love This Recipe

  1. Rich and Creamy Texture: This crème brûlée offers a velvety smoothness that melts in your mouth, making every bite a luxurious experience.
  2. Vanilla Bliss: The use of real vanilla bean elevates the flavor to a whole new level, giving a fragrant aroma and a delightful taste.
  3. Elegant Presentation: The caramelized sugar crust adds a beautiful finish, making it a stunning dessert for any occasion.
  4. Simple Yet Impressive: Despite its gourmet appearance, this recipe is straightforward and easy to follow, allowing anyone to impress their guests.

Ingredients

List of Ingredients

– 2 cups heavy cream

– 1 vanilla bean (or 2 teaspoons pure vanilla extract)

– 5 large egg yolks

– 1/2 cup granulated sugar (plus extra for topping)

– 1/4 teaspoon salt

– Fresh berries for garnish (optional)

To make a great Vanilla Bean Crème Brûlée, you need simple ingredients. Heavy cream gives it a rich flavor. The vanilla bean adds a lovely scent. Egg yolks make it creamy and smooth. Sugar sweetens the dish. A pinch of salt balances the flavors. You can use fresh berries to add color and taste on top.

Optional Garnishes

– Fresh berries (like raspberries or strawberries)

– Mint leaves for a pop of color

– Edible flowers for a fancy touch

Garnishes give your dessert a nice finish. Fresh berries add tartness. Mint leaves add freshness. Edible flowers look beautiful and are safe to eat. They make your dish stand out.

Substitutions for Ingredients

– Use coconut cream for a dairy-free option.

– Substitute the vanilla bean with vanilla extract if needed.

– Brown sugar can replace granulated sugar for a different flavor.

You can make this recipe your own. Coconut cream works well for those avoiding dairy. If you can’t find a vanilla bean, vanilla extract is a good swap. Brown sugar gives a deeper taste and color. Feel free to get creative!

Step-by-Step Instructions

Preparation Steps

1. First, preheat your oven to 325°F (160°C).

2. In a saucepan, mix 2 cups of heavy cream with the seeds from the vanilla bean. If you don’t have a bean, use 2 teaspoons of pure vanilla extract.

3. Heat this mix over medium heat until it simmers. Stir it gently.

4. Once it simmers, remove it from heat and let it steep for 15 minutes.

5. In a bowl, whisk together 5 large egg yolks, 1/2 cup of granulated sugar, and 1/4 teaspoon of salt until smooth and light.

6. Slowly add the warm cream to the egg mix. Whisk as you pour to avoid curdling.

7. Strain this mixture through a fine mesh sieve into a large measuring cup. This removes lumps and the vanilla pod.

8. Pour the strained mix into 4 to 6 ramekins, filling them about 3/4 full.

Baking Method

1. Take a roasting pan and place the ramekins inside.

2. Carefully add hot water to the pan until it reaches halfway up the sides of the ramekins.

3. Bake in the preheated oven for 30 to 35 minutes. The edges should set, but the centers can still jiggle a bit.

4. After baking, remove the ramekins from the water bath. Let them cool to room temperature.

5. Once cooled, refrigerate them for at least 4 hours or overnight.

Caramelizing the Sugar

1. When ready to serve, sprinkle a thin layer of granulated sugar on top of each custard.

2. Use a kitchen torch to caramelize the sugar until it forms a golden crust.

3. If you don’t have a torch, place the ramekins under a broiler for a few minutes. Watch closely to avoid burning.

4. Let the sugar crust cool for a minute before serving. You can add fresh berries for a nice touch.

Tips & Tricks

Achieving the Perfect Texture

To get a creamy texture, use fresh ingredients. Heavy cream is key for smoothness. When mixing, add the warm cream slowly. This helps avoid cooking the egg yolks. Strain the mixture to catch lumps for a silkier finish. Bake in a water bath to keep the heat gentle. This method ensures even cooking.

Flavor Enhancements

For a richer flavor, use a whole vanilla bean. Scrape the seeds to release more aroma. You can also add a pinch of cinnamon or espresso powder for warmth. Try mixing in orange zest for a bright twist. Fresh berries not only add color but also a fresh taste.

Common Mistakes to Avoid

Don’t rush the cooling time. Let the custards cool fully before chilling. If you skip straining, you may have clumps in your dessert. Watch the baking closely; overcooked custard can become rubbery. Lastly, don’t burn the sugar when caramelizing. A torch gives the best control, but a broiler works too—just keep an eye on it!

Pro Tips

  1. Choose Quality Vanilla: Using a high-quality vanilla bean will enhance the flavor of your crème brûlée, making it richer and more aromatic than using extract alone.
  2. Prevent Curdling: To prevent the egg yolks from curdling, make sure to add the warm cream gradually while whisking continuously.
  3. Perfect Water Bath: Ensure that the water bath reaches halfway up the sides of the ramekins for even cooking, which helps maintain the creamy texture.
  4. Cooling Time Matters: Allowing the crème brûlée to chill for at least 4 hours, or overnight, ensures a perfect set and enhances the flavors.

Variations

Flavor Infusions

You can change the flavor of your crème brûlée easily. Here are some ideas:

Chocolate: Add 4 ounces of melted dark chocolate to the cream.

Coffee: Use brewed coffee instead of some cream.

Citrus: Add the zest of an orange or lemon for a fresh twist.

These flavors mix well with the creamy base. Each bite will surprise you with new tastes.

Presentation Ideas

How you serve your crème brûlée matters. Ramekins come in many styles. Choose colorful or unique shapes to stand out. You can also layer the crème brûlée with fruits or sauces in clear glasses. This adds flair and shows off the layers. Garnish with herbs or edible flowers for a pop of color.

Dietary Alternatives

You can make this dessert fit different diets. For a dairy-free option, use coconut cream instead of heavy cream. Use a plant-based milk for a lighter version. For those avoiding eggs, try using silken tofu blended until smooth. You can still get a creamy texture that everyone will enjoy.

Storage Info

Storing Leftovers

After you make your vanilla bean crème brûlée, store it in the fridge. Cover each ramekin with plastic wrap to keep it fresh. This helps the custard stay creamy and tasty. If you have extra sugar on top, it can get soft. So, try not to cover those. Enjoy your leftovers within a few days for the best taste.

Reheating Instructions

You don’t usually heat crème brûlée again. The heat can change its smooth texture. If you must, take off the sugar crust first. Warm it gently in the oven at a low setting, like 300°F (150°C), for about 10 minutes. Watch it closely to avoid cooking it too much. Once warm, add fresh sugar on top and caramelize again.

Shelf Life Guidelines

Vanilla bean crème brûlée can last in the fridge for about 3 to 4 days. If you keep it longer, the flavor may fade. I recommend eating it sooner for the best experience. If you freeze it, it can last a month. But, the texture may change after thawing. Always check for any signs of spoilage before enjoying it again.

FAQs

How long does Crème Brûlée last in the fridge?

Vanilla Bean Crème Brûlée can last up to four days in the fridge. Store it in an airtight container for best results. The longer it sits, the softer the sugar crust may get. I recommend enjoying it fresh for the best texture.

Can I make Vanilla Bean Crème Brûlée ahead of time?

Yes, you can make this dessert a day in advance. Prepare the custards and chill them overnight. This allows the flavors to blend nicely. Just remember to caramelize the sugar right before serving. This keeps the crust crisp and delicious.

What is the best way to caramelize sugar without a torch?

If you don’t have a kitchen torch, you can use your oven’s broiler. Sprinkle sugar on top of the custard, then place it under the broiler. Watch closely, as sugar can burn fast. It usually takes just a few minutes to turn golden brown. Remove it when it looks perfect and let it cool before serving.

This blog post covered how to make the perfect Crème Brûlée. We looked at key ingredients, step-by-step instructions, and tips for great results. You learned about variations, storing leftovers, and answered some common questions.

Making this treat can seem tricky, but with practice, you can master it. Remember, the right texture and flavors make all the difference. Enjoy your delicious creatio

- 2 cups heavy cream - 1 vanilla bean (or 2 teaspoons pure vanilla extract) - 5 large egg yolks - 1/2 cup granulated sugar (plus extra for topping) - 1/4 teaspoon salt - Fresh berries for garnish (optional) To make a great Vanilla Bean Crème Brûlée, you need simple ingredients. Heavy cream gives it a rich flavor. The vanilla bean adds a lovely scent. Egg yolks make it creamy and smooth. Sugar sweetens the dish. A pinch of salt balances the flavors. You can use fresh berries to add color and taste on top. - Fresh berries (like raspberries or strawberries) - Mint leaves for a pop of color - Edible flowers for a fancy touch Garnishes give your dessert a nice finish. Fresh berries add tartness. Mint leaves add freshness. Edible flowers look beautiful and are safe to eat. They make your dish stand out. - Use coconut cream for a dairy-free option. - Substitute the vanilla bean with vanilla extract if needed. - Brown sugar can replace granulated sugar for a different flavor. You can make this recipe your own. Coconut cream works well for those avoiding dairy. If you can’t find a vanilla bean, vanilla extract is a good swap. Brown sugar gives a deeper taste and color. Feel free to get creative! {{ingredient_image_1}} 1. First, preheat your oven to 325°F (160°C). 2. In a saucepan, mix 2 cups of heavy cream with the seeds from the vanilla bean. If you don’t have a bean, use 2 teaspoons of pure vanilla extract. 3. Heat this mix over medium heat until it simmers. Stir it gently. 4. Once it simmers, remove it from heat and let it steep for 15 minutes. 5. In a bowl, whisk together 5 large egg yolks, 1/2 cup of granulated sugar, and 1/4 teaspoon of salt until smooth and light. 6. Slowly add the warm cream to the egg mix. Whisk as you pour to avoid curdling. 7. Strain this mixture through a fine mesh sieve into a large measuring cup. This removes lumps and the vanilla pod. 8. Pour the strained mix into 4 to 6 ramekins, filling them about 3/4 full. 1. Take a roasting pan and place the ramekins inside. 2. Carefully add hot water to the pan until it reaches halfway up the sides of the ramekins. 3. Bake in the preheated oven for 30 to 35 minutes. The edges should set, but the centers can still jiggle a bit. 4. After baking, remove the ramekins from the water bath. Let them cool to room temperature. 5. Once cooled, refrigerate them for at least 4 hours or overnight. 1. When ready to serve, sprinkle a thin layer of granulated sugar on top of each custard. 2. Use a kitchen torch to caramelize the sugar until it forms a golden crust. 3. If you don’t have a torch, place the ramekins under a broiler for a few minutes. Watch closely to avoid burning. 4. Let the sugar crust cool for a minute before serving. You can add fresh berries for a nice touch. To get a creamy texture, use fresh ingredients. Heavy cream is key for smoothness. When mixing, add the warm cream slowly. This helps avoid cooking the egg yolks. Strain the mixture to catch lumps for a silkier finish. Bake in a water bath to keep the heat gentle. This method ensures even cooking. For a richer flavor, use a whole vanilla bean. Scrape the seeds to release more aroma. You can also add a pinch of cinnamon or espresso powder for warmth. Try mixing in orange zest for a bright twist. Fresh berries not only add color but also a fresh taste. Don’t rush the cooling time. Let the custards cool fully before chilling. If you skip straining, you may have clumps in your dessert. Watch the baking closely; overcooked custard can become rubbery. Lastly, don’t burn the sugar when caramelizing. A torch gives the best control, but a broiler works too—just keep an eye on it! Pro Tips Choose Quality Vanilla: Using a high-quality vanilla bean will enhance the flavor of your crème brûlée, making it richer and more aromatic than using extract alone. Prevent Curdling: To prevent the egg yolks from curdling, make sure to add the warm cream gradually while whisking continuously. Perfect Water Bath: Ensure that the water bath reaches halfway up the sides of the ramekins for even cooking, which helps maintain the creamy texture. Cooling Time Matters: Allowing the crème brûlée to chill for at least 4 hours, or overnight, ensures a perfect set and enhances the flavors. {{image_2}} You can change the flavor of your crème brûlée easily. Here are some ideas: - Chocolate: Add 4 ounces of melted dark chocolate to the cream. - Coffee: Use brewed coffee instead of some cream. - Citrus: Add the zest of an orange or lemon for a fresh twist. These flavors mix well with the creamy base. Each bite will surprise you with new tastes. How you serve your crème brûlée matters. Ramekins come in many styles. Choose colorful or unique shapes to stand out. You can also layer the crème brûlée with fruits or sauces in clear glasses. This adds flair and shows off the layers. Garnish with herbs or edible flowers for a pop of color. You can make this dessert fit different diets. For a dairy-free option, use coconut cream instead of heavy cream. Use a plant-based milk for a lighter version. For those avoiding eggs, try using silken tofu blended until smooth. You can still get a creamy texture that everyone will enjoy. After you make your vanilla bean crème brûlée, store it in the fridge. Cover each ramekin with plastic wrap to keep it fresh. This helps the custard stay creamy and tasty. If you have extra sugar on top, it can get soft. So, try not to cover those. Enjoy your leftovers within a few days for the best taste. You don't usually heat crème brûlée again. The heat can change its smooth texture. If you must, take off the sugar crust first. Warm it gently in the oven at a low setting, like 300°F (150°C), for about 10 minutes. Watch it closely to avoid cooking it too much. Once warm, add fresh sugar on top and caramelize again. Vanilla bean crème brûlée can last in the fridge for about 3 to 4 days. If you keep it longer, the flavor may fade. I recommend eating it sooner for the best experience. If you freeze it, it can last a month. But, the texture may change after thawing. Always check for any signs of spoilage before enjoying it again. Vanilla Bean Crème Brûlée can last up to four days in the fridge. Store it in an airtight container for best results. The longer it sits, the softer the sugar crust may get. I recommend enjoying it fresh for the best texture. Yes, you can make this dessert a day in advance. Prepare the custards and chill them overnight. This allows the flavors to blend nicely. Just remember to caramelize the sugar right before serving. This keeps the crust crisp and delicious. If you don't have a kitchen torch, you can use your oven's broiler. Sprinkle sugar on top of the custard, then place it under the broiler. Watch closely, as sugar can burn fast. It usually takes just a few minutes to turn golden brown. Remove it when it looks perfect and let it cool before serving. This blog post covered how to make the perfect Crème Brûlée. We looked at key ingredients, step-by-step instructions, and tips for great results. You learned about variations, storing leftovers, and answered some common questions. Making this treat can seem tricky, but with practice, you can master it. Remember, the right texture and flavors make all the difference. Enjoy your delicious creation!

Vanilla Dream Crème Brûlée

A rich and creamy vanilla custard topped with a crispy caramelized sugar crust.
Prep Time 20 minutes
Cook Time 35 minutes
Total Time 5 hours
Course Dessert
Cuisine French
Servings 4
Calories 300 kcal

Ingredients
  

  • 2 cups heavy cream
  • 1 vanilla bean or 2 teaspoons pure vanilla extract
  • 5 large egg yolks
  • 0.5 cup granulated sugar (plus extra for topping)
  • 0.25 teaspoon salt
  • 1 serving Fresh berries for garnish (optional)

Instructions
 

  • Preheat your oven to 325°F (160°C).
  • In a saucepan, combine the heavy cream and the seeds scraped from the vanilla bean (or the vanilla extract). Bring to a gentle simmer over medium heat, stirring occasionally. Once simmering, remove from heat and let it steep for 15 minutes.
  • In a mixing bowl, whisk the egg yolks, sugar, and salt until the mixture is smooth and light in color.
  • Gradually add the warm cream to the egg mixture, whisking continuously to prevent curdling.
  • Strain the mixture through a fine mesh sieve into a large measuring cup or bowl to remove any lumps and the vanilla bean pods.
  • Pour the strained mixture into 4-6 ramekins (depending on their size), filling them about 3/4 full.
  • Place the ramekins in a roasting pan and carefully add hot water to the pan until it reaches halfway up the sides of the ramekins.
  • Bake in the preheated oven for 30-35 minutes, or until the edges are set but the centers are still slightly jiggly.
  • Remove the ramekins from the water bath and let them cool to room temperature, then refrigerate for at least 4 hours or overnight.
  • When ready to serve, sprinkle an even layer of granulated sugar on top of each custard.
  • Using a kitchen torch, carefully caramelize the sugar until it forms a golden crust. If you don’t have a torch, you can place the ramekins under a broiler for a few minutes, watching carefully to avoid burning.
  • Allow the sugar crust to cool for a minute before serving. Garnish with fresh berries if desired.

Notes

For best results, use a kitchen torch to caramelize the sugar.
Keyword crème brûlée, dessert, vanilla

WANT TO SAVE THIS RECIPE?

Leave a Comment

Recipe Rating