BBQ Chicken Sliders Flavorful and Easy Recipe
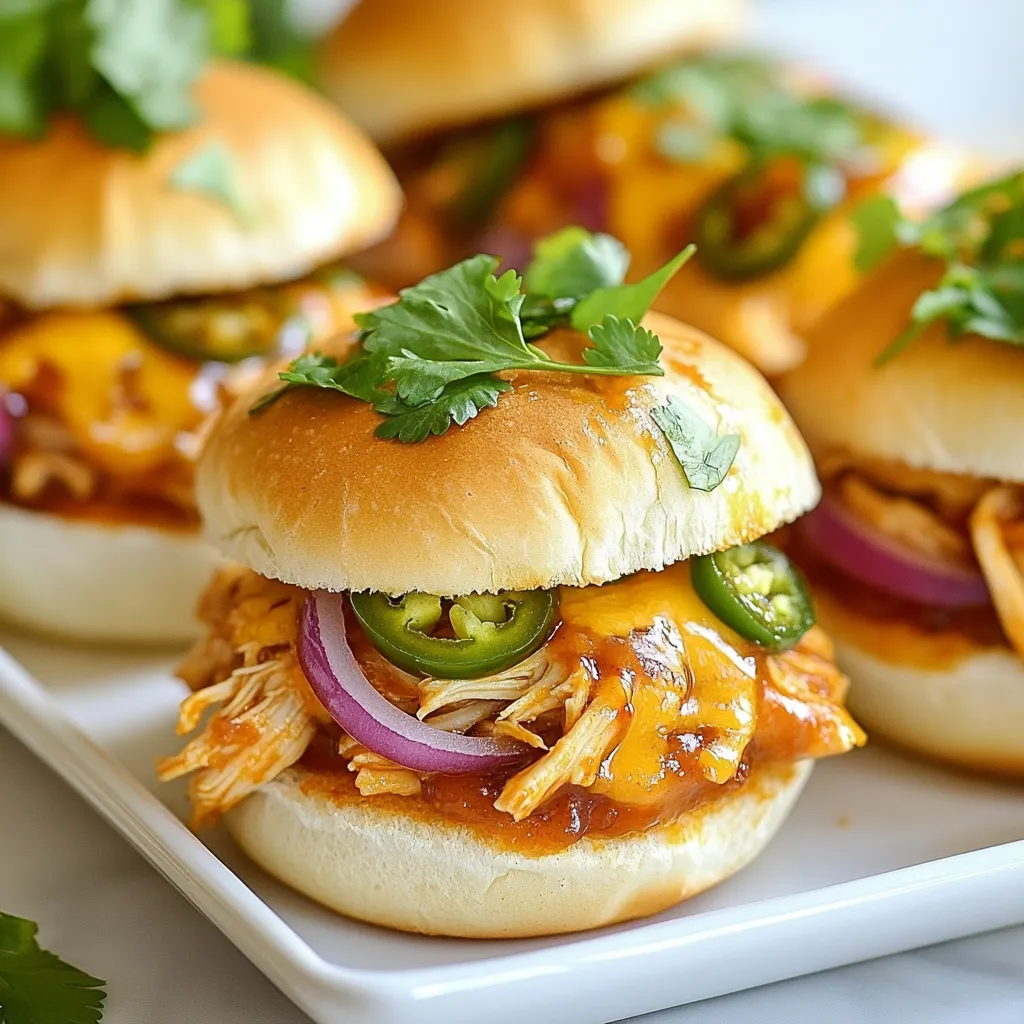
If you want a tasty meal that’s quick and simple, you’ll love my BBQ Chicken Sliders recipe. These sliders pack

If you want a tasty meal that’s quick and simple, you’ll love my BBQ Chicken Sliders recipe. These sliders pack
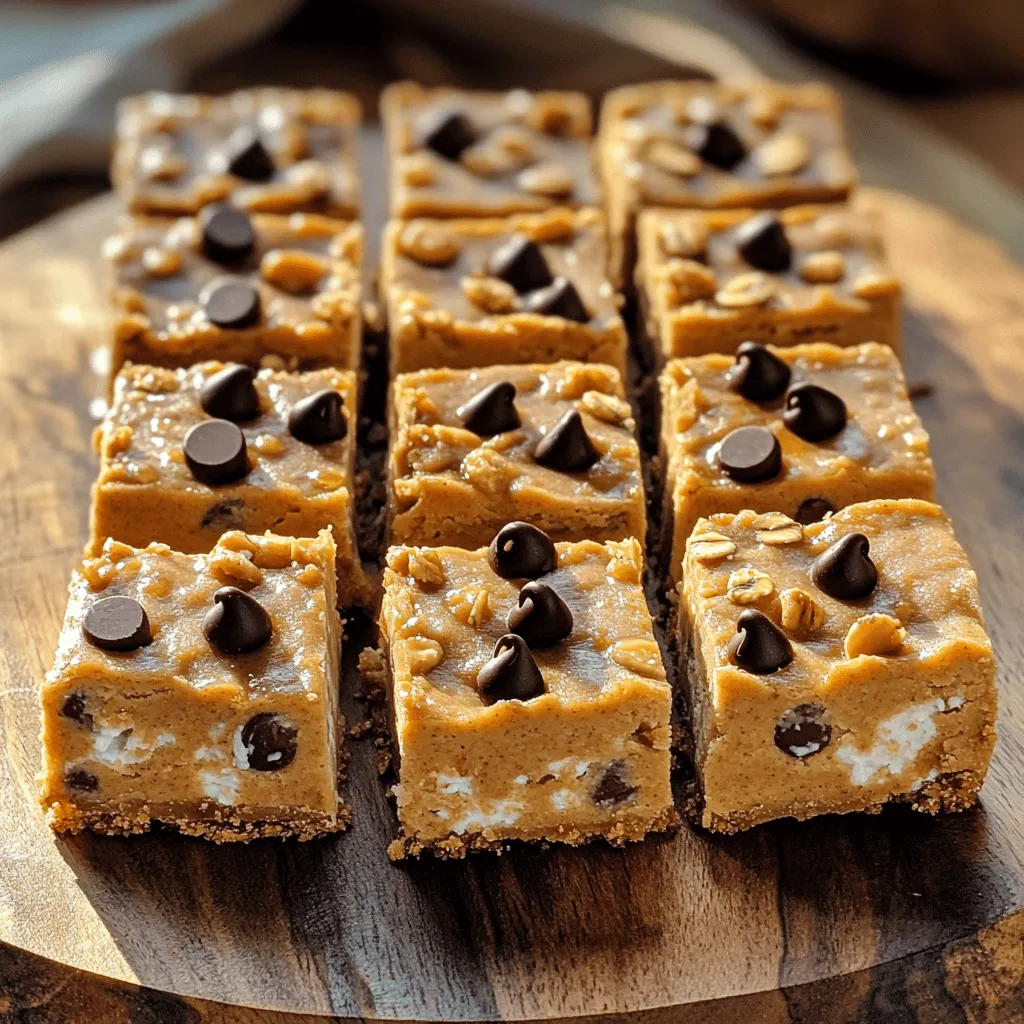
Looking for a healthier dessert that still satisfies your sweet tooth? Try my Cottage Cheese Cookie Dough Bars! Packed with

Looking for a quick dinner that’s bursting with flavor? This Creamy Lemon Garlic Shrimp Skillet is your answer! You can
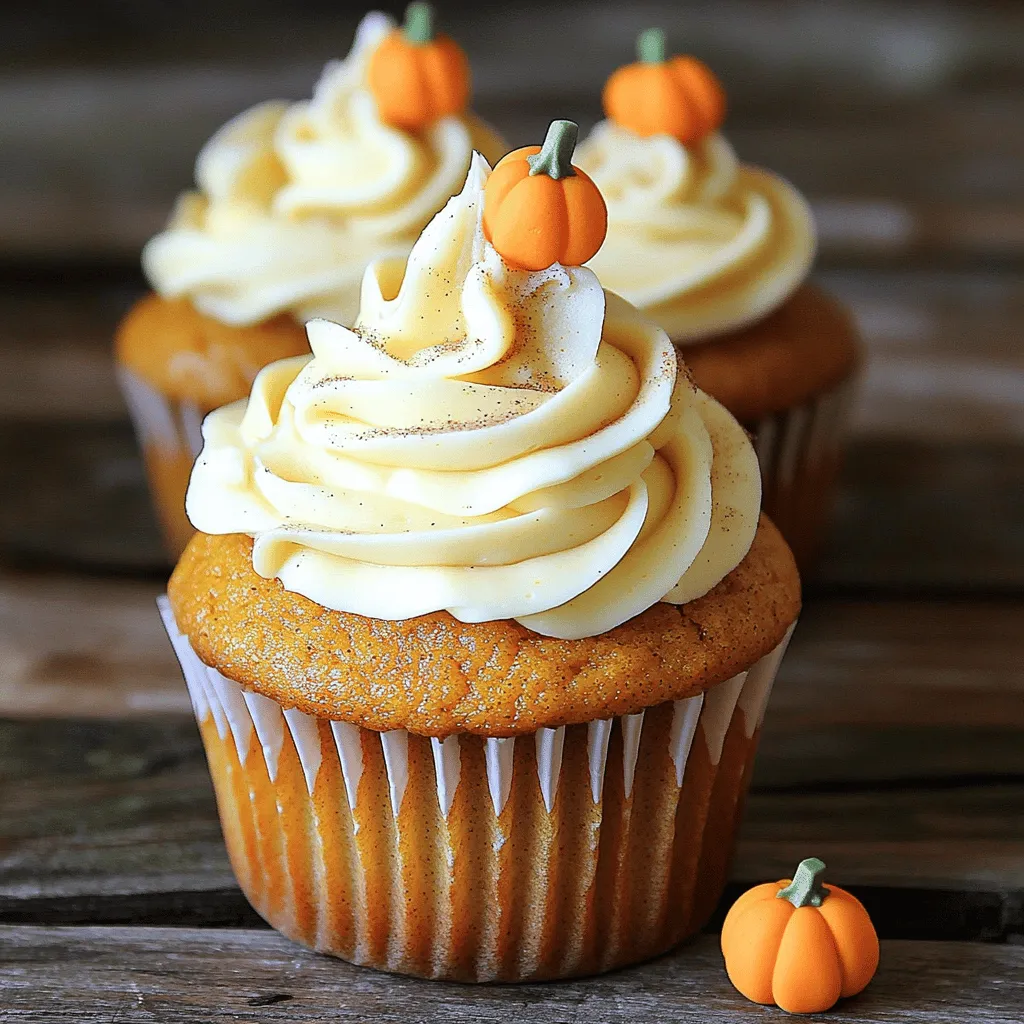
As the leaves turn and the air chills, nothing says fall like pumpkin spice cupcakes. These treats blend warm spices
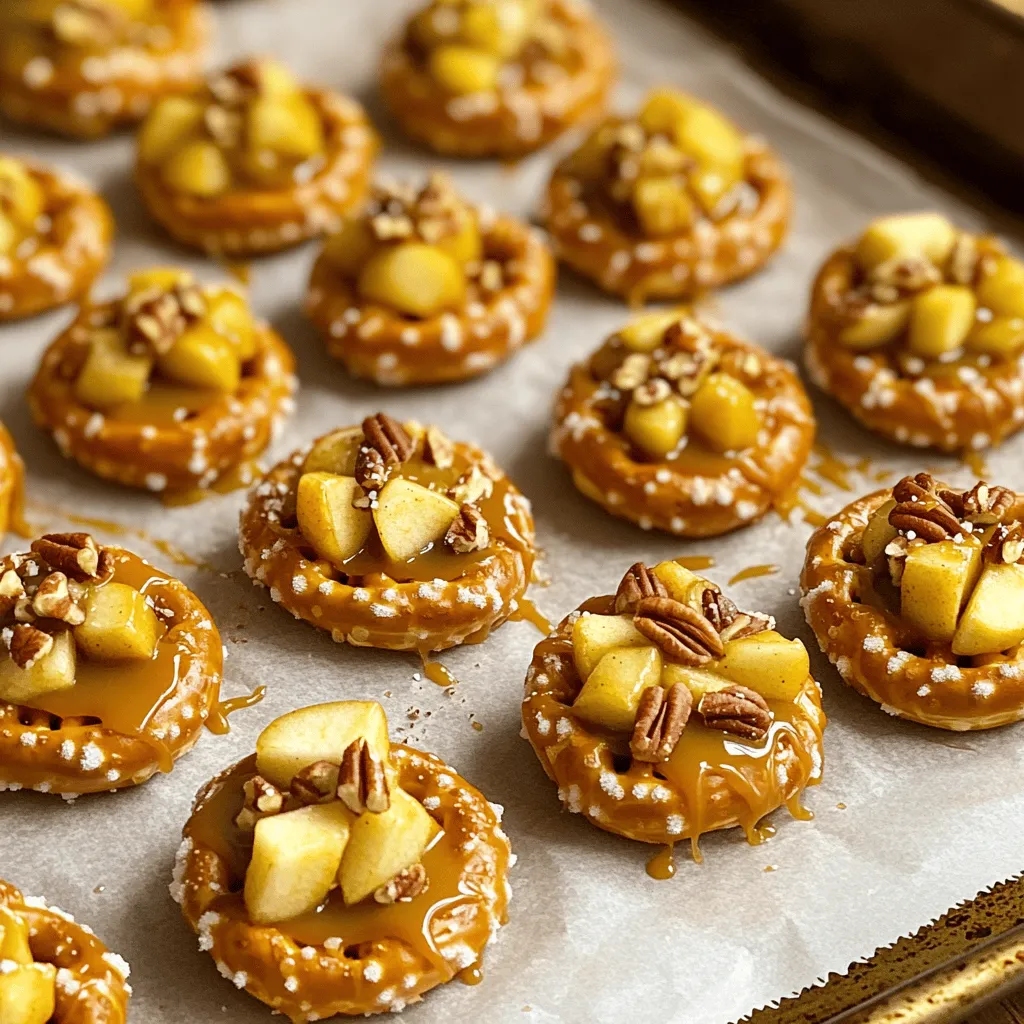
Fall is the perfect time for tasty treats, and Caramel Apple Pretzel Bites are a must-try! These delightful snacks blend

If you love pumpkin spice and sweet treats, you’re in for a treat! These Pumpkin Cheesecake Oreo Truffles are simple
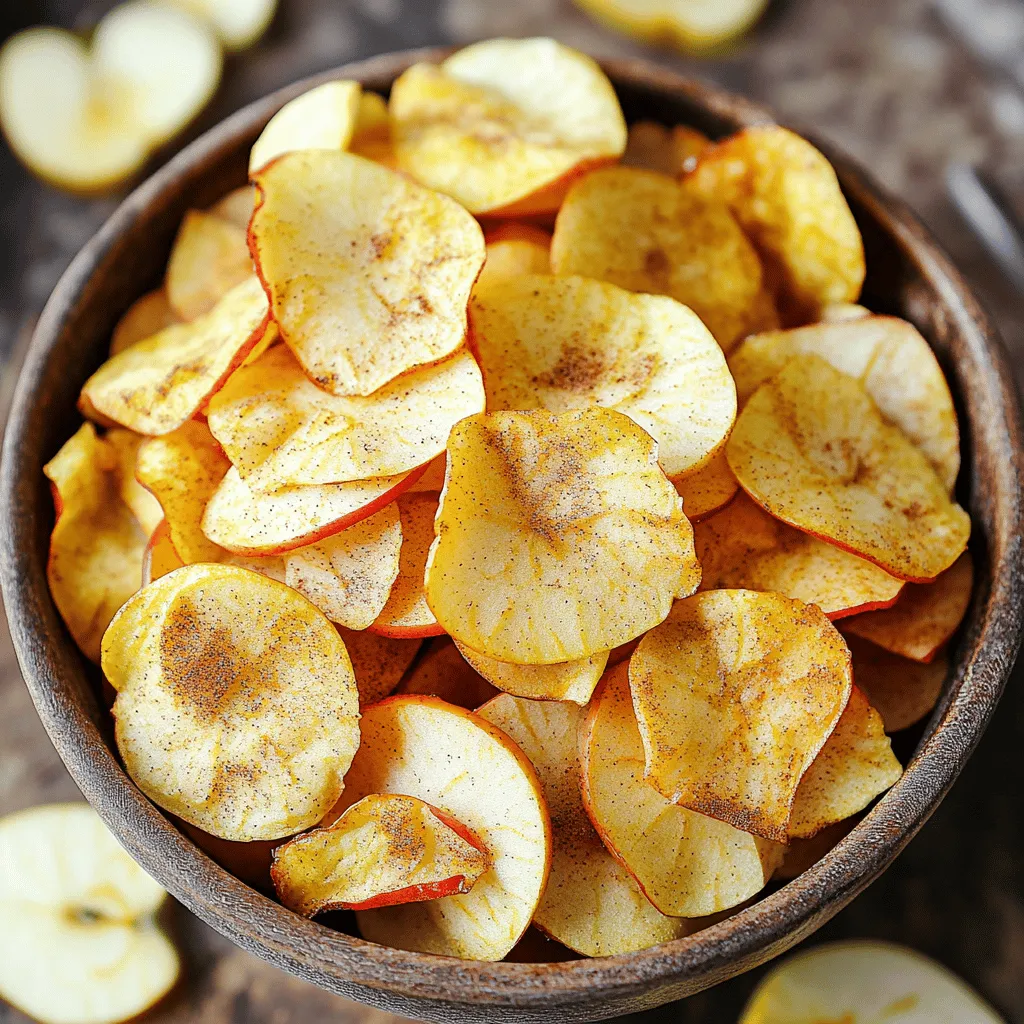
Craving a crunchy, healthy snack? Look no further! With just a few simple ingredients, you can whip up Air Fryer
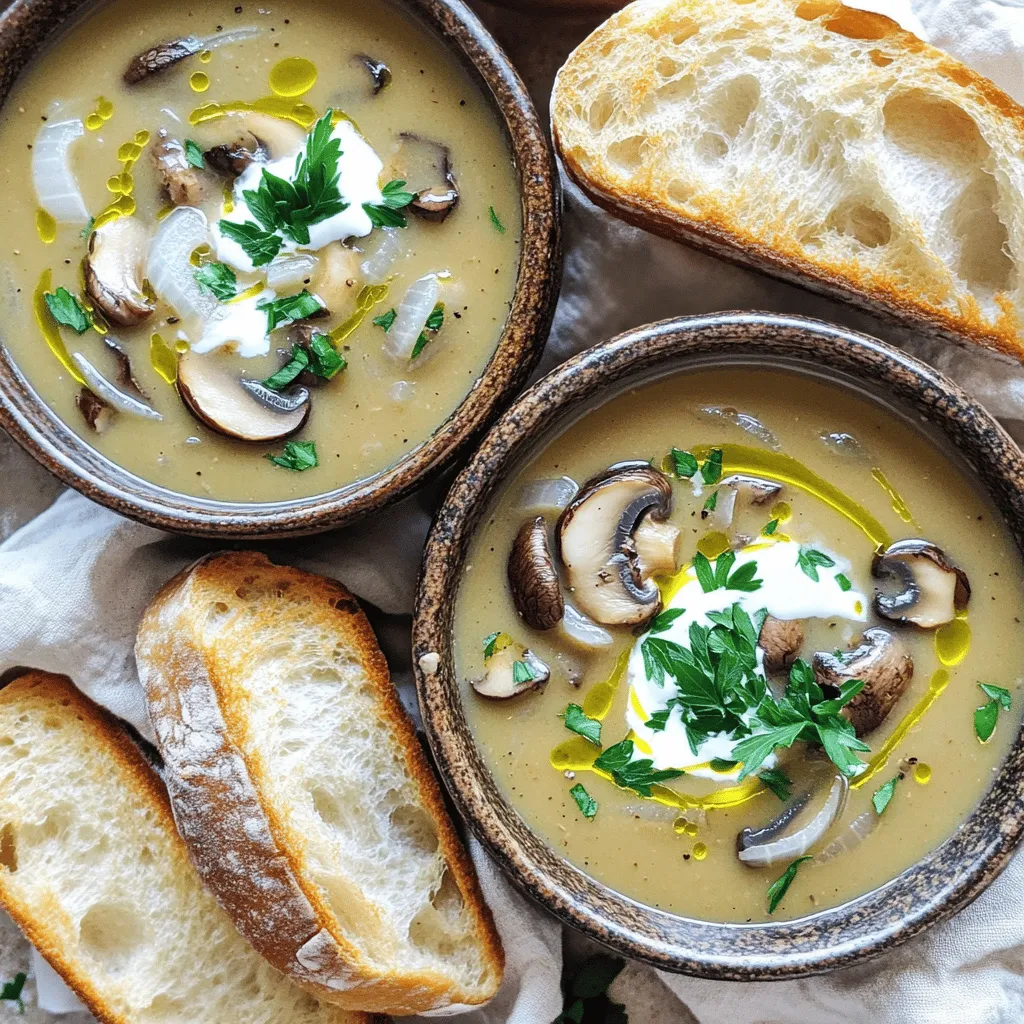
If you’re craving a warm and hearty meal, my Slow Cooker Wild Mushroom Soup is the answer! This easy recipe

Are you craving a quick and tasty dinner that everyone will love? This Sheet Pan Teriyaki Chicken with broccoli is
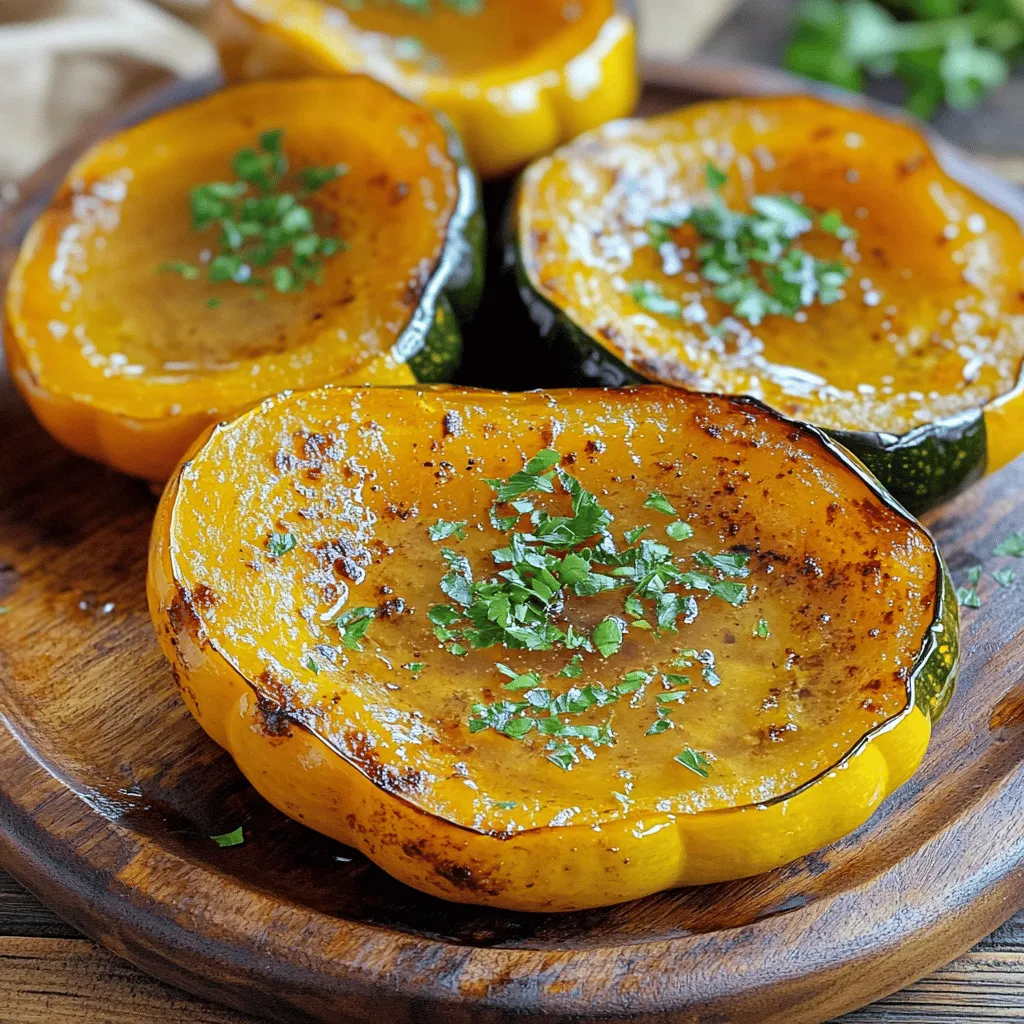
Looking for a tasty fall recipe? Garlic Butter Roasted Acorn Squash is here to please! This simple dish packs a
